
Brownies emerged in the early 20th century as a portable, chocolate‑rich treat, quickly becoming a staple of American home bakeries. Their dense crumb and glossy top were once prized by cooks who prized efficiency and flavor in equal measure. Over decades, bakers have layered them with mousse, creating a luxurious contrast that honors both the fudgy tradition and modern pastry elegance. This combination, while seemingly decadent, remains rooted in simple pantry staples and a love for chocolate that spans generations.
Why You'll Love It
-
- The mousse stays airy, the brownie stays fudgy
-
- Minimal equipment, all kitchen‑friendly
-
- Perfect for celebrations or quiet moments
-
- Freezes well for make‑ahead convenience
"These brownies turned my afternoon tea into a celebration – the mousse is like a cloud on chocolate earth."
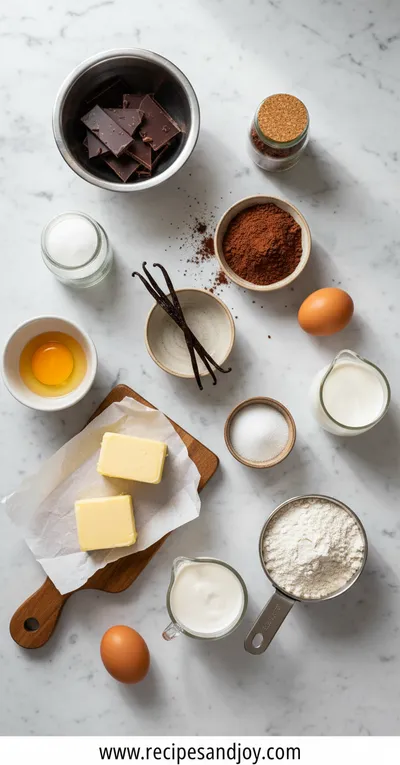
Essential Ingredient Guide
- Dark chocolate: Choose 70% cocoa for depth; melt gently to keep the flavor bright.
- Heavy cream: Room‑temperature cream whips smoother and gives the mousse silk.
- Eggs: Fresh eggs add lift; separate yolk and white for a light texture.
- Sugar: Granulated sugar dissolves fully in the brownie batter.
- Cocoa powder: Unsweetened cocoa intensifies the chocolate profile without extra sugar.
- Vanilla extract: A splash adds warmth and rounds the overall taste.

Complete Cooking Process
-
Ingredient Readiness:
Measure and sift dry ingredients, melt chocolate, and chill cream before whisking.
-
Flavor Development:
Brown the butter lightly to bring out nutty notes before mixing into the batter.
-
Texture Control:
Fold whipped egg whites into the mousse last, preserving its airy structure.
-
Finishing Touches:
Swirl mousse into the baked brownie layer while still warm, then chill.
-
Serving Timing:
Allow the brownies to sit at room temperature for 10 minutes before slicing.
-
Use a silicone spatula for gentle folds.
-
Chill the pan for a crisp bottom.
-
Dust with cocoa just before serving.
-
Store in airtight containers for up to 3 days.
Pro Tips
Well, I’ve learned that a quiet moment while the mousse sets in the fridge can be just as satisfying as the first bite. So, let the flavors meld, and you’ll notice how the chocolate edge softens into a velvety hug. It’s those little pauses that make home baking feel like a quiet celebration.
The essence of the dish:
A rich, fudgy brownie base meets a light, whipped chocolate mousse, creating a contrast of dense and airy that delights every bite.
A fun fact or historical angle:
The original brownie was born out of a kitchen accident, and today’s mousse‑layered version is a tribute to culinary curiosity.
Flavor or sensory focus:
Expect the deep bitterness of dark chocolate to mingle with a sweet, silky mousse that melts like a sigh on the tongue.
You Must Know
-
Do not over‑mix the batter; a few lumps are okay.
-
Cool the baked brownie slightly before adding mousse.
-
Seal the pan tightly when chilling.
Frequently Asked Questions
→ Can I make this gluten‑free?
Absolutely – substitute the all‑purpose flour with an equal amount of almond flour or a gluten‑free blend.
→ How long can I store them?
Refrigerated in an airtight container, they keep for up to 4 days; they also freeze well for a month.
→ Do I need a special pan?
A 9‑inch square pan works fine; a silicone or parchment liner helps with cleanup.
→ Can I add nuts?
Yes, fold in toasted walnuts or pecans into the brownie batter for extra crunch.
→ What if I don’t have heavy cream?
You can use full‑fat coconut milk, chilled and whipped, though the flavor will have a subtle tropical note.
→ Is this recipe suitable for kids?
The sweetness level is moderate, but you can reduce sugar a bit if you prefer a milder taste for younger palates.
Nutrition Facts
per serving
420
Calories
6g
Protein
38g
Carbs
26g
Fat
Taste Profile
Rich chocolate with a silky, sweet mousse finish
Ingredient Substitutions
Don't have an ingredient? Try these alternatives
Gives a faint coconut aroma; use a cold can for best whip.
Creates a slightly denser brownie but adds nutty flavor.
Recipe Variations
Try these delicious twists on the original
Spicy Version
Add a pinch of cayenne and a drizzle of no bake chocolate sauce for a subtle kick.
Mediterranean Style
Fold in chopped pistachios and a hint of orange zest for bright contrast.
Common Mistakes to Avoid
Learn from others' mistakes for perfect results
- Over‑mixing the batter, which leads to a cakey texture.
- Adding mousse while the brownie is too hot, causing it to melt.
- Using low‑fat cream, resulting in a less stable mousse.
Meal Prep & Storage
Make Ahead Tips
You can bake the brownie layer a day ahead and store it wrapped; whip the mousse the night before and assemble just before serving.
Leftover Ideas
Reheat gently in a microwave for 10‑15 seconds; the mousse will soften but remain creamy.
Perfect Pairings
Serve this with...
Cooking Timeline
Gather and measure all ingredients; line the pan.
Melt butter and chocolate; whisk eggs and sugar.
Combine wet and dry components; pour into pan.
Bake brownies; while baking, whip cream for mousse.
Prepare mousse, fold in chocolate, and let cool slightly.
Spread mousse onto warm brownies, chill to set.
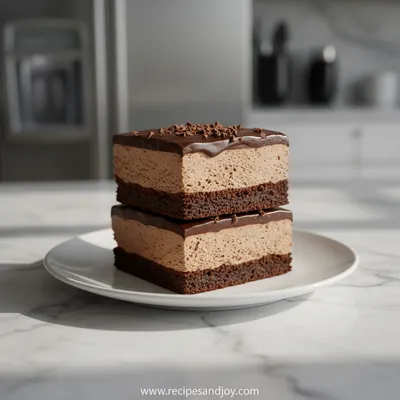
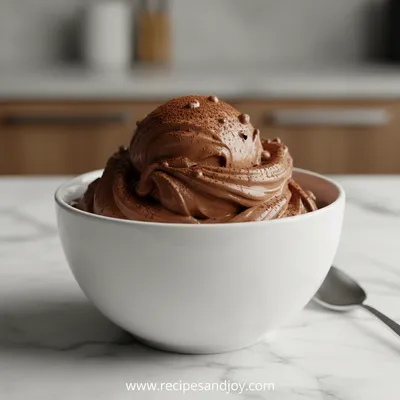
Chocolate Mousse Brownies – Creamy Decadent Dessert
Indulge in rich chocolate mousse brownies with creamy layers and decadent flavor – a perfect sweet treat for any occasion.
Timing
Prep Time
20 Minutes
Cook Time
25 Minutes
Total Time
45 Minutes
Recipe Details
Ingredients
Brownie Base
-
01
1/2 cup unsalted butter
-
02
200 g dark chocolate, chopped
-
03
3/4 cup granulated sugar
-
04
2 large eggs
-
05
1 tsp vanilla extract
-
06
1/3 cup cocoa powder
-
07
3/4 cup all‑purpose flour
-
08
1/4 tsp salt
Chocolate Mousse
-
01
1 cup heavy cream, chilled
-
02
2 tbsp granulated sugar
-
03
4 oz dark chocolate, melted
-
04
2 large egg yolks
-
05
1 tsp vanilla extract
Instructions
Preheat the oven to 350°F (175°C). Line a 9‑inch square pan with parchment.
Melt butter and dark chocolate together over a low simmer, stirring until smooth. Let cool slightly.
In a bowl, whisk sugar, eggs, and vanilla until pale. Fold in the chocolate mixture, then sift in cocoa, flour, and salt; mix just until combined.
Spread the brownie batter evenly in the pan and bake for 18‑20 minutes. The center should be set but still slightly soft.
While the brownies bake, prepare the mousse: whisk chilled cream with sugar until soft peaks form.
In a separate bowl, combine melted chocolate, egg yolks, and vanilla; let warm slightly, then fold into the whipped cream gently.
Cool the baked brownie layer for 10 minutes, then spread the mousse on top, smoothing with a spatula.
Refrigerate for at least 2 hours, or until the mousse is set. Slice with a warm knife for clean squares.
Notes & Tips
-
1
Make sure the chocolate in the mousse isn’t too hot, or it will melt the whipped cream.
-
2
If you prefer a sweeter mousse, add an extra tablespoon of sugar.
-
3
For an extra glossy finish, brush the top with a thin layer of melted chocolate before chilling.
Tools You'll Need
-
9‑inch square baking pan
-
Mixing bowls
-
Whisk
-
Spatula
-
Parchment paper
-
Saucepan
Must-Know Tips
-
Don’t over‑mix the brownie batter; a few streaks are fine.
-
Whisk the mousse gently to keep it airy.
-
Let the brownies cool slightly before adding mousse to avoid melting.
Professional Secrets
-
Use a double‑boiler for melting chocolate; it prevents scorching.
-
Chill the cream and bowl for better volume when whipping.
-
Roll the pan in a towel after baking to keep the bottom crisp.

Recipe by
Lily AndersonLife is sweeter with dessert 🍰💕 Baking joy, spreading smiles, and loving every sprinkle ✨
Get Delicious Recipes Weekly
Join 25,000+ home cooks getting our best recipes straight to their inbox.
Free forever • No spam • Unsubscribe anytime