
Hot chocolate traces its roots back to the ancient Maya and Aztec civilizations, who consumed a bitter, spicy drink made from ground cocoa beans. When Spanish explorers brought cocoa to Europe in the 16th century, sugar was added, transforming it into the sweet treat we know today. Throughout history, hot chocolate has been a symbol of comfort and luxury, enjoyed by royalty and commoners alike during cold winters. This healthier version honors that rich tradition while adapting to modern nutritional preferences, using quality ingredients to create a beverage that warms both body and soul.
Why You'll Love It
-
Uses natural sweeteners instead of refined sugar
-
Rich cocoa flavor without the guilt
-
Quick and easy to make in under 10 minutes
-
Perfect for cozy mornings or chilly evenings
-
Customizable with your favorite milk and toppings
"This is the best hot chocolate I've ever had! So rich and chocolatey without being overly sweet. My whole family asks for it now."
Essential Ingredient Guide
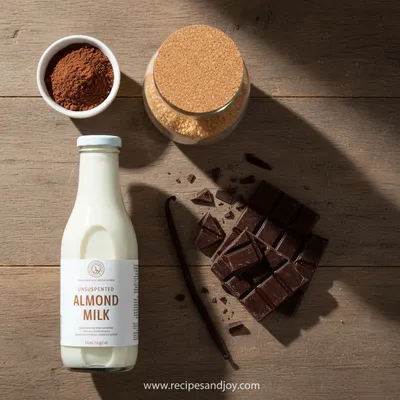
- Unsweetened cocoa powder: Look for high-quality cocoa powder with a deep chocolate flavor. Dutch-processed works beautifully here, giving a smoother, less acidic taste. The better the cocoa, the richer your hot chocolate will be.
- Maple syrup: This natural sweetener adds a subtle caramel note that complements the chocolate perfectly. Grade B maple syrup has a stronger flavor if you prefer that, but any grade will work. It dissolves easily and doesn't leave a gritty texture.
- Milk of choice: Whole milk creates the creamiest result, but oat milk or almond milk work wonderfully for a dairy-free version. The fat content affects the richness, so choose according to your preference. I often use what I have on hand.
- Vanilla extract: Just a splash enhances all the chocolate flavors and adds warmth. Real vanilla extract makes a noticeable difference compared to imitation. It's one of those small touches that really elevates the drink.
- Pinch of salt: This might seem odd, but salt makes the chocolate flavor pop. Just a tiny bit balances the sweetness and deepens the cocoa notes. It's the secret to making it taste professional.
- Cinnamon: Optional, but a dash of cinnamon adds warmth and complexity. It pairs beautifully with chocolate and makes the drink feel even cozier. I sometimes add a tiny pinch of cayenne for a Mexican hot chocolate variation.

Complete Cooking Process
-
Ingredient Readiness:
Before you begin, measure everything out. Have your cocoa, sweetener, and milk ready. If you're using any spices, measure those too. This makes the process smooth and prevents rushing. I like to warm my milk slightly before adding it to the cocoa mixture – it helps everything blend together more evenly.
-
Flavor Development:
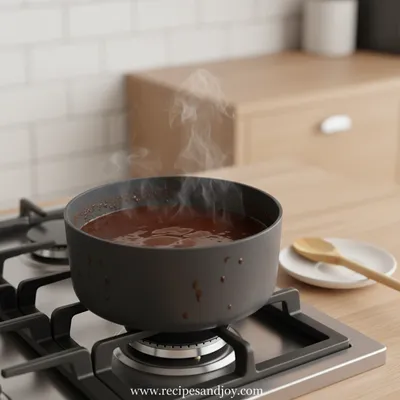
The key moment is when the cocoa powder dissolves into the warm milk. You'll see it transform from a dark paste to a smooth, unified liquid. This is when the chocolate aroma really starts to fill the kitchen. That smell... it's just wonderful. It takes a couple of minutes of gentle whisking, but the patience is worth it.
-
Texture Control:
Whisking continuously prevents lumps and creates that velvety smooth texture we all love in hot chocolate. Don't rush this part – let the heat do its work slowly. If you see any tiny cocoa lumps, just keep whisking patiently. They'll disappear eventually.
-
Finishing Touches:
Right before serving, add the vanilla extract. Adding it too early can make the flavor dissipate with the heat. A final whisk incorporates it perfectly. This is also when I might add a tiny pat of butter or coconut oil for extra richness, but that's optional.
-
Serving Timing:
Serve immediately while hot. Hot chocolate is one of those drinks that's best enjoyed fresh. The warmth is part of the comfort experience. If it sits too long, it can develop a skin or cool down, losing that perfect drinking temperature.
-
Use a whisk instead of a spoon for smoother results
-
Don't boil the milk – heat it gently to avoid scorching
-
Taste as you go and adjust sweetness to your preference
-
Warm your mug first with hot water for longer-lasting warmth
Pro Tips
You know, making hot chocolate is one of those simple kitchen tasks that feels almost meditative. Standing there by the stove, watching the steam rise, whisking slowly... it's a small moment of peace in a busy day. I've found that the quality of your ingredients really shines through in such a simple recipe. Good cocoa makes all the difference.
And honestly, don't be afraid to make it your own. Sometimes I add a peppermint stick for stirring, or a dash of orange zest for brightness. It's your hot chocolate – make it exactly how you like it. The best part is sharing it with someone you care about. There's something special about handing a warm mug to someone and seeing their face light up.
The essence of the drink:
This healthier hot chocolate captures all the comfort of the classic version but with thoughtful ingredient swaps. It's rich and chocolatey without being overly sweet, and the natural sweeteners allow the true cocoa flavor to shine through. The warmth spreads through your hands as you hold the mug, and that first sip... it's pure comfort.
A fun historical angle:
Hot chocolate has been warming people for centuries, but originally it was quite different. The ancient Maya drank it bitter and spicy, often mixed with chili peppers. Can you imagine? Our modern sweet version is a relatively recent development. Still, that connection to history makes each sip feel a little more special.
Flavor and sensory focus:
What you'll notice most is the deep chocolate aroma that fills the room as it heats. Then the first taste – not cloyingly sweet, but balanced and rich. The warmth spreads through you, and there's a subtle vanilla note that rounds everything out. It feels indulgent but light, which is a rare combination.
You Must Know
-
Quality cocoa powder is non-negotiable for great flavor
-
Don't skip the salt – it makes the chocolate taste richer
-
Heat gently to avoid scorching the milk
-
Whisk continuously for the smoothest texture
Frequently Asked Questions
→ Can I make this dairy-free?
Absolutely. Oat milk works beautifully because it's naturally creamy, but almond or coconut milk also work well. Just choose an unsweetened version since we're adding our own sweetener. The flavor will be slightly different but still delicious.
→ How can I make it even healthier?
You could reduce the maple syrup slightly or use date syrup instead. Adding a tablespoon of collagen peptides or protein powder works well too. Some people like to blend in a spoonful of nut butter for extra protein and creaminess.
→ Can I make a larger batch?
Yes, but it's best made fresh. If you need to make more, simply multiply the ingredients. Keep it warm on the stove on very low heat, but don't let it boil. Stir occasionally to prevent a skin from forming.
→ What's the best cocoa powder to use?
I prefer Dutch-processed cocoa for its smooth, less acidic flavor, but natural cocoa works fine too. Look for a brand that smells rich and chocolatey when you open the container. The quality really shows in such a simple recipe.
→ Can I add other flavors?
Definitely! A pinch of cinnamon, cardamom, or even cayenne pepper adds nice warmth. Orange zest or peppermint extract are classic additions too. Start with small amounts and taste as you go.
→ How should I store leftovers?
It's really best enjoyed immediately, but if you must store it, refrigerate in an airtight container for up to 2 days. Reheat gently on the stove, whisking to recombine. It might separate slightly, but whisking will bring it back together.

Nutrition Facts
per serving
180
Calories
8g
Protein
22g
Carbs
8g
Fat
Taste Profile
Rich chocolate flavor with balanced sweetness and warm vanilla notes
Ingredient Substitutions
Don't have an ingredient? Try these alternatives
Adjust to taste as sweetness levels vary
Oat milk creates the creamiest dairy-free version
Cacao is less processed but may be more bitter
Recipe Variations
Try these delicious twists on the original
Mexican Style
Add a pinch of cinnamon and cayenne pepper for warm spice
Mint Chocolate
Use peppermint extract instead of vanilla and top with crushed candy cane
Orange Chocolate
Add orange zest and a drop of orange extract for citrus notes
Common Mistakes to Avoid
Learn from others' mistakes for perfect results
- Heating too quickly can scorch the milk
- Not whisking enough can leave cocoa lumps
- Adding vanilla too early diminishes its flavor
- Skipping the salt reduces chocolate intensity
Meal Prep & Storage
Make Ahead Tips
You can mix the dry ingredients (cocoa powder, spices) ahead of time. Store in an airtight container. When ready to make, simply combine with milk and sweetener.
Leftover Ideas
Reheat gently on the stove, whisking to recombine. May separate slightly when refrigerated, but whisking will bring it back together.
Perfect Pairings
Serve this with...
Cooking Timeline
Whisk cocoa powder with sweetener and splash of milk to form paste
Gradually whisk in remaining milk until smooth
Heat gently, whisking frequently, until steaming
Remove from heat, add vanilla and spices
Final whisk, taste adjustment, pour into mugs
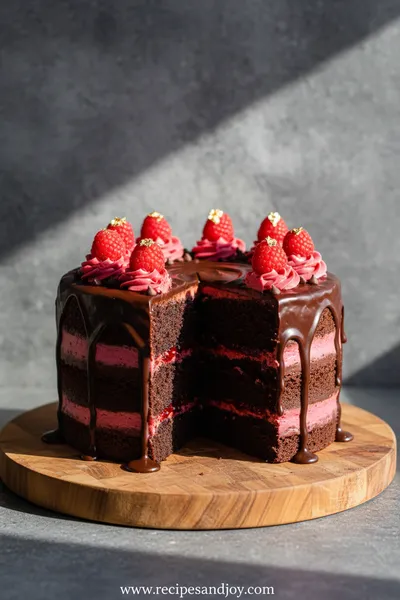
 Sweet Treats & Desserts
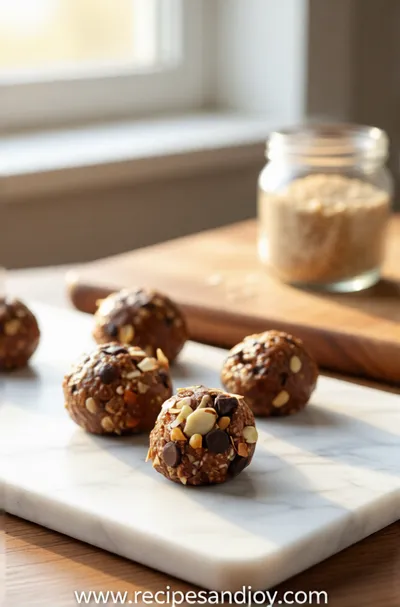
No-Bake Protein Energy Balls – Easy Healthy Snack
A simple, no‑bake bite of protein‑packed goodness you can carry anywhere.

Healthier Hot Chocolate Recipe
A warm, comforting hot chocolate made healthier with natural sweeteners and rich cocoa. Perfect for cozy evenings by the fire or a special treat that feels indulgent without the guilt.
Timing
Prep Time
2 Minutes
Cook Time
8 Minutes
Total Time
10 Minutes
Recipe Details
Ingredients
Main Ingredients
-
01
2 cups milk of choice (whole, oat, or almond)
-
02
3 tablespoons unsweetened cocoa powder
-
03
2-3 tablespoons maple syrup (adjust to taste)
-
04
1/4 teaspoon vanilla extract
-
05
Pinch of salt
-
06
Optional: dash of cinnamon or other spices
Instructions
In a small saucepan, whisk together the cocoa powder, maple syrup, and a tiny splash of milk to form a smooth paste. This prevents lumps later. I like to do this off the heat first – it makes everything blend together so much better.
Gradually whisk in the remaining milk until everything is well combined. Place the saucepan over medium-low heat. You want it warm but not boiling. Patience here is key – rushing with high heat can scorch the milk.
Heat gently, whisking frequently, until steam begins to rise and the hot chocolate is warm to your liking. This usually takes about 5-7 minutes. Don't walk away – it can go from perfect to too hot quickly. The smell will tell you when it's ready.
Remove from heat and stir in the vanilla extract and optional spices. Give it one final whisk to incorporate everything smoothly. Taste and adjust sweetness if needed – sometimes I add another teaspoon of maple syrup at this point.
Pour into warmed mugs and serve immediately. If you're feeling fancy, top with a sprinkle of cocoa powder or cinnamon. But honestly, it's perfect just as it is. That first sip... wow, just pure comfort.
Notes & Tips
-
1
Store leftover hot chocolate in the refrigerator for up to 2 days
-
2
Reheat gently on the stove, whisking to recombine
-
3
For extra richness, add a teaspoon of coconut oil or butter at the end
-
4
This recipe doubles easily for serving a crowd
 Easy Everyday Dinners
Chicken Caesar Pasta Salad Recipe
Quick creamy chicken Caesar pasta salad, ideal for weeknight meals.
Tools You'll Need
-
Small saucepan
-
Whisk
-
Measuring spoons
-
Measuring cup
-
Mugs
Must-Know Tips
-
Use a whisk for smoothest results – spoons can leave lumps
-
Don't boil the milk – gentle heat preserves the flavor
-
Warm your mugs first for longer-lasting heat
-
Taste and adjust sweetness to your preference
Professional Secrets
-
A tiny pinch of salt enhances chocolate flavor dramatically
-
Quality cocoa powder makes all the difference in simple recipes
-
Adding vanilla at the end preserves its delicate aroma
-
Whisking continuously creates that velvety texture we love

Recipe by
Lily AndersonLife is sweeter with dessert 🍰💕 Baking joy, spreading smiles, and loving every sprinkle ✨
Get Delicious Recipes Weekly
Join 25,000+ home cooks getting our best recipes straight to their inbox.
Free forever • No spam • Unsubscribe anytime