
The notion of incorporating cottage cheese into desserts isn't entirely new, but its recent resurgence as a secret ingredient for creamy, high-protein treats speaks to a desire for balance. This recipe transforms a simple, nutritious dairy staple into a silky-smooth frozen dessert that satisfies a chocolate craving without the heaviness of traditional ice cream. It's a modern twist on a classic, proving that wholesome ingredients can create the most delightful indulgences.
Why You'll Love It
-
- Incredibly creamy texture that feels like a true indulgence.
-
- Packed with protein from the cottage cheese, making it a satisfying treat.
-
- No-churn method means no fancy ice cream maker is required.
-
- Simple, wholesome ingredients you can feel good about serving.
"My kids have no idea it's made with cottage cheese! It's our new favorite healthy dessert."
Essential Ingredient Guide
- Cottage Cheese: Use full-fat for the creamiest results. Blending it until completely smooth is the key to eliminating any graininess and creating that luxurious base.
- Good Quality Cocoa Powder: This is where your chocolate flavor comes from, so choose a brand you love. Dutch-processed cocoa will give a deeper, richer chocolate taste.
- Pure Maple Syrup: It adds a lovely, nuanced sweetness that complements the chocolate beautifully. You can adjust the amount to your taste.
- Vanilla Extract: A splash of real vanilla rounds out the flavors and adds a warm, aromatic depth that makes the chocolate taste even more chocolatey.
- A Pinch of Salt: Don't skip this. It's not about making it salty, but about making all the other flavors pop and balancing the sweetness perfectly.
 Healthy, Simple & Family Cooking
Crispy Keto Onion Rings
A easy, crunchy keto snack that feels indulgent without the carbs.
Complete Cooking Process
-
Ingredient Readiness:
Everything needs to be ready to go before you start. Make sure your cottage cheese is well-blended, and your maple syrup is measured. Having it all set makes the process flow so smoothly.
-
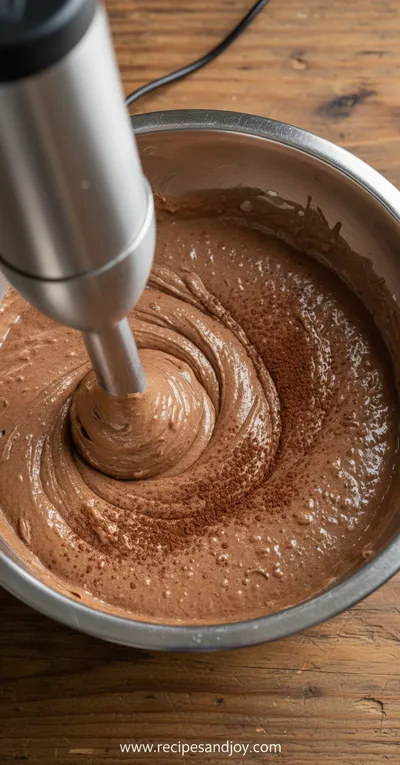
Flavor Development:
The magic happens right in the blender. As the cottage cheese, cocoa, and maple syrup whirl together, the flavors meld into a single, rich chocolate base. You'll see it turn into a beautiful, uniform color.
-
Texture Control:
This is the most important part. You must blend the cottage cheese until it's utterly, completely smooth. I mean, let the blender run for a good minute or two. That patience is what gives you the creamy dreamy texture, not icy or grainy at all.
-
Finishing Touches:
Just before freezing, a final stir ensures everything is perfectly combined. If you're adding any mix-ins, like a few chocolate chips, this is the moment to gently fold them in.
-
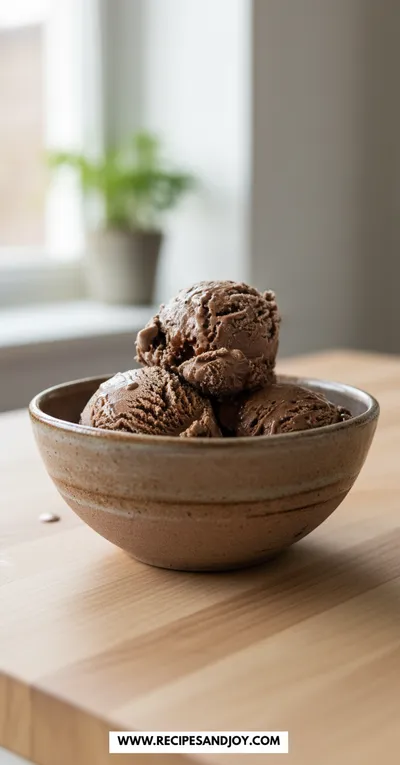
Serving Timing:
Let it sit on the counter for five or ten minutes after taking it out of the freezer. That little bit of softening makes it perfectly scoopable and lets the creamy texture truly shine.
-
Blend, blend, blend! Don't rush this step for the smoothest result.
-
Taste the mixture before freezing to adjust sweetness.
-
Use a loaf pan for easy freezing and scooping.
-
Press plastic wrap directly onto the surface to prevent ice crystals.
Pro Tips
Honestly, the first time I made this, I was a little skeptical. Cottage cheese in ice cream? But when I let that blender run, I watched it transform into this velvety, dark chocolate river. It was a quiet little miracle in my kitchen.
I remember when my sister visited, and I served her a bowl without telling her what was in it. She just kept saying, 'This is so good, what is this?' When I told her, she couldn't believe it. It's those small surprises that make cooking so much fun, you know?


The essence of the dish:
This ice cream is all about that magical transformation. It takes a humble, healthy ingredient and turns it into something that feels decadent. The creaminess is genuine, the chocolate flavor is deep and rich, and you can enjoy it knowing it's doing your body a bit of good, too. It's a treat without the trick.
A fun fact or historical angle:
Cottage cheese has been a staple in many cultures for centuries, valued for its nutritional content. Using it creatively in sweet applications is a relatively modern twist, a clever way to add protein and creaminess to desserts for those seeking a healthier lifestyle.
Flavor or sensory focus:
The first thing you'll notice is the intense, smooth chocolate taste. Then, as it melts on your tongue, you get that cold, creamy sensation that is so satisfying. There's no iciness, just a rich, velvety melt that coats your mouth in the best way possible.
You Must Know
-
A high-speed blender is your best friend here for ultimate smoothness.
-
Freezing time is crucial; don't try to rush it by putting it in a deeper freeze.
-
This is a softer-set ice cream, so it melts a bit faster than store-bought.
Frequently Asked Questions
→ Can I use low-fat cottage cheese?
You can, but the texture will be less creamy and might be a bit icier. Full-fat cottage cheese gives that luxurious mouthfeel that makes this ice cream so special.
→ My ice cream is too hard to scoop, what happened?
It just needs a few minutes on the counter to soften. This is normal for homemade ice cream without stabilizers. Let it sit out for 5-10 minutes before serving.
→ Can I add mix-ins?
Absolutely! Fold in some mini chocolate chips, chopped nuts, or even a swirl of peanut butter after blending for a fun variation.
→ How long does it keep in the freezer?
It's best within the first week for optimal texture, but it will keep for up to a month. Just make sure it's covered tightly.
→ Is this considered a high-protein dessert?
Yes, thanks to the cottage cheese, it has a good amount of protein per serving, making it more satisfying than traditional ice cream.
→ Can I make this vegan?
For a vegan version, you could try blending silken tofu with the cocoa and maple syrup, though the texture will be different. It's an experiment worth trying!
Nutrition Facts
per serving
180
Calories
10g
Protein
22g
Carbs
6g
Fat
Taste Profile
Rich, deep chocolate flavor balanced by a subtle creamy tang.
Ingredient Substitutions
Don't have an ingredient? Try these alternatives
Honey will add its own distinct flavor, which can be lovely with chocolate.
Cacao is less processed and can be used one-for-one, though it may have a slightly more bitter edge.
Recipe Variations
Try these delicious twists on the original
Mocha Version
Add 1-2 teaspoons of instant espresso powder to the blender for a coffee-chocolate twist.
Peanut Butter Cup
Swirl in 1/4 cup of peanut butter after blending and add chopped peanuts.
Mint Chocolate Chip
Add 1/2 teaspoon peppermint extract with the vanilla and use dark chocolate chips.
Common Mistakes to Avoid
Learn from others' mistakes for perfect results
- Not blending long enough, resulting in a grainy texture.
- Skipping the plastic wrap step, leading to ice crystal formation.
- Using low-fat cottage cheese, which can make the ice cream icy.
Meal Prep & Storage
Make Ahead Tips
You can blend the base up to a day ahead and keep it refrigerated before freezing, but freezing it the day you make it is best for freshness.
Leftover Ideas
Leftover ice cream should be covered tightly and will keep in the freezer for up to a month. It may develop a slightly icier texture over time.
Perfect Pairings
Serve this with...
Cooking Timeline
Gather all ingredients and add them to the blender.
Blend on high until completely smooth and creamy.
Taste and adjust sweetness, then pour into a loaf pan.
Press plastic wrap onto the surface and place in the freezer.
Freeze until firm, preferably overnight.
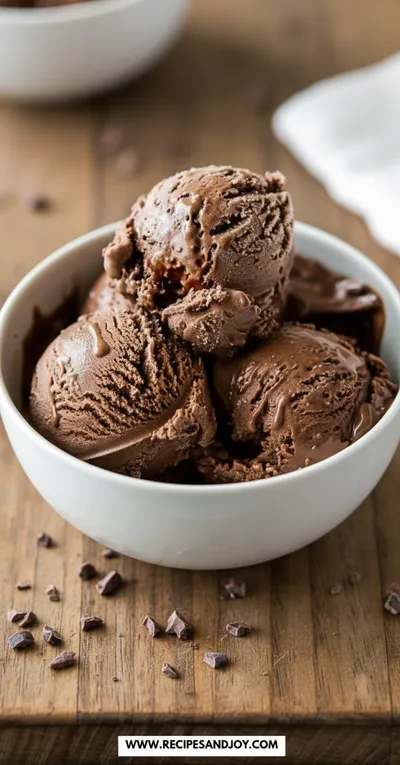
Creamy Chocolate Cottage Cheese Ice Cream
An unbelievably smooth and rich chocolate ice cream made with cottage cheese for a healthy, protein-packed dessert that feels like a true indulgence.
Timing
Prep Time
15 Minutes
Cook Time
0 Minutes
Total Time
4 Hours 15 Minutes
Recipe Details
Ingredients
Ice Cream Base
-
01
2 cups full-fat cottage cheese
-
02
1/2 cup good quality unsweetened cocoa powder
-
03
1/2 cup pure maple syrup (or to taste)
-
04
1 teaspoon pure vanilla extract
-
05
1/4 teaspoon fine sea salt
-
06
1/2 cup dark chocolate chips (optional)
Instructions
Add the cottage cheese, cocoa powder, maple syrup, vanilla extract, and salt to a high-speed blender. Honestly, just dump it all in there.
Blend on high speed until the mixture is completely smooth and silky. This might take a full two minutes. Scrape down the sides once to make sure everything is incorporated. You're looking for no graininess at all.
Taste the mixture and adjust sweetness if you like by adding a little more maple syrup. If you're using chocolate chips, stir them in gently by hand now.
Pour the creamy chocolate mixture into a loaf pan or a freezer-safe container. Smooth the top with a spatula.
Press a piece of plastic wrap directly onto the surface of the ice cream. This is my little trick to prevent those pesky ice crystals from forming.
Freeze for at least 4 hours, or until firm. Overnight is perfect. When you're ready to serve, let it sit out for a few minutes to soften up for easy scooping.
Notes & Tips
-
1
For the creamiest results, ensure your blender is powerful enough to completely smooth the cottage cheese.
-
2
If the ice cream is too hard straight from the freezer, let it sit at room temperature for 5-10 minutes before serving.
-
3
Feel free to swirl in some peanut butter or add chopped nuts for different flavor variations.
Tools You'll Need
-
High-speed blender
-
Loaf pan or freezer-safe container
-
Spatula
-
Measuring cups and spoons
Must-Know Tips
-
Blend until silky smooth, Patience here prevents graininess
-
Taste before freezing, Adjust sweetness to your liking
-
Press wrap on surface, This simple step prevents ice crystals
Professional Secrets
-
Full-fat dairy, Creates a richer, creamier base
-
Direct-contact wrap, The best defense against freezer burn
-
Room-temp rest, Allows flavors to meld perfectly before freezing

Recipe by
Lily AndersonLife is sweeter with dessert 🍰💕 Baking joy, spreading smiles, and loving every sprinkle ✨
Get Delicious Recipes Weekly
Join 25,000+ home cooks getting our best recipes straight to their inbox.
Free forever • No spam • Unsubscribe anytime