
The soft pretzel has a surprisingly humble yet long history, tracing its knotted shape back to early European monks who folded the dough to resemble arms crossed in prayer. These baked treats, originally called 'bretzels,' were symbols of good luck and spiritual fulfillment. Over centuries, they traveled across the Atlantic with German immigrants, finding a beloved home in American cuisine, particularly at fairs and sporting events. This recipe simplifies that tradition into bite-sized morsels, capturing the same satisfying chew and iconic flavor in a form perfect for sharing.
Why You'll Love It
-
- Unbelievably soft and chewy texture that’s just so satisfying to bite into.
-
- That classic pretzel flavor with a hint of salt is just pure comfort.
-
- The creamy cheese dip turns a simple snack into something truly special.
-
- They’re fun to make with the family – kids love shaping the little bites.
-
- Far more rewarding and delicious than anything you can buy frozen.
"My kids said these were even better than the ones at the mall! We'll be making these every weekend now."
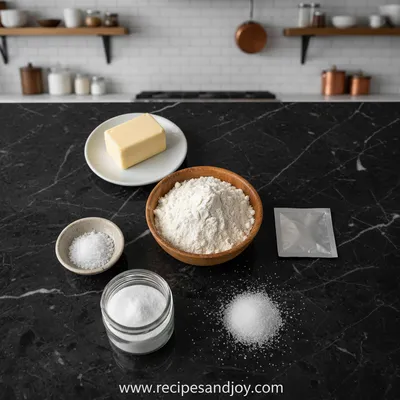
Essential Ingredient Guide
- Bread Flour: Bread flour gives the pretzel bites their signature chewy texture because it has a higher protein content than all-purpose flour. Honestly, it makes all the difference for that satisfying pull.
- Active Dry Yeast: This is the heart of the recipe, making the dough rise and giving it that lovely airy quality. Make sure your yeast is fresh and bubbly when you proof it – it should look alive and active.
- Baking Soda Bath: Dipping the dough bites in a baking soda bath before baking is the secret to that dark golden-brown, slightly crackly crust that defines a true pretzel. It’s a neat little bit of kitchen science.
- Coarse Salt: A generous sprinkle of coarse salt right before baking gives that iconic salty contrast to the sweet, soft dough. You can adjust it to your taste, but don’t skip it – it’s part of the soul of a pretzel.
- Milk: Using milk instead of water in the dough adds a subtle richness and helps create a softer, more tender crumb. Whole milk is best for the most flavor.
- Butter: A little butter melted into the dough adds flavor and helps keep the pretzel bites soft and delicious even after they cool down a bit.

Complete Cooking Process
-
Ingredient Readiness:
You'll want everything measured and at the ready. The yeast needs to be proofed in warm liquid – not too hot, or you'll hurt it, just comfortably warm to the touch, like a nice bath. The milk and butter should be warmed gently together until the butter melts. Having your baking soda bath ready to go before shaping makes the whole process flow smoothly.
-
Flavor Development:
The flavor really develops during the first rise of the dough. As the yeast works, it creates those lovely, complex bread flavors. The brief dip in the baking soda solution just before baking adds that distinct pretzel taste to the crust. It's amazing how such a simple step changes everything.
-
Texture Control:
Kneading the dough well is key for developing the gluten, which gives you that wonderful, pull-apart chewiness. The baking soda bath is also crucial for texture – it gives the outside that unique, slightly crisp skin. Not letting the dough over-rise keeps the bites light and not too dense.
-
Finishing Touches:
Right out of the oven, while the pretzel bites are still hot, is the time to brush them with a little melted butter. This adds a beautiful sheen and an extra layer of flavor that just seals the deal. Then, you sprinkle on the salt while the butter is still wet so it sticks perfectly.
-
Serving Timing:
These are honestly best served warm, almost straight from the oven. The cheese dip should be warm and gooey, ready for dipping. The contrast of the hot, soft pretzel with the cool, creamy dip is just heaven. If they sit too long, they can start to get a bit tough, so timing is everything.
-
Use a kitchen scale to measure your flour for perfect consistency every time.
-
Don't rush the first rise – let the dough double in size for the best flavor.
-
Make sure your baking soda bath is at a gentle simmer, not a rolling boil.
-
Use a slotted spoon for the baking soda bath dip to drain excess water.
Pro Tips
You know, the first time I made these, I was so worried about the baking soda bath step. It felt a little intimidating, like I might mess it up. But honestly, it's simpler than it looks. Just a quick dip, in and out, and you're golden. Literally. And the warmth of the kitchen while they bake… it’s one of my favorite feelings. It reminds me of being a kid, waiting for my mom to pull something wonderful out of the oven. These little bites are more than just a snack; they're a little moment of quiet joy. I mean, on a busy weeknight, sometimes you need something simple and comforting, just like an easy skillet dinner. Something that doesn't take all evening but still feels like a treat.
The essence of the dish:
It’s all about that warm, soft, chewy center contrasted with a slightly crisp, salty exterior. It’s the ultimate handheld comfort food, perfect for sharing and dipping. There's a wholesome simplicity to it that just feels good.
A fun fact or historical angle:
The pretzel's unique knot shape is said to have been created by a monk in the early 7th century, who twisted the dough to look like arms crossed in prayer. The three holes were meant to represent the Holy Trinity.
Flavor or sensory focus:
The first thing you'll notice is the amazing aroma of baking bread filling your home. Then, when you bite in, it's the texture – that perfect resistance giving way to a soft, pillowy interior, followed by the hit of salt and the rich, creamy cheese.
You Must Know
-
The baking soda bath is non-negotiable for authentic pretzel flavor and color.
-
Handle the dough gently when shaping the bites to keep them light.
-
Serve them immediately for the best possible texture and experience.
Frequently Asked Questions
→ Can I use all-purpose flour instead of bread flour?
You can, but the texture will be less chewy. Bread flour has more protein, which develops more gluten and gives pretzels their characteristic pull. All-purpose will make a softer, more bread-like bite.
→ Why do I need to dip them in baking soda water?
This step is what gives soft pretzels their unique flavor and dark brown, glossy crust. The alkaline solution encourages Maillard browning reactions on the surface of the dough during baking.
→ Can I make the dough ahead of time?
Yes, you can! After the first rise, punch the dough down, wrap it tightly in plastic, and refrigerate for up to 24 hours. Let it come to room temperature for about an hour before shaping and proceeding with the recipe.
→ My dough didn't rise. What went wrong?
This usually means your yeast was old or the liquid you used to proof it was too hot and killed the yeast. The liquid should be warm, around 110°F (43°C), not hot. Always test your yeast to make sure it's foamy before adding the flour.
→ Can I freeze the baked pretzel bites?
Absolutely. Let them cool completely, then freeze them in a single layer on a baking sheet before transferring to a freezer bag. Reheat them in a 350°F (175°C) oven for about 10 minutes until warm and soft again.
→ What's the best cheese for the dip?
A good melting cheese like sharp cheddar, Monterey Jack, or a processed cheese product like American cheese will give you the smoothest, creamiest dip. You can also add a bit of gruyère for a more complex flavor.

Nutrition Facts
per serving
280
Calories
9g
Protein
38g
Carbs
10g
Fat
Taste Profile
Savory, salty, and bready with a rich, creamy contrast from the cheese dip.
Ingredient Substitutions
Don't have an ingredient? Try these alternatives
The texture will be less chewy and more bread-like, but it will still be delicious.
The dough may be slightly less rich and tender. Water will create a chewier, more traditional pretzel texture.
Different cheeses will alter the flavor and meltability of the dip. American cheese will give you a very smooth, classic cheese dip.
Recipe Variations
Try these delicious twists on the original
Cinnamon Sugar Sweet Bites
Skip the salt topping. After baking and buttering, toss the warm bites in a mixture of cinnamon and sugar. Serve with a cream cheese frosting dip.
Everything Bagel Pretzel Bites
After the egg wash, top with an 'everything bagel' seasoning blend (poppy seeds, sesame seeds, garlic, onion, salt) before baking.
Stuffed Pretzel Bites
Flatten each dough piece slightly and place a small cube of cheese (like mozzarella or cheddar) in the center. Pinch the dough around it to seal completely before the baking soda bath.
Common Mistakes to Avoid
Learn from others' mistakes for perfect results
- Using water that is too hot for the yeast, which kills it and prevents the dough from rising.
- Over-kneading the dough, which can make the pretzels tough.
- Boiling the pretzel bites too long in the baking soda bath, which can make them taste bitter.
- Overcrowding the baking sheet, which leads to uneven baking and steaming instead of browning.
Meal Prep & Storage
Make Ahead Tips
You can prepare the dough through the first rise, then punch it down, wrap it tightly in plastic, and refrigerate for up to 24 hours. Let it come to room temperature for about an hour before shaping. The cheese dip can be made up to 2 days ahead and reheated gently.
Leftover Ideas
Reheat leftover pretzel bites in a 350°F (175°C) oven for 5-10 minutes until warm and soft again. The microwave will make them rubbery. They are best enjoyed fresh but can be revived nicely.
Perfect Pairings
Serve this with...
Cooking Timeline
Proof the yeast in warm milk/butter/sugar mixture.
Mix and knead the dough until smooth and elastic.
First rise – let the dough double in size (about 1 hour).
Prepare baking soda bath and preheat oven.
Shape dough into bites and give them the baking soda bath.
Bake the pretzel bites until deep golden brown.
Prepare the cheese dip while the pretzel bites bake.
 Sweet Treats & Desserts
Healthier Hot Chocolate Recipe
Learn how to make a delicious healthier hot chocolate that's perfect for a cozy warm beverage.

Homemade Soft Pretzel Bites Recipe
Honestly, there's something so comforting about these warm, chewy soft pretzel bites fresh from the oven, served with a rich, creamy cheese dip. The kitchen smells like a cozy bakery, like stepping into a warm hug after a long day. They're such a simple joy, you know?
Timing
Prep Time
30 Minutes
Cook Time
15 Minutes
Total Time
1 Hour 45 Minutes
Recipe Details
Ingredients
For the Pretzel Dough
-
01
1 ½ cups warm whole milk (about 110°F/43°C)
-
02
2 tablespoons unsalted butter, melted
-
03
1 tablespoon light brown sugar
-
04
2 ¼ teaspoons active dry yeast (one packet)
-
05
4 cups bread flour, plus more for dusting
-
06
1 teaspoon fine salt
For the Baking Soda Bath
-
01
½ cup baking soda
-
02
8 cups water
For Topping and Dip
-
01
1 large egg, beaten with 1 tablespoon water (egg wash)
-
02
Coarse sea salt, for sprinkling
-
03
2 tablespoons unsalted butter, melted (for brushing)
-
04
8 oz sharp cheddar cheese, shredded
-
05
½ cup milk
-
06
1 tablespoon all-purpose flour
-
07
1 tablespoon butter
-
08
Pinch of paprika (optional)
Instructions
In a large bowl, combine the warm milk, melted butter, and brown sugar. Sprinkle the yeast over the top and let it sit for about 5-10 minutes, until it becomes foamy. This means your yeast is active and ready to go.
In a separate bowl, whisk together the 4 cups of bread flour and the teaspoon of fine salt. Gradually add the flour mixture to the yeast mixture, stirring with a wooden spoon until a shaggy dough forms.
Turn the dough out onto a lightly floured surface and knead for about 5-7 minutes, until the dough is smooth and elastic. It should feel springy and slightly tacky but not sticky. If it's too sticky, add a little more flour, a tablespoon at a time.
Place the dough in a lightly oiled bowl, turning it once to coat. Cover the bowl with a clean kitchen towel or plastic wrap and let it rise in a warm, draft-free place for about 1 hour, or until doubled in size.
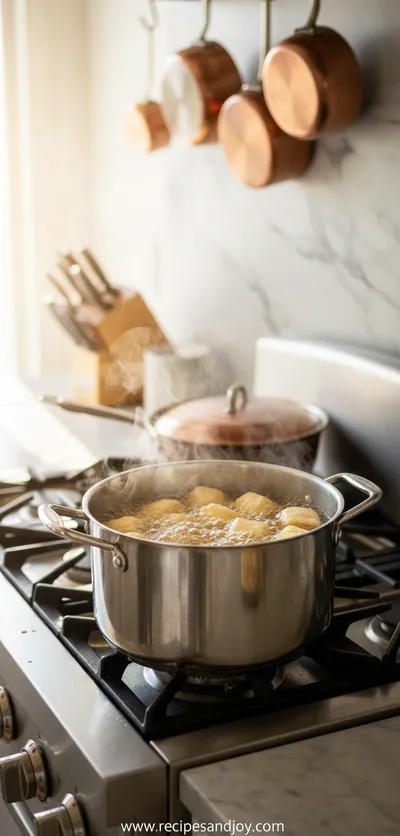
While the dough rises, prepare the baking soda bath. In a large pot, bring the 8 cups of water to a boil. Carefully add the baking soda – it will foam up a bit – and reduce the heat to a gentle simmer.
Preheat your oven to 425°F (220°C). Line two baking sheets with parchment paper. Punch the risen dough down and turn it out onto a lightly floured surface. Divide the dough into 4 equal pieces.
Roll each piece of dough into a long rope, about an inch thick. Using a sharp knife or kitchen scissors, cut each rope into 1-inch pieces. You don't need to be perfect here; rustic is charming.
Working in batches, gently place about 10-15 dough bites into the simmering baking soda water. Let them cook for about 30 seconds, flipping them once halfway through. They will puff up slightly. Use a slotted spoon to transfer them to the prepared baking sheets, leaving a little space between each.
Brush the tops of the par-boiled pretzel bites lightly with the egg wash. This will help them brown beautifully. Then, sprinkle generously with the coarse sea salt.
Bake for 12-15 minutes, rotating the pans halfway through, until the pretzel bites are a deep golden brown. While they bake, make the cheese dip. It’s a wonderful complement, just like a good sauce can elevate a simple skillet chicken dish.
For the cheese dip, melt the tablespoon of butter in a small saucepan over medium heat. Whisk in the tablespoon of flour and cook for one minute. Gradually whisk in the milk until smooth. Bring to a simmer, then reduce heat and stir in the shredded cheese until melted and smooth. Stir in the paprika if using.
Remove the pretzel bites from the oven and immediately brush them with the melted butter. This adds a wonderful gloss and flavor. Serve the warm pretzel bites immediately with the warm cheese dip for dipping. Enjoy the cozy, satisfying moment.
Notes & Tips
-
1
The baking soda bath is key for the authentic pretzel flavor and color. Don't skip it!
-
2
If your kitchen is cool, let the dough rise in a slightly warmed oven (turn it off after preheating for 1 minute).
-
3
You can customize the toppings – try everything bagel seasoning, garlic powder, or cinnamon sugar for a sweet version.
-
4
Leftover pretzel bites can be reheated in the oven to restore their texture; the microwave will make them tough.
 Easy Everyday Dinners
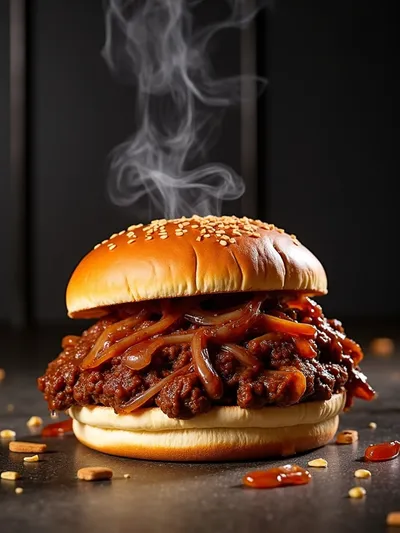
French Onion Beef Sloppy Joes – Easy Dinner
Hearty French onion beef sloppy joes with caramelized onions and a savory, sweet sauce.
Tools You'll Need
-
Large mixing bowl
-
Stand mixer with dough hook (optional, but helpful)
-
Wooden spoon
-
Measuring cups and spoons
-
Large pot for baking soda bath
-
Slotted spoon
-
Baking sheets
-
Parchment paper
-
Pastry brush
-
Small saucepan for cheese dip
Must-Know Tips
-
Don't let the dough over-rise, or the bites can become too airy and lose their chew.
-
Handle the dough gently after the baking soda bath to keep the shape intact.
-
The cheese dip thickens as it cools, so serve it warm for the best consistency.
Professional Secrets
-
Room temperature ingredients, Ensures the yeast activates properly and the dough rises evenly.
-
A brief boil in alkaline water, Creates the unique pretzel crust through the Maillard reaction.
-
Brushing with butter after baking, Adds flavor and keeps the pretzels soft.

Recipe by
Emily ParkerFood hugs in every bite 🥘✨ Lover of cozy meals, nostalgic flavors, and slow evenings around the table ❤️
Get Delicious Recipes Weekly
Join 25,000+ home cooks getting our best recipes straight to their inbox.
Free forever • No spam • Unsubscribe anytime