
The concept of a no‑bake protein bar traces back to the early 2000s when athletes sought convenient, on‑the‑go nutrition without a kitchen. Over time, home cooks adapted the idea, adding flavors that feel like a treat rather than a supplement. This blend of practicality and comfort makes it a modern classic, suitable for anyone who craves a gentle energy lift.
Why You'll Love It
-
- No oven needed, just a few minutes of hands‑on love
-
- Vegan, gluten‑free, and naturally sweetened
-
- Packs protein and fiber for lasting satisfaction
-
- Easy to customize with your favorite nuts or dried fruits
"These bars are my go‑to afternoon pick‑me‑up—soft, sweet, and filling!"
Essential Ingredient Guide
- Gluten‑free rolled oats: Provides the base texture; toast lightly for extra nuttiness
- Plant protein powder: Boosts protein; choose pea or soy for a neutral flavor
- Nut butter: Adds richness and helps bind; almond or cashew work well
- Maple syrup: Natural sweetener that adds a subtle caramel aroma
- Lemon juice: A touch of acid brightens the flavor and balances sweetness
- Vanilla extract: Enhances overall aroma without overwhelming the palate
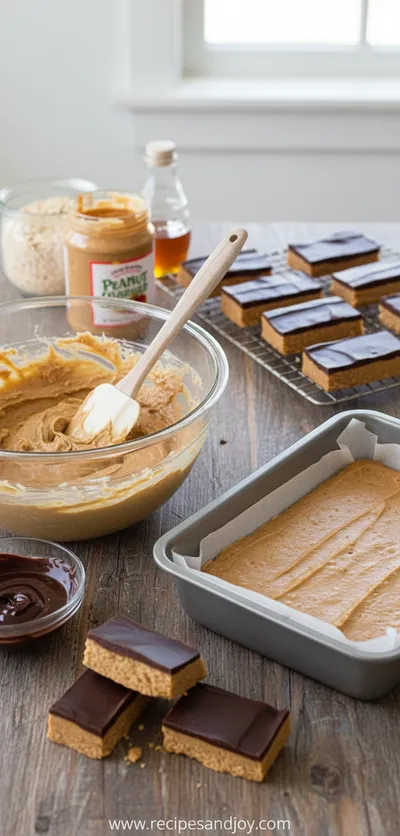
Complete Cooking Process
-
Ingredient Readiness:
Measure and lightly toast oats, warm nut butter with syrup to a pourable consistency.
-
Flavor Development:
Mix dried fruits, seeds, and vanilla into the wet mixture, letting the aroma settle.
-
Texture Control:
Press the combined mixture firmly into the pan so it holds together after cooling.
-
Finishing Touches:
Sprinkle a pinch of sea salt or cocoa nibs for a subtle contrast.
-
Serving Timing:
Cool for at least 30 minutes, then slice; serve at room temperature for optimal chew.
-
Press the mixture with a piece of parchment for an even surface
-
If the bars feel crumbly, add a teaspoon more nut butter
-
Freeze for an hour to make slicing cleaner
-
Store in an airtight container to keep moisture in
Pro Tips
I’ve found a little patience goes a long way. When you let the bars set, the flavors meld and the texture firms up, making each bite feel satisfying yet gentle. It’s a calm moment in a busy day, and the bars keep well for a few days, so you can reach for them whenever you need a quiet lift.

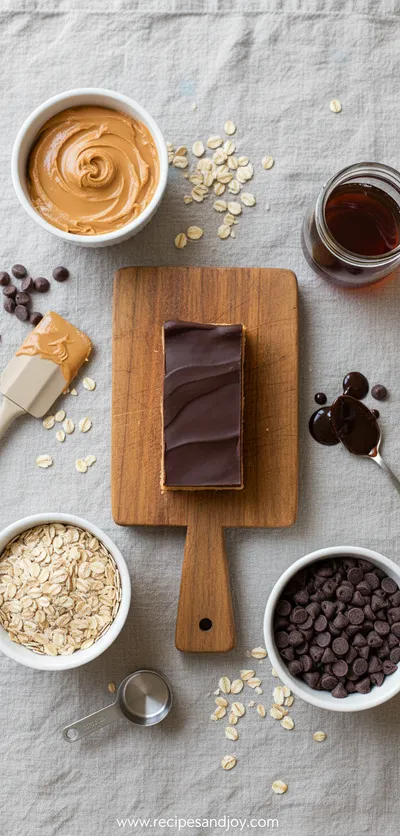
The essence of the dish:
It’s all about simplicity—oats, protein, and a drizzle of nature’s sweetness come together in a chewy, slightly crunchy bar that feels like a comforting snack.
A fun fact or historical angle:
The first commercial protein bars appeared in the 1970s as a supplement for marathon runners, but home‑made versions have become a staple for everyday families.
Flavor or sensory focus:
You’ll notice the warm nutty scent from the toasted oats, the subtle caramel note of maple, and the gentle snap when you bite into the chilled bar.
You Must Know
-
Use gluten‑free oats to keep the bar safe for sensitive stomachs
-
Press firmly to avoid crumbling later
-
Let the bars chill fully before cutting
Frequently Asked Questions
→ Can I use honey instead of maple syrup?
Yes, but that would make the bars no longer vegan. Maple syrup keeps them vegan and adds a gentle caramel flavor.
→ How long do the bars keep?
Stored in an airtight container at room temperature they stay fresh for 4‑5 days, or you can refrigerate for up to a week.
→ What can I substitute for nut butter?
Sunflower seed butter works well if you have a nut allergy, offering a similar creamy texture.
→ Can I add chocolate chips?
Absolutely—just be sure to use dairy‑free chips and add them after the mixture cools a bit so they don’t melt completely.
→ Is this recipe gluten‑free?
Yes, using certified gluten‑free oats ensures there’s no hidden wheat.
→ Do I need a special pan?
A small square pan lined with parchment paper works best; it helps lift the bars cleanly.
Nutrition Facts
per serving
210
Calories
12g
Protein
24g
Carbs
9g
Fat
Taste Profile
Naturally sweet, nutty, with a hint of citrus brightness
Ingredient Substitutions
Don't have an ingredient? Try these alternatives
Works well for nut‑allergy sufferers, keep the same amount.
Provides similar sweetness with a richer fruit flavor.
Recipe Variations
Try these delicious twists on the original
Spicy Version
Add 1/2 tsp cayenne and a drizzle of agave for a sweet‑heat kick.
Mediterranean Style
Swap dried cranberries for chopped figs and add toasted pistachios.
Common Mistakes to Avoid
Learn from others' mistakes for perfect results
- Skipping the chilling step – bars may fall apart.
- Using too much syrup – results in a sticky, overly sweet bar.
- Not pressing firmly – leads to crumbliness.
Meal Prep & Storage
Make Ahead Tips
Mix and press the bars up to 24 hours ahead; keep them chilled until ready to serve.
Leftover Ideas
Enjoy a bar straight from the fridge; if it feels firm, let it sit a few minutes at room temperature.
Perfect Pairings
Serve this with...
Cooking Timeline
Toast oats and measure dry ingredients.
Warm almond butter with maple syrup and whisk smooth.
Combine wet and dry mixes, add seeds and fruit.
Press mixture into pan, chill to set.
Allow bars to firm, slice, and store.
No Bake Protein Bar – Easy Vegan Treat
A quick, no‑bake, vegan protein bar that feels like a comforting hug. It’s gluten‑free, sweetened with maple, and packed with plant protein for a gentle boost anytime you need it.
Timing
Prep Time
15 Minutes
Cook Time
0 Minutes
Total Time
45 Minutes
Recipe Details
Ingredients
Base
-
01
2 cups gluten‑free rolled oats
-
02
1 cup plant‑based protein powder (vanilla or unflavored)
-
03
1/2 cup almond butter
-
04
1/3 cup pure maple syrup
-
05
2 tbsp chia seeds
-
06
1/4 cup dried cranberries, chopped
-
07
1 tsp vanilla extract
-
08
1 tbsp lemon juice
-
09
Pinch of sea salt
Optional Add‑Ins
-
01
2 tbsp cocoa nibs
-
02
2 tbsp unsweetened shredded coconut
-
03
1/4 cup pumpkin seeds
Instructions
In a large bowl, combine the oats and protein powder; give them a quick stir so they’re evenly blended.
Warm the almond butter and maple syrup together in a microwave‑safe bowl for about 30 seconds, then whisk until smooth.
Pour the warm almond‑maple mixture over the dry ingredients, add vanilla, lemon juice, and sea salt, then mix until everything sticks together. If the mixture feels dry, drizzle a little more maple syrup.
Fold in chia seeds, dried cranberries, and any optional add‑ins you like. The chia will help bind the bars and add a subtle crunch.
Press the mixture firmly into a parchment‑lined 8×8‑inch pan, smoothing the top with the back of a spoon. Chill in the refrigerator for at least 30 minutes, then slice into 12 bars.
Notes & Tips
-
1
If you’d like a richer chocolate flavor, add 2 tbsp cocoa powder to the dry mix.
-
2
For extra crunch, sprinkle a few extra seeds on top before chilling.
-
3
Feel free to swap dried cranberries for raisins or chopped apricots.

Tools You'll Need
-
Large mixing bowl
-
Measuring cups and spoons
-
Microwave‑safe bowl
-
Whisk
-
Spatula
-
8×8‑inch square pan
-
Parchment paper
Must-Know Tips
-
Press firmly to avoid crumbly bars, use a flat surface like a cutting board.
-
Let the bars chill fully; warm bars can fall apart when sliced.
-
Store in a cool, dry place; moisture can make them soggy.
Professional Secrets
-
Toasting oats for just a minute adds depth without burning.
-
Using chia seeds as an egg‑free binder keeps the bars moist.
-
Chilling the mixture solidifies the natural fats in the nut butter.

Recipe by
Lily AndersonLife is sweeter with dessert 🍰💕 Baking joy, spreading smiles, and loving every sprinkle ✨
Get Delicious Recipes Weekly
Join 25,000+ home cooks getting our best recipes straight to their inbox.
Free forever • No spam • Unsubscribe anytime