
While Oreo balls feel like a modern treat, the concept of combining cookies with a binding agent for a new confection has roots in resourcefulness. The Oreo cookie itself, first introduced in 1912, became a staple in American households. It's believed that no-bake cookie ball recipes gained popularity as a way to create impressive desserts without extensive baking equipment, perfect for potlucks and family gatherings where ease was as important as flavor. The simplicity of crushing, mixing, and dipping made them a beloved treat across generations.
Why You'll Love It
-
Incredibly simple with just a few basic ingredients.
-
No baking required, perfect for any skill level.
-
The perfect make-ahead treat for parties or gifts.
-
That rich, creamy, and crunchy texture is utterly irresistible.
"My family devoured these in minutes! So easy and so addictive."
Essential Ingredient Guide
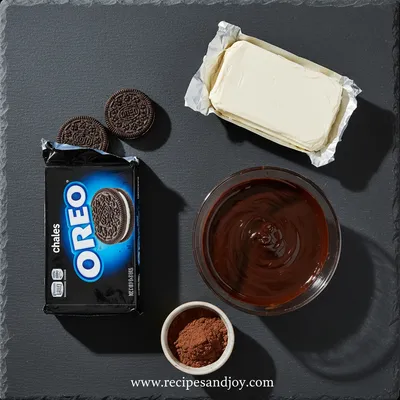
- Oreo cookies: The heart of the recipe. Use the regular variety for that classic flavor. Honestly, the filling is part of the magic, so don't scrape it out.
- Cream cheese: This binds everything together and adds a lovely tang that cuts the sweetness. Make sure it's softened to room temperature for easier mixing.
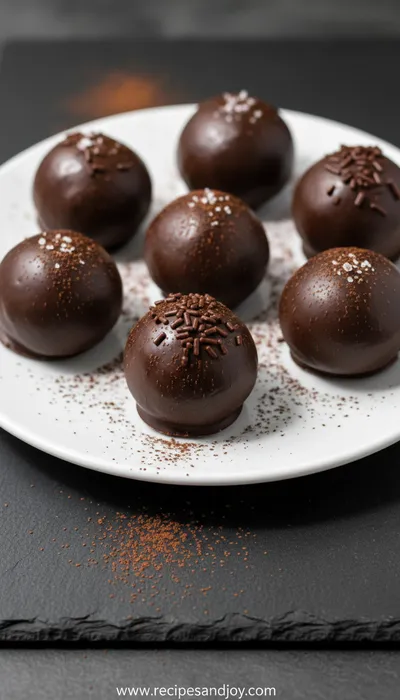
- Chocolate melting wafers: These give the balls their beautiful, smooth shell. They melt evenly and set nicely. I find semi-sweet balances the sweetness perfectly, but milk chocolate is lovely too.
- Vanilla extract: Just a splash deepens all the other flavors. It’s a small touch that makes a big difference.
- Sprinkles: Optional, but oh, so fun. They add color and a little festive crunch. Perfect for holidays.
 Healthy, Simple & Family Cooking
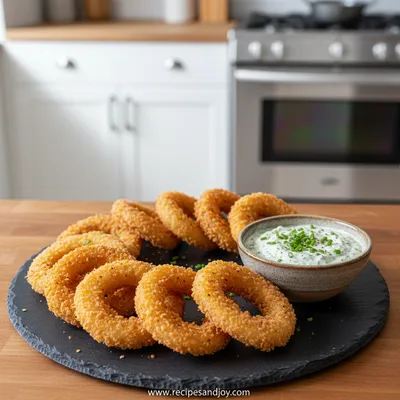
Crispy Keto Onion Rings
A easy, crunchy keto snack that feels indulgent without the carbs.
Complete Cooking Process
-
Ingredient Readiness:
Let the cream cheese sit out until it's soft and spreadable. This makes blending it with the cookie crumbs so much easier, preventing lumps. I mean, there's nothing worse than fighting with cold cream cheese.
-
Flavor Development:
The flavor really comes alive after the mixed dough chills. The crumbs soak up the moisture from the cream cheese, and the whole mixture firms up, making it easier to handle and allowing the flavors to meld beautifully.
-
Texture Control:
Chilling the formed balls is the most important step for texture. A firm, cold ball won't fall apart when you dip it, and it gives you that fantastic contrast between the crisp shell and the soft, truffle-like center.
-
Finishing Touches:
Adding the sprinkles right after dipping, while the chocolate is still wet, is key. They'll stick perfectly. It's the final little touch that makes them look as good as they taste.
-
Use a food processor for the finest, most uniform crumbs.
-
A small cookie scoop ensures all your balls are the same size for even dipping.
-
Keep the balls cold! If they start to soften while working, pop the tray back in the freezer for 10 minutes.
-
Melt your chocolate in short bursts in the microwave, stirring well each time, to avoid seizing.
Pro Tips
You know, the first time I made these, I was a bit impatient. I didn't chill the dough long enough, and dipping was a messy affair. Dang, they were still delicious, but they looked a little... rustic. So, yeah, patience here really pays off. The wait makes the process smooth and the result picture-perfect. It’s one of those recipes where the little details, like a well-chilled ball, make all the difference between a treat and a triumph.

The essence of the dish:
What makes these so special is their beautiful contradiction. They feel fancy, like a petit four, but they're made with such humble, everyday ingredients. It’s that magic of transformation. The crunch of the cookie, the creaminess of the filling, the snap of the chocolate—all in one perfect bite. It’s a little like that simple recipe that somehow feels like a celebration.
A fun fact or historical angle:
The Oreo cookie has been around for over a century, and its design, with the embossed pattern, is actually a trademark. Isn't that something? A cookie with its own legal protection. It’s become such a part of our culture, showing up in all sorts of creative desserts.
Flavor or sensory focus:
The first thing you'll notice is the smooth, cool chocolate shell giving way to that soft, almost truffle-like center. Then the distinct Oreo flavor hits you—chocolatey, a little sweet, a little creamy. It’s a real sensory experience, much like the fresh, crisp flavors you get from a good fresh salad, but on the sweet side of things.
You Must Know
-
Chilling is non-negotiable for easy dipping.
-
A food processor is your best friend for fine crumbs.
-
Don't skip the vanilla—it enhances the chocolate flavor.
-
Work quickly when dipping to keep the balls firm.
Frequently Asked Questions
→ Can I use a different type of cookie?
Absolutely! Golden Oreos work wonderfully for a vanilla version. You could also try mint Oreos for a cool twist. Just make sure they're the cream-filled sandwich cookies for the right texture.
→ My chocolate is too thick for dipping. What happened?
It probably got too hot and seized up. Chocolate can be finicky. Try adding a tiny bit of coconut oil or shortening to thin it out. Melt it gently next time, stirring frequently.
→ How long do they need to chill before dipping?
I find at least an hour in the freezer, or two hours in the refrigerator, is perfect. You want them to be very firm to the touch.
→ Can I freeze Oreo balls?
Yes, they freeze beautifully! Place them in a single layer on a parchment-lined tray to freeze solid, then transfer to an airtight container. They'll keep for up to 3 months. Thaw in the fridge.
→ What's the best way to crush the Oreos?
A food processor is fastest and gives you fine, even crumbs. If you don't have one, place the cookies in a heavy-duty zip-top bag and crush them with a rolling pin until no big pieces remain.
→ Can I make these without a mixer?
Of course. A sturdy spoon and some elbow grease will do the trick. It might take a minute or two of mixing to get it completely combined, but it works just fine.
Nutrition Facts
per serving
150
Calories
2g
Protein
16g
Carbs
9g
Fat
Taste Profile
A rich, sweet chocolate flavor balanced by a subtle tang from the cream cheese.
Ingredient Substitutions
Don't have an ingredient? Try these alternatives
The texture will be slightly different, and the balls may be softer. Chill thoroughly.
Chocolate bars need to be tempered properly for a shiny finish, which is more complex.
Recipe Variations
Try these delicious twists on the original
Peppermint Twist
Use mint Oreos and add a drop of peppermint extract to the filling for a festive holiday version.
Cookie Dough Style
Use Golden Oreos and add a handful of mini chocolate chips to the mixture for a cookie dough flavor.
Common Mistakes to Avoid
Learn from others' mistakes for perfect results
- Not chilling the balls long enough, leading to messy dipping.
- Overheating the chocolate, causing it to seize and become grainy.
- Using cold cream cheese, which is difficult to mix smoothly.
Meal Prep & Storage
Make Ahead Tips
You can make the dough balls and refrigerate them for up to 2 days before dipping. They can also be fully assembled and stored in the fridge for up to a week, making them an excellent party prep item.
Leftover Ideas
Leftovers should be kept refrigerated. They are best enjoyed cold. The texture remains perfect for several days.
Perfect Pairings
Serve this with...
Cooking Timeline
Crush Oreos and mix with cream cheese and vanilla.
Roll the mixture into balls and place on a tray.
Chill the balls until firm (1 hour fridge / 30 min freezer).
Melt chocolate and dip each ball, adding sprinkles.
Let chocolate set at room temp or in the fridge.
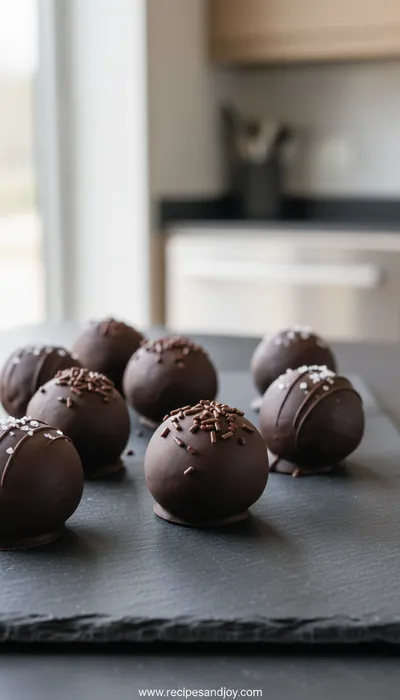
Oreo Balls Recipe
Easy and delicious Oreo balls make the perfect sweet treat – a simple no-bake dessert everyone will love, perfect for gatherings or a quiet evening treat.
Timing
Prep Time
25 Minutes
Cook Time
0 Minutes
Total Time
1 Hour 25 Minutes
Recipe Details
Ingredients
For the Balls
-
01
36 Oreo cookies (one standard package)
-
02
8 ounces cream cheese, softened to room temperature
-
03
1 teaspoon vanilla extract
For Coating & Decoration
-
01
16 ounces (about 2 ½ cups) semi-sweet chocolate melting wafers
-
02
1 tablespoon coconut oil (optional, for thinning chocolate)
-
03
Sprinkles, for decorating (optional)
Instructions
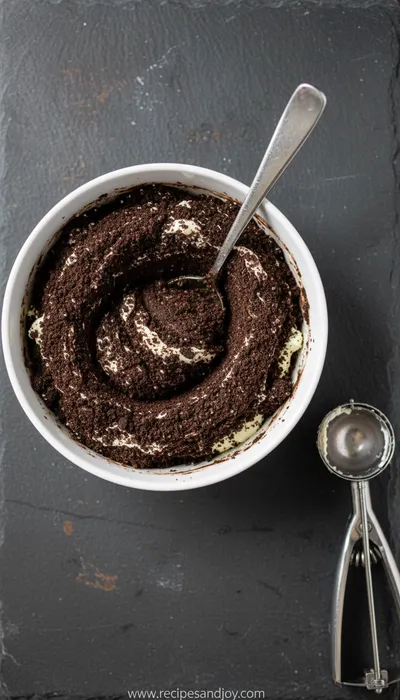
Place the whole Oreo cookies (filling and all) into a food processor. Pulse until they become fine, even crumbs. If you don't have a processor, put them in a sturdy plastic bag and crush them with a rolling pin until finely ground. Transfer the crumbs to a large mixing bowl.
Add the softened cream cheese and vanilla extract to the cookie crumbs. Use a hand mixer on medium speed (or a sturdy spoon) to mix until everything is completely combined and a thick, uniform dough forms. It will be quite sticky.
Line a baking sheet with parchment paper. Using a small cookie scoop or a tablespoon, portion the dough and roll it between your hands to form 1-inch balls. Place each ball on the prepared baking sheet. Once all the dough is rolled, cover the tray with plastic wrap and refrigerate for at least 1 hour, or freeze for 30 minutes, until very firm.
When the balls are almost chilled, melt the chocolate wafers according to package directions, usually in 30-second intervals in the microwave, stirring well between each interval. If the chocolate seems too thick for easy dipping, stir in the coconut oil.
Using a fork or a dipping tool, dip each chilled ball into the melted chocolate, coating it completely. Let the excess chocolate drip off, then place it back on the parchment-lined tray. Immediately add sprinkles if using. They’re perfect for a summer side dish spread.
Allow the chocolate coating to set completely at room temperature, or for a quicker set, place the tray back in the refrigerator for about 15 minutes. Once set, transfer to an airtight container and store in the refrigerator until ready to serve. They’re a great make-ahead option, just like a peach salad you can prepare in advance.
Notes & Tips
-
1
For a neater dip, use a fork to lower the ball and tap off excess chocolate.
-
2
Store leftovers in an airtight container in the fridge for up to a week.
-
3
These are perfect for gifting! Place them in a small decorative box or tin.
Tools You'll Need
-
Food processor or zip-top bag and rolling pin
-
Large mixing bowl
-
Hand mixer or sturdy spoon
-
Baking sheet
-
Parchment paper
-
Small cookie scoop (optional but helpful)
-
Microwave-safe bowl
-
Fork or dipping tool
Must-Know Tips
-
Room temperature cream cheese is crucial for a smooth, lump-free mixture.
-
Chill the balls thoroughly so they hold their shape when dipped.
-
Melt chocolate slowly and stir often to prevent it from burning or seizing.
Professional Secrets
-
A small cookie scoop ensures uniform size for even setting and a professional look.
-
A tiny bit of coconut oil in the chocolate makes it smoother and easier to work with.
-
Letting the excess chocolate drip off completely prevents a puddle from forming around the base.

Recipe by
Lily AndersonLife is sweeter with dessert 🍰💕 Baking joy, spreading smiles, and loving every sprinkle ✨
Get Delicious Recipes Weekly
Join 25,000+ home cooks getting our best recipes straight to their inbox.
Free forever • No spam • Unsubscribe anytime