
Seasonal cookies have been a part of holiday traditions for centuries, with heart-shaped variations appearing in European bakeries as early as the 1500s. Originally sweetened with honey and spices, these treats were often exchanged as tokens of affection during festive gatherings. The practice of decorating cookies with seasonal motifs evolved over time, becoming a cherished way to celebrate changing seasons and special occasions with homemade warmth and creativity.
Why You'll Love It
-
The dough comes together in one bowl with simple ingredients
-
Perfect for cookie exchanges and holiday gifting
-
Freezes beautifully for make-ahead convenience
-
Subtle spice blend that's comforting without being overwhelming
"These cookies melted in my mouth! The perfect balance of sweetness and spice - my family begged me to make another batch immediately."
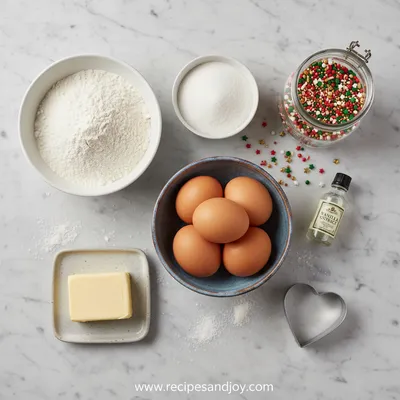
Essential Ingredient Guide
- Butter: Use high-quality unsalted butter at room temperature - it should be soft but still hold its shape when pressed. This creates that melt-in-your-mouth texture we all love in cookies.
- Seasonal spices: A blend of cinnamon, nutmeg, and a pinch of cardamom gives these cookies their warm, seasonal character. Freshly ground spices make all the difference in flavor intensity.
- Vanilla extract: Pure vanilla extract adds depth and warmth. I sometimes add a tiny bit of almond extract too, which gives a lovely subtle complexity to the flavor profile.
- Flour: All-purpose flour works best for these cookies. Measure by spooning into the cup and leveling off - too much flour can make the cookies tough rather than tender.
- Brown sugar: The molasses in brown sugar adds moisture and a caramel-like flavor that pairs perfectly with the spices. Light brown sugar gives a milder flavor than dark brown.
- Egg: One large egg binds the dough together and adds richness. Make sure it's at room temperature to blend smoothly with the butter and sugar.

Complete Cooking Process
-
Ingredient Readiness:
Having all ingredients at room temperature is crucial here. Cold butter won't cream properly with the sugar, and a cold egg can cause the butter to seize up. I usually take everything out about an hour before I start baking.
-
Flavor Development:
The magic happens when you cream the butter and sugars together until light and fluffy. This step incorporates air and creates the base for that tender cookie texture. The spices bloom beautifully when mixed into the creamed butter.
-
Texture Control:
Chilling the dough is non-negotiable. It allows the flour to hydrate properly and prevents the cookies from spreading too much in the oven. The dough should be firm enough to roll out without sticking desperately to the rolling pin.
-
Finishing Touches:
A light egg wash brushed over the cookies before baking gives them a beautiful golden shine. You can sprinkle with sparkling sugar or leave them plain - both ways are lovely.
-
Serving Timing:
These cookies are best enjoyed the day they're baked, but honestly, they keep wonderfully in an airtight container for up to a week. The flavors actually deepen a bit after a day or two.
-
Chill the dough between rolling and cutting for cleaner edges
-
Dip cookie cutter in flour between cuts to prevent sticking
-
Rotate baking sheet halfway through for even browning
-
Let cookies cool on sheet for 5 minutes before transferring
Pro Tips
You know, I've found that the secret to perfect cut-out cookies is patience. Rushing the chilling process or rolling the dough too thin can lead to frustration. The dough should feel like firm clay when you work with it.
Another thing - don't be afraid to re-roll the scraps. Just gather them gently, press together without overworking, and chill again before rolling. The second batch might be slightly less tender, but they're still delicious. I always bake those last and save them for my own snacking, honestly.
The essence of the dish:
What makes these seasonal cookies special is how they capture the feeling of celebration in every bite. The heart shape isn't just for Valentine's Day - it's a symbol of love and care that makes any occasion feel more meaningful. I remember baking these with my daughter when she was small, her little hands carefully arranging the cookies on the baking sheet.
A fun fact or historical angle:
Did you know that heart-shaped cookies became popular during the Renaissance when sugar became more widely available? Bakers would create intricate designs for wealthy patrons, and the tradition trickled down to home kitchens over time. It's comforting to think we're part of a baking tradition that spans centuries.
Flavor or sensory focus:
When you bite into one of these cookies, you'll notice the crisp edge giving way to a soft, almost cake-like center. The warmth of cinnamon and nutmeg comes through first, followed by the rich buttery flavor. They're not too sweet - just enough to satisfy that cookie craving without overwhelming the palate.
You Must Know
-
Room temperature ingredients are non-negotiable for proper creaming
-
Chill dough thoroughly before rolling - at least 1 hour
-
Roll dough on floured surface to 1/4-inch thickness
-
Bake until edges are just golden - they continue cooking on sheet
Frequently Asked Questions
→ Can I make these cookies ahead of time?
Absolutely! The dough can be wrapped tightly and refrigerated for up to 3 days or frozen for 3 months. You can also freeze the baked cookies in an airtight container for up to 2 months. Thaw at room temperature when ready to serve.
→ My cookies spread too much - what went wrong?
This usually happens if the dough wasn't chilled enough or if the butter was too soft. Make sure your dough is firm before baking, and if your kitchen is warm, chill the cut cookies on the baking sheet for 10 minutes before they go in the oven.
→ Can I use this dough for other shapes?
Definitely! This is a versatile dough that works beautifully with any cookie cutter shape. Just adjust baking time slightly if making larger or smaller cookies. For intricate designs, make sure the dough is well-chilled for clean cuts.
→ How do I prevent the cookies from browning too much?
Use light-colored baking sheets rather than dark ones, and consider rotating the sheets halfway through baking. If your oven runs hot, reduce the temperature by 25°F and bake a minute or two longer.
→ Can I make these vegan?
Yes! Use plant-based butter and a flax egg (1 tbsp ground flax + 3 tbsp water). The texture will be slightly different but still delicious. You might enjoy our vegan recipes for other plant-based ideas.
→ What's the best way to decorate these cookies?
Simple is often best - a sprinkle of sparkling sugar before baking adds sparkle. For icing, wait until cookies are completely cool. A basic powder sugar glaze drizzled over looks beautiful and doesn't overwhelm the delicate spice flavor.
Nutrition Facts
per serving
120
Calories
1g
Protein
17g
Carbs
5g
Fat
Taste Profile
Warm, buttery with subtle spice notes that are comforting rather than overwhelming
Ingredient Substitutions
Don't have an ingredient? Try these alternatives
Use a high-quality vegan butter that has a similar fat content to dairy butter for best results
Mix 1 tablespoon ground flaxseed with 3 tablespoons water, let sit for 5 minutes until gelatinous
Will add a deeper caramel flavor and the cookies may be slightly darker in color
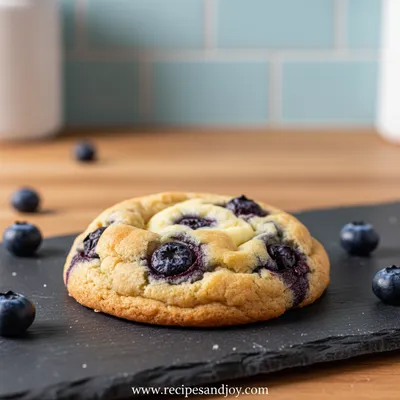
Recipe Variations
Try these delicious twists on the original
Lemon Zest Version
Add 2 teaspoons of lemon zest to the dough for a bright, citrusy twist that pairs beautifully with the spices
Chocolate Dipped
Melt semi-sweet chocolate and dip half of each cooled cookie for an elegant presentation and rich flavor contrast
Common Mistakes to Avoid
Learn from others' mistakes for perfect results
- Using cold butter that doesn't cream properly with sugar
- Skipping the chilling step which causes cookies to spread too much
- Overmixing the dough after adding flour resulting in tough cookies
- Rolling dough too thin causing fragile cookies that break easily
Meal Prep & Storage
Make Ahead Tips
You can make the dough up to 3 days in advance and keep it refrigerated, or freeze it for up to 3 months. Baked cookies freeze beautifully for up to 2 months. Thaw at room temperature when ready to serve.
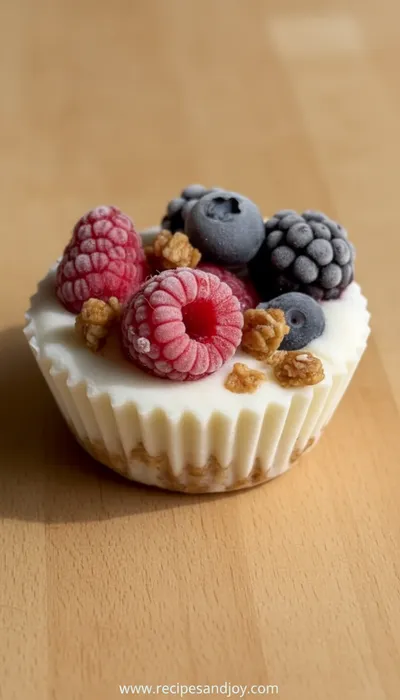
Leftover Ideas
Store leftover cookies in an airtight container. They're wonderful crumbled over yogurt or ice cream, or you can gently warm them in a 300°F oven for 3-4 minutes to restore their fresh-baked texture.
Perfect Pairings
Serve this with...
Cooking Timeline
Gather and measure all ingredients, bring butter and eggs to room temperature if not already
Whisk dry ingredients, cream butter and sugar, mix in wet ingredients
Form dough into discs, wrap and refrigerate for at least 1 hour
Roll out first disc of dough, cut out cookies, place on baking sheets
Brush with egg wash, sprinkle with sugar, bake first batch
Continue with remaining dough, cool cookies completely before storing
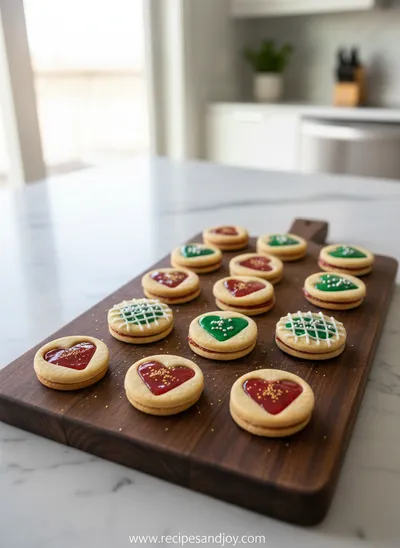
Seasonal Cookies Recipe
Bake up a batch of these delicious heart-shaped seasonal cookies for a festive homemade treat. Soft, buttery cookies with subtle spice notes that capture the essence of the changing seasons.
Timing
Prep Time
30 Minutes
Cook Time
10 Minutes
Total Time
1 Hour 40 Minutes
Recipe Details
Ingredients
Cookie Dough
-
01
2 1/4 cups all-purpose flour
-
02
1/2 teaspoon baking powder
-
03
1/4 teaspoon salt
-
04
3/4 cup unsalted butter, room temperature
-
05
3/4 cup light brown sugar, packed
-
06
1 large egg, room temperature
-
07
2 teaspoons pure vanilla extract
-
08
1 teaspoon ground cinnamon
-
09
1/4 teaspoon ground nutmeg
-
10
Pinch of ground cardamom (optional)
For Finishing
-
01
1 egg beaten with 1 tablespoon water (for egg wash)
-
02
2 tablespoons sparkling sugar or granulated sugar for sprinkling
Instructions
In a medium bowl, whisk together the flour, baking powder, salt, cinnamon, nutmeg, and cardamom if using. Set aside. In a large bowl, cream the softened butter and brown sugar together until light and fluffy, about 3-4 minutes with an electric mixer. Beat in the egg and vanilla until well combined.
Gradually add the flour mixture to the butter mixture, mixing on low speed until just combined. The dough will be soft. Divide the dough in half, shape into discs, wrap in plastic wrap, and refrigerate for at least 1 hour or until firm.
Preheat oven to 350°F (175°C). Line baking sheets with parchment paper. On a lightly floured surface, roll one disc of dough to 1/4-inch thickness. Using a 3-inch heart-shaped cookie cutter, cut out cookies and place them 1 inch apart on prepared baking sheets.
Brush the tops of the cookies lightly with the egg wash and sprinkle with sparkling sugar. Bake for 8-10 minutes or until the edges are just beginning to turn golden. The centers should still look soft. Let cookies cool on the baking sheet for 5 minutes before transferring to a wire rack to cool completely.
Gather the dough scraps, re-roll, and continue cutting out cookies until all dough is used. Repeat with the second disc of dough. Store cooled cookies in an airtight container at room temperature for up to 1 week.
Notes & Tips
-
1
For even more flavor, you can add 1/2 teaspoon of orange zest to the dough
-
2
If the dough becomes too soft while working with it, chill for 15 minutes before continuing
-
3
These cookies freeze beautifully for up to 3 months - layer between parchment paper in an airtight container
-
4
For a softer cookie, bake for the minimum time; for crisper cookies, bake a minute or two longer
Tools You'll Need
-
Large mixing bowls
-
Electric mixer
-
Measuring cups and spoons
-
Rolling pin
-
Heart-shaped cookie cutter (3-inch)
-
Parchment paper
-
Baking sheets
-
Wire cooling racks
-
Pastry brush
Must-Know Tips
-
Don't overmix the dough after adding flour - mix until just combined to avoid tough cookies
-
Let butter come to room temperature naturally - don't microwave it
-
Chill dough thoroughly before rolling - this prevents spreading and makes cutting easier
-
Rotate baking sheets halfway through baking for even browning
Professional Secrets
-
Room temperature ingredients, Ensures proper creaming and even texture
-
Chill between rolling sessions, Prevents dough from becoming too soft to work with
-
Use flour-dipped cutter, Creates clean cuts without sticking
-
Cool on baking sheet briefly, Allows cookies to set before moving

Recipe by
Lily AndersonLife is sweeter with dessert 🍰💕 Baking joy, spreading smiles, and loving every sprinkle ✨
Get Delicious Recipes Weekly
Join 25,000+ home cooks getting our best recipes straight to their inbox.
Free forever • No spam • Unsubscribe anytime