
The concept of microwave mug cakes became popular in the early 2000s as busy lifestyles demanded quicker dessert solutions. This protein-packed version builds on that convenience but adds nutritional value, turning a simple indulgence into a more balanced treat. The combination of cocoa and protein powder creates a rich, satisfying texture that feels indulgent while providing lasting energy.
Why You'll Love It
-
- Ready in just two minutes from craving to eating
-
- Packed with protein to keep you satisfied
-
- Naturally gluten-free and easily adaptable
-
- Single-serving size means no leftovers tempting you
"I make this almost every night now! It's my guilt-free way to end the day with something sweet."
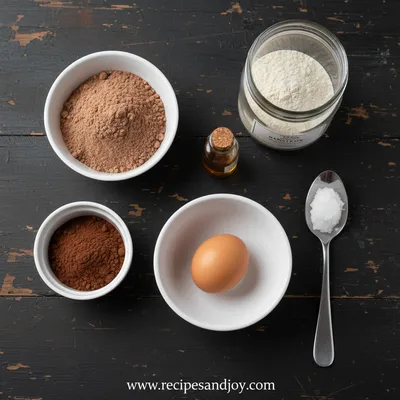
Essential Ingredient Guide
- Chocolate protein powder: This is the star that gives the brownie its structure and protein boost. Look for a good-quality one you enjoy the taste of, as it really comes through.
- Cocoa powder: Use natural, unsweetened cocoa for that deep chocolate flavor. It makes the brownie taste rich and authentic, not just sweet.
- Egg: Just one egg binds everything together and gives it that classic brownie texture. It makes the center stay wonderfully fudgy.
- Maple syrup: A touch of natural sweetness that blends beautifully with the chocolate. You could use honey too, but maple has this warmth I really love.
- Baking powder: Just a pinch makes the brownie rise slightly and become cake-like instead of dense. It's the difference between a brick and a treat.

Complete Cooking Process
-
Ingredient Readiness:
Having everything measured and ready is key since this comes together so fast. The egg should be at room temperature if possible, so it blends in smoothly without overmixing.
-
Flavor Development:
The chocolate flavor deepens as it cooks. The microwave does this funny thing where it kind of steams the cocoa, making it taste richer than you'd expect from such a quick method.
-
Texture Control:
Don't overcook it - that's the biggest secret. The top should look set but the center might still look a tiny bit wet. It continues cooking as it rests, becoming perfectly fudgy.
-
Finishing Touches:
Let it sit for a minute after microwaving. This is when I sometimes sprinkle a few chocolate chips on top so they melt slightly into a shiny glaze. It feels fancy without any extra work.
-
Serving Timing:
Eat it warm, right from the mug. The heat makes the chocolate aroma fill the air, and that first spoonful when it's still a bit steamy... wow, it's pure comfort.
-
Use a microwave-safe mug that's wider than it is tall for even cooking
-
Mix gently - overbeating can make the brownie tough
-
Start with less time and add more if needed - microwaves vary
-
Let it rest for 1-2 minutes after cooking for the perfect texture
Pro Tips
I remember the first time I made this, I was so skeptical that something from the microwave could taste good. But honestly, when that warm chocolate smell filled my kitchen, I knew I had something special. It's become my go-to for those nights when I want dessert but don't want to deal with cleaning a bunch of bowls. You know how sometimes you just need a little something sweet to round out your day? This is perfect for that. And the best part is, since it's single-serving, there's no temptation to eat half a pan of brownies later. Not that I've ever done that with a certain chocolate marble zucchini bread or anything... Okay, maybe I have. But this brownie solves that problem beautifully.
The essence of the dish:
This is about immediate gratification meeting good nutrition. It’s that moment when you think 'I deserve something special' but don't want to undo your healthy eating. The brownie satisfies both the craving and the conscience.
A fun fact or historical angle:
Microwave mug cakes became internet sensations during the pandemic when people were baking more at home but wanted quick, small-batch recipes. This protein version is part of that evolution toward healthier convenience foods.
Flavor or sensory focus:
The rich chocolate aroma that fills the room as it cooks is half the pleasure. Then there's the contrast between the slightly crisp top and the fudgy, warm center that melts on your tongue.
You Must Know
-
Exact microwave times vary - watch it carefully the first time
-
The brownie will continue cooking after you remove it from microwave
-
Use a mug with straight sides for best rising
-
Don't skip the resting time - it's crucial for texture
Frequently Asked Questions
→ Can I make this without protein powder?
You could try using almond flour instead, but the texture will be different - more cake-like and less fudgy. The protein powder really gives it that dense brownie quality.
→ My brownie came out rubbery - what happened?
Probably overmixed or overcooked. Mix just until combined and start with less time. Microwaves vary a lot in power.
→ Can I double this recipe?
Yes, but use a larger microwave-safe bowl and increase cooking time by about 50%. You might need to experiment to get it perfect.
→ What's the best protein powder to use?
I like a whey-casein blend for the best texture, but plant-based powders work too. Just make sure you like the flavor since it dominates.
→ Can I bake this in the oven instead?
Sure, at 350°F in a small oven-safe dish for 12-15 minutes. But honestly, the microwave magic is part of what makes this special.
→ How do I store leftovers?
It's really best fresh, but if you must, cover and refrigerate. Reheat for 15-20 seconds before eating.
Nutrition Facts
per serving
215
Calories
22g
Protein
15g
Carbs
8g
Fat
Taste Profile
Rich chocolate flavor with balanced sweetness
Ingredient Substitutions
Don't have an ingredient? Try these alternatives
Adjust to taste - honey is slightly sweeter than maple syrup
Use 1 extra tablespoon cocoa powder if using vanilla protein
Mix and let sit for 5 minutes to thicken before using
Recipe Variations
Try these delicious twists on the original
Nutty Brownie
Add a tablespoon of chopped walnuts or pecans for crunch and healthy fats.
Mint Chocolate
Add 1/4 teaspoon peppermint extract for a refreshing twist that pairs beautifully with chocolate.
Peanut Butter Swirl
Drop a teaspoon of peanut butter on top before microwaving and swirl gently with a knife.
Common Mistakes to Avoid
Learn from others' mistakes for perfect results
- Overmixing the batter making it tough
- Overcooking resulting in dry brownie
- Using a mug that's too small or narrow
- Not letting it rest after microwaving
Meal Prep & Storage
Make Ahead Tips
You can mix the dry ingredients in the mug ahead of time and store covered. Just add wet ingredients when ready to cook.
Leftover Ideas
This is really best fresh, but if you have leftovers, reheat for 15-20 seconds in the microwave.
Perfect Pairings
Serve this with...
Cooking Timeline
Measure and mix dry ingredients in mug
Add wet ingredients, mix gently
Microwave and let rest
Enjoy warm
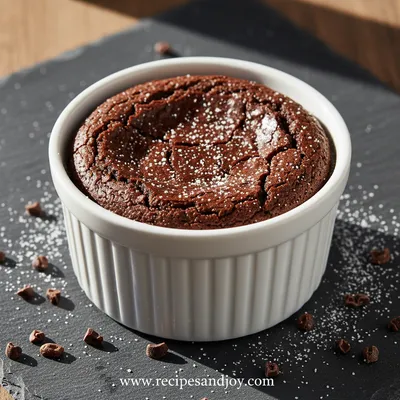
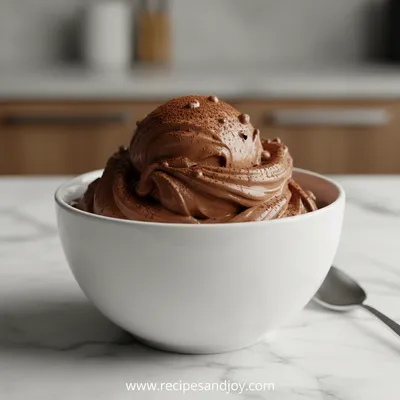
Two Minute Protein Brownie Recipe
When that chocolate craving hits hard but you want something wholesome, this two-minute protein brownie is your best friend. Honestly, it’s so simple and fast, you’ll wonder why you ever bothered with complicated desserts.
Timing
Prep Time
2 Minutes
Cook Time
2 Minutes
Total Time
4 Minutes
Recipe Details
Ingredients
Brownie Base
-
01
3 tablespoons chocolate protein powder
-
02
1 tablespoon cocoa powder
-
03
1 tablespoon maple syrup
-
04
1 large egg
-
05
1/4 teaspoon baking powder
-
06
Pinch of salt
Optional Add-ins
-
01
1 tablespoon chocolate chips
-
02
1 teaspoon coconut oil (for extra richness)
-
03
1/4 teaspoon vanilla extract
Instructions
In a microwave-safe mug, whisk together the protein powder, cocoa powder, baking powder, and salt until well combined and any lumps are gone.
Add the egg, maple syrup, and any optional add-ins like vanilla. Mix gently with a fork until just combined - don't overmix or the brownie can become tough.
Microwave on high for 1 minute 30 seconds to 2 minutes. Start checking at 1:30 - the top should look set but the center might still look a bit wet.
Let it rest in the mug for 1-2 minutes. It will continue cooking and firm up perfectly during this time.
Enjoy warm right from the mug with a spoon. Sometimes I like to add a dollop of Greek yogurt on top for contrast.
Notes & Tips
-
1
For a cake-like texture, cook a bit longer. For fudgy, stick to the minimum time.
-
2
If using a plant-based protein powder, you might need a tablespoon of milk or water for moisture.
-
3
The mug will be hot! Use an oven mitt to remove it from the microwave.
Tools You'll Need
-
Microwave-safe mug
-
Fork or small whisk
-
Measuring spoons
Must-Know Tips
-
Don't overcook - better slightly underdone than over
-
Mix gently - overbeating makes it tough
-
Let it rest after microwaking - patience pays off
Professional Secrets
-
Room temperature egg blends better
-
Sift dry ingredients for no lumps
-
Use a wide mug for even cooking

Recipe by
Lily AndersonLife is sweeter with dessert 🍰💕 Baking joy, spreading smiles, and loving every sprinkle ✨
Get Delicious Recipes Weekly
Join 25,000+ home cooks getting our best recipes straight to their inbox.
Free forever • No spam • Unsubscribe anytime