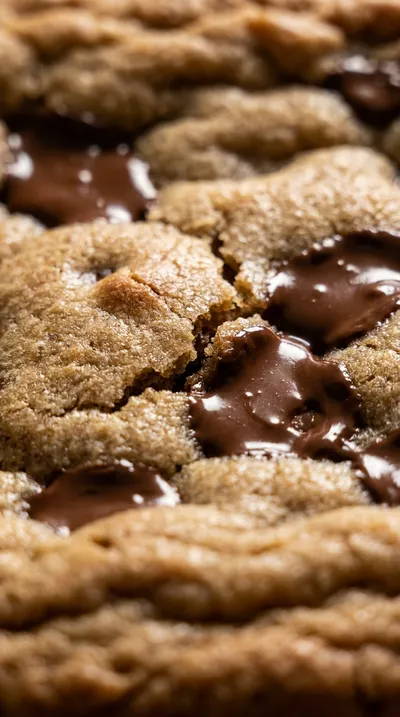
The chocolate chip cookie is a quintessential piece of Americana, born from a happy accident in the 1930s at the Toll House Inn. While traditional cookies are scooped into rounds, the evolution into chewy chocolate chip cookie bars reflects a shift toward home-baking convenience and communal sharing. This format allows the edges to caramelize beautifully while the center remains dense and fudgy.
Culturally, these bars bridge the gap between a rustic cookie and a decadent brownie. By utilizing a blend of 3/4 cup granulated sugar and 3/4 cup packed light brown sugar, the baker achieves a complex depth of flavor and a moisture level that individual cookies often lose to the dry heat of the oven.
In many households, the pan-baked method became a staple for potlucks and school bake sales. The ability to slice a single batch into sixteen to twenty uniform squares made it the ideal choice for feeding a crowd while maintaining that sought-after, chewy consistency that defines the classic American treat.
Why You'll Love It
-
- Honestly, it's just so much easier than scooping out individual cookies, and you get that same gooey, comforting warmth in every single bite.
-
- I love how these turn out incredibly soft and chewy; it reminds me of the treats I used to make when the kids were small and always asking for a snack.
-
- The way the 2 cups semi-sweet chocolate chips melt into the dough creates these little pockets of joy that just make the whole house smell like a dream.
-
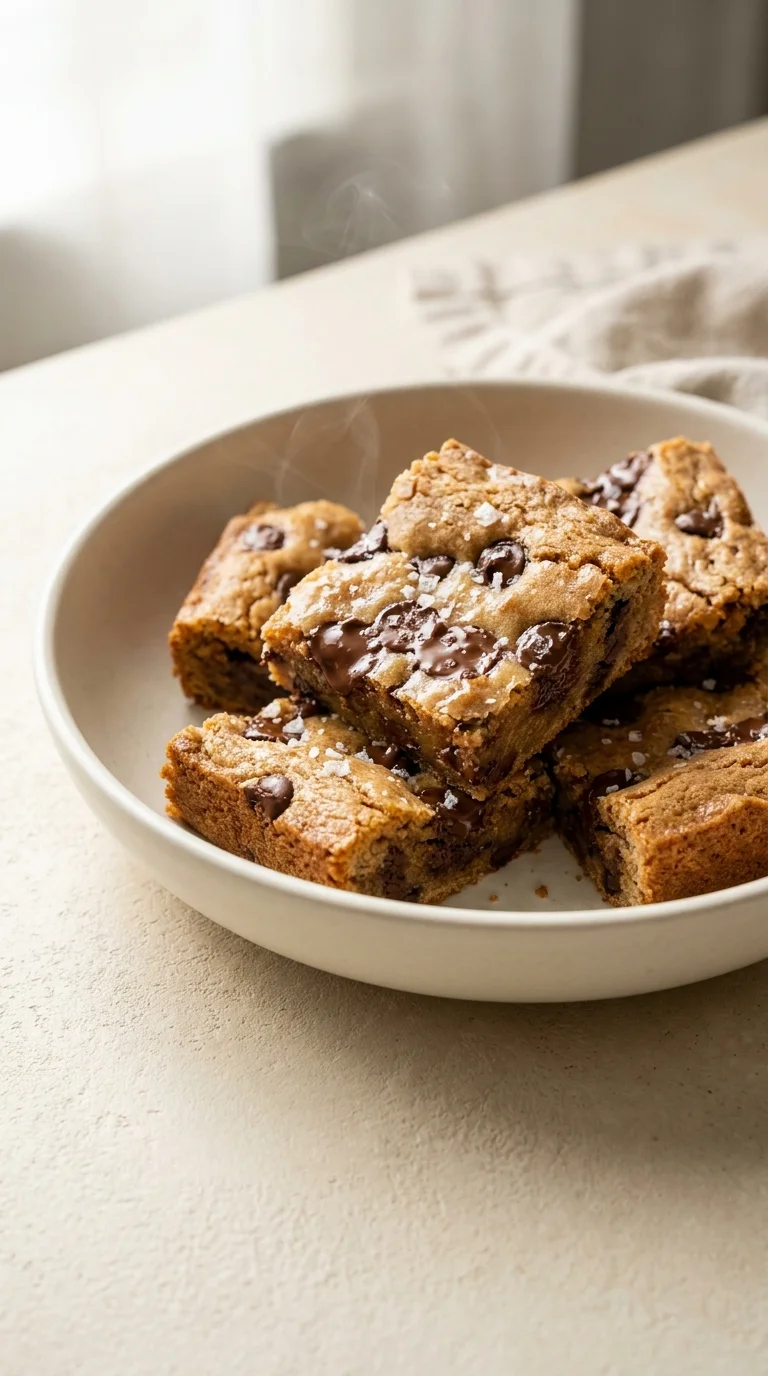
- Well, look, that little sprinkle of flaky sea salt on top just cuts through the sweetness perfectly, giving it a sophisticated little touch.
"Honestly, these are way better than individual cookies. So soft, so chocolatey, and just plain easy!"
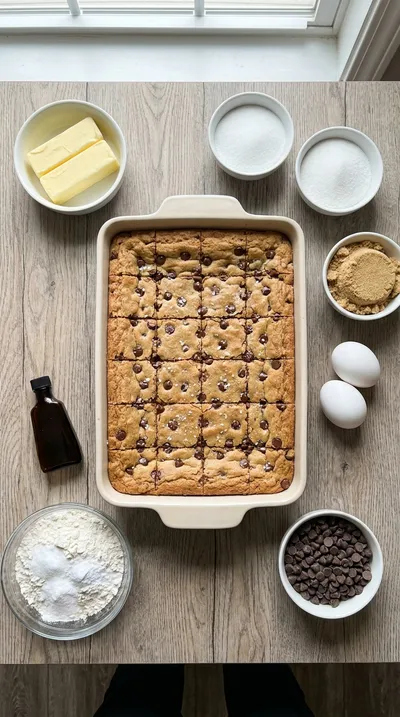
Essential Ingredient Guide
- 1 cup (2 sticks) unsalted butter, softened: This is where the magic starts. Make sure it's pliable but not melted, or your bars might spread too much—yeah, I've learned that the hard way!
- 2 cups semi-sweet chocolate chips: I always use a generous amount so every square is packed. They add that rich, velvety sweetness that makes these bars feel like a real indulgence.
- Optional: flaky sea salt, for sprinkling: It's just a tiny bit, but wow, it really wakes up the flavor. It adds a lovely crunch and a hint of saltiness that balances the sugars.
- 1 teaspoon salt: Don't skip this part. It's tucked into the dry ingredients to make sure the chocolate tastes even richer and more vibrant.
- 1 teaspoon pure vanilla extract: A little splash of this adds a warm, aromatic depth. It's that classic home-baked scent that just feels like a hug in a kitchen.
- 3/4 cup granulated sugar and 3/4 cup packed light brown sugar: Using both is the secret here. The brown sugar brings that deep, molasses-like chewiness while the granulated sugar keeps things just right.

Complete Cooking Process
-
Ingredient Readiness:
Start by getting your 1 cup (2 sticks) unsalted butter, softened just right. I usually set mine out early so it's easy to cream with the sugars without any cold lumps.
-
Flavor Development:
The real flavor builds when you cream the sugars and butter for a few minutes until fluffy. Then, stirring in the pure vanilla extract adds that lovely, nostalgic fragrance.
-
Texture Control:
Be so careful not to overmix once you add the 2 1/4 cups all-purpose flour. If you overwork it, the bars get tough, and we want them soft and chewy, right?
-
Finishing Touches:
Once they're out of the oven, a gentle sprinkle of flaky sea salt makes them look professional. It's a small detail, but it really completes the experience.
-
Serving Timing:
Now, this is the hard part: let them cool completely in the pan. If you cut them too soon, they might fall apart, and we want those perfect, clean squares.
-
Line your pan with parchment paper and leave an overhang so you can lift the bars out effortlessly.
-
Avoid overbaking! Look for golden edges and a center that still has a few moist crumbs on a toothpick.
-
Cream the butter and sugars for a full 2-3 minutes to ensure that signature chewy texture.
-
Make sure your butter is truly softened but not melted to keep the structure of the bars.
Pro Tips
Just trust your instincts and enjoy the process!
Better For You Treats
Ways to Make it Your Own
Serving Suggestions
Frequently Asked Questions
→ What if I accidentally melt my butter instead of softening it?
Oops, it happens! Your bars might end up a bit thinner and greasier, so next time, just let it sit at room temperature for a bit.
→ How do I know when they are actually done baking?
Look for golden brown edges. A toothpick should come out with a few moist crumbs—don't wait for it to be clean, or they'll be too dry!
→ Can I store these for later?
Yes, they keep just fine in an airtight container for 3 days, or you can pop them in the freezer for up to 2 months. Just thaw them out before you enjoy!
Nutrition Facts
per serving
320
Calories
4g
Protein
38g
Carbs
16g
Fat
Taste Profile
A rich, buttery sweetness balanced by deep notes of brown sugar and chocolate.
Ingredient Substitutions
Don't have an ingredient? Try these alternatives
Reduce the added salt by half if using salted butter.
Use a 1:1 blend with xanthan gum for similar results.
Adds a richer, slightly more bitter chocolate flavor.
Recipe Variations
Try these delicious twists on the original
Peanut Butter Swirl
For a little bit of a twist, swirl a few tablespoons of peanut butter into the batter right before it goes into the oven.
Salted Caramel Chocolate Chip
After baking, drizzle some salted caramel sauce over the top and add a bit more flaky sea salt for an irresistible treat.
Common Mistakes to Avoid
Learn from others' mistakes for perfect results
- Overmixing the batter, which leads to tough, bready bars instead of chewy ones.
- Using melted butter instead of softened butter, which changes the rise and texture.
- Overbaking the bars, which removes the moist center and makes them dry.
Meal Prep & Storage
Make Ahead Tips
You can definitely make these in advance and store them in an airtight container, or even freeze them for up to 2 months for a quick treat later.
Leftover Ideas
Keep them in an airtight container at room temperature for 3 days; they stay wonderfully chewy.
Perfect Pairings
Serve this with...
Cooking Timeline
Preheat oven and line the baking pan with parchment paper.
Cream together butter and sugars, then beat in eggs and vanilla.
Whisk dry ingredients and gradually mix into the wet batter, then stir in chips.
Spread dough in pan and bake for 25-30 minutes until edges are golden.
Cool completely on a wire rack before cutting into squares.
 Sweet Treats & Desserts
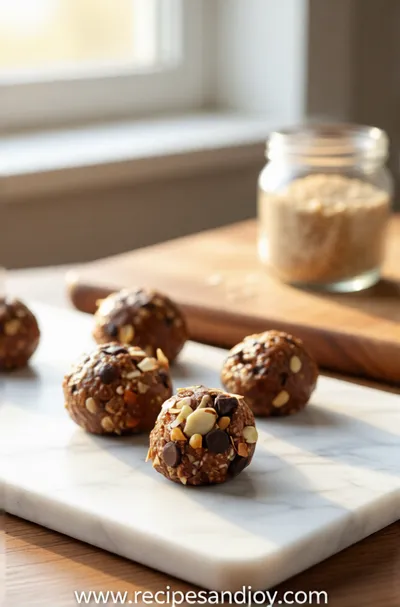
No-Bake Protein Energy Balls – Easy Healthy Snack
A simple, no‑bake bite of protein‑packed goodness you can carry anywhere.

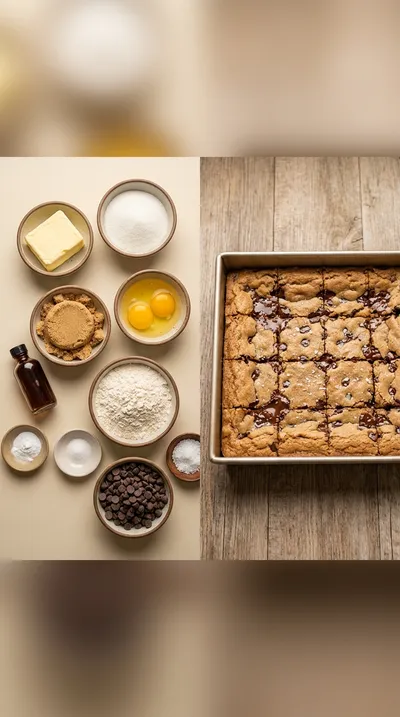
Chewy Chocolate Chip Cookie Bars
These chewy chocolate chip cookie bars wrap the classic taste of home into one easy pan. With a soft, buttery center and plenty of 2 cups semi-sweet chocolate chips, they are a cozy treat for any afternoon.
Timing
Prep Time
15 Minutes
Cook Time
25-30 Minutes
Total Time
40-45 Minutes
Recipe Details
Ingredients
Main Ingredients
-
01
1 cup (2 sticks) unsalted butter, softened
-
02
3/4 cup granulated sugar
-
03
3/4 cup packed light brown sugar
-
04
2 large eggs
-
05
1 teaspoon pure vanilla extract
-
06
2 1/4 cups all-purpose flour
-
07
1 teaspoon baking soda
-
08
1 teaspoon salt
-
09
2 cups semi-sweet chocolate chips
Optional Garnish
-
01
Optional: flaky sea salt, for sprinkling
Instructions
First things first, go ahead and preheat your oven to 350°F (175°C). I like to line my 9x13 inch baking pan with parchment paper, and honestly, make sure you leave a little overhang on the sides. It makes lifting the bars out so much easier, and you get those perfectly clean edges we all want.
In a large mixing bowl, cream together the softened butter, granulated sugar, and brown sugar. Just let them beat together until they're light and fluffy, which usually takes about 2-3 minutes with your mixer. Now, don't rush this part—it's really the secret to getting that wonderful chewy texture.
Now, gently beat in the eggs one at a time. Once those are in, just stir in the vanilla extract. It smells so good at this stage, doesn't it?
In a separate bowl, whisk together the flour, baking soda, and salt. I always do this separately just to make sure the leavening agent is evenly distributed throughout the flour.
Gradually add your dry ingredients into the wet mixture, mixing on low speed until they're just combined. Be careful here—don't overmix! If you do, well, the bars will end up a bit tougher than we want.
Stir in the semi-sweet chocolate chips until they're evenly distributed throughout the dough. I mean, you can never have too many chocolate chips, right?
Pour the dough into your prepared baking pan and spread it into an even layer. You can just use the back of a spoon or a spatula to smooth it all out.
Bake for 25-30 minutes. You're looking for the edges to be golden brown and the center to be set. If you poke a toothpick in the center and it comes out with a few moist crumbs, that's actually exactly what you want for that chewy finish.
Let the cookie bars cool completely in the pan on a wire rack. Once they're settled, use that parchment paper overhang to lift them right out.
Cut them into squares and you're done. If you're feeling fancy, sprinkle a bit of flaky sea salt on top for a little extra touch of flavor.
Notes & Tips
-
1
The combination of granulated and brown sugar is what gives these bars their complex, chewy soul.
-
2
Using parchment paper is a lifesaver for clean removal and easier cleanup.
-
3
A toothpick with a few moist crumbs is the signal that they are perfectly baked.
 Sweet Treats & Desserts
Healthier Hot Chocolate Recipe
Learn how to make a delicious healthier hot chocolate that's perfect for a cozy warm beverage.
Tools You'll Need
-
9x13 inch baking pan for the perfect bar shape
-
Parchment paper to prevent sticking
-
Two mixing bowls to keep wet and dry separate
-
Electric mixer (handheld or stand) for creaming butter
-
Measuring cups and spoons for precision
-
Rubber spatula for folding and spreading
Must-Know Tips
-
Butter Temperature, Ensure butter is truly softened but not melted so it creams properly with sugar.
-
Avoid Overbaking, Slightly underbaked bars stay much chewier than overbaked ones.
-
Don't Overmix, Mix dry ingredients only until combined to prevent tough bars.
Professional Secrets
-
The 2-3 minute creaming window is essential for the air incorporation that creates the texture.
-
The 'moist crumb' toothpick test is the only way to guarantee a chewy center.
-
Using both sugars creates a depth of flavor that a single sugar type can't achieve.

Recipe by
Lily AndersonLife is sweeter with dessert 🍰💕 Baking joy, spreading smiles, and loving every sprinkle ✨
Get Delicious Recipes Weekly
Join 25,000+ home cooks getting our best recipes straight to their inbox.
Free forever • No spam • Unsubscribe anytime