
The original ice cream cake was introduced by a popular American fast‑food chain in the early 1980s, quickly becoming a beloved dessert for celebrations. Its appeal lies in the harmonious combination of a dense chocolate cake base with a smooth vanilla soft‑serve topping, creating contrasting textures that delight the palate. This recipe captures that classic duo, offering a nostalgic treat that can be prepared at home without the need for specialized equipment.
Why You'll Love It
-
- No need for an ice cream machine, just your freezer
-
- Layers of chocolate cake and vanilla soft‑serve create perfect balance
-
- Simple ingredients you likely have on hand
-
- Great for birthdays, graduations, or any celebration
“This copycat cake tasted just like the one from the restaurant—so rich and creamy, everyone asked for seconds!”
Essential Ingredient Guide
- Vanilla ice cream base: Choose a high‑fat vanilla ice cream for a richer mouthfeel; it will stay softer longer.
- Chocolate cake mix: A dark, cocoa‑rich mix provides depth; sift it before folding to avoid lumps.
- Whipped cream topping: Lightly sweetened whipped cream adds a cloud‑like finish and balances the chocolate.
- Chocolate ganache: Use semi‑sweet chocolate for a glossy glaze that sets with a gentle snap.
- Fresh berries: Their bright acidity cuts through the richness, adding a burst of color.
- Sea salt sprinkle: A pinch enhances the chocolate flavor and adds a subtle crunch.

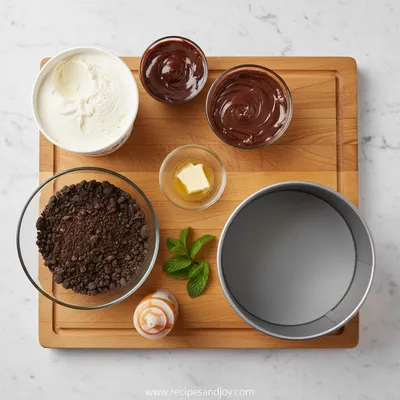
Complete Cooking Process
-
Ingredient Readiness:
Soak the cake mix, soften the butter, and let the ice cream sit a few minutes at room temperature for easy spreading.
-
Flavor Development:
Bake the chocolate layers until a fragrant aroma fills the kitchen, then let them cool fully.
-
Texture Control:
Layer the softened ice cream between the cooled cakes, ensuring each layer is even for a smooth bite.
-
Finishing Touches:
Spread the ganache, drizzle with melted chocolate, and garnish with berries and a sea‑salt pinch.
-
Serving Timing:
Freeze the assembled cake for at least two hours, then let it sit ten minutes before slicing for clean cuts.
-
Use a springform pan for easy removal.
-
Pat the cake layers with a damp towel to prevent crumbs in the ice cream.
-
Freeze the cake on a flat tray to keep it level.
-
Slice with a warm knife for smoother pieces.
Pro Tips
Well, you’ll notice that the cake holds together beautifully when you follow these steps. The contrast between the soft‑serve interior and the firm chocolate exterior makes each bite a little celebration. I mean, it’s the kind of dessert that invites you to linger, to savor the way the flavors marry over time.
The essence of the dish:
It’s the marriage of silky vanilla ice cream and rich chocolate cake, a duo that whispers of celebrations past while feeling fresh and home‑crafted.
A fun fact or historical angle:
The original ice cream cake debuted in 1982, quickly becoming a go‑to treat for birthday parties across the United States.
Flavor or sensory focus:
The cool, buttery vanilla juxtaposed with the deep, slightly bitter chocolate creates a balanced taste that lingers on the palate.
You Must Know
-
Prepare the cake layers completely before adding ice cream.
-
Keep the assembled cake chilled until serving.
-
Use a warm knife for clean slices.
Frequently Asked Questions
→ Can I use a different ice cream flavor?
Absolutely, try strawberry or coffee for a fun twist, just ensure it’s a full‑fat variety.
→ Do I need a springform pan?
A springform pan makes removal easier, but a regular cake pan works if you line it with parchment.
→ How long can the cake be stored?
Keep it wrapped tightly in the freezer for up to one week; let it soften before serving.
→ Can I make this ahead of time?
Yes, you can assemble and freeze the cake up to three days before you plan to serve.
→ What can I use instead of whipped cream topping?
A dollop of mascarpone mixed with a touch of honey works beautifully.
→ Is this recipe kid‑friendly?
Definitely—just watch for any nut allergies if you add optional toppings.
Nutrition Facts
per serving
420
Calories
6g
Protein
45g
Carbs
22g
Fat
Taste Profile
Rich, creamy, and decadently chocolatey
Ingredient Substitutions
Don't have an ingredient? Try these alternatives
Use the almond milk ice for a dairy‑free alternative, adjusting sugar to taste.
Chunks melt into richer pockets, giving a slightly bitter edge.
Recipe Variations
Try these delicious twists on the original
Spicy Version
Add a teaspoon of cayenne pepper to the chocolate ganache for a subtle heat.
Mediterranean Style
Swap chocolate ganache for a honey‑orange glaze and garnish with pistachios.
Red Velvet Twist
Replace the chocolate cake with red velvet layers for a festive hue.
Common Mistakes to Avoid
Learn from others' mistakes for perfect results
- Over‑mixing the batter, which can make the cake dense.
- Adding the ice cream before the cake layers are fully cooled.
- Using chocolate that is too sweet, which overwhelms the vanilla.
Meal Prep & Storage
Make Ahead Tips
You can bake the cake layers up to two days ahead and store them wrapped; assemble with ice cream when ready to freeze.
Leftover Ideas
Reheat gently in a skillet over low heat, allowing the ice cream to soften while the ganache melts for a silky sauce.
Perfect Pairings
Serve this with...
Cooking Timeline
Gather and measure all ingredients; preheat oven.
Mix dry and wet ingredients separately, then combine.
Pour batter into pans and bake until done.
Cool cakes, melt ganache, and soften ice cream.
Assemble layers, spread ice cream, pour ganache, garnish.
Transfer to freezer for at least two hours.
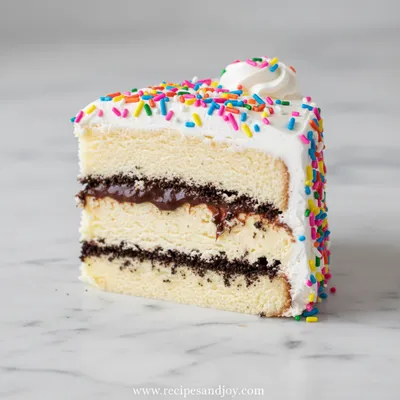
Copycat Dairy Queen Ice Cream Cake
A luscious copycat Dairy Queen ice cream cake that brings the classic swirl of soft‑serve and rich chocolate cake together, perfect for birthdays or any celebration.
Timing
Prep Time
20 Minutes
Cook Time
30 Minutes
Total Time
2 Hours 15 Minutes
Recipe Details
Ingredients
Cake Layers
-
01
2 cups all‑purpose flour
-
02
1 cup unsweetened cocoa powder
-
03
1 ½ cups sugar
-
04
1 tsp baking soda
-
05
½ tsp salt
-
06
1 cup milk
-
07
½ cup vegetable oil
-
08
2 large eggs
-
09
1 tsp vanilla extract
Ice Cream Filling
-
01
1 quart high‑fat vanilla ice cream (softened)
-
02
2 tbsp powdered sugar
Ganache & Topping
-
01
1 cup semi‑sweet chocolate chips
-
02
½ cup heavy cream
-
03
¼ cup fresh berries
-
04
A pinch of flaky sea salt
-
05
Whipped cream for serving
Instructions
Preheat the oven to 350°F (175°C). Grease two 9‑inch round pans and line the bottoms with parchment.
In a large bowl, whisk together flour, cocoa, sugar, baking soda, and salt. In another bowl, combine milk, oil, eggs, and vanilla; then pour into dry ingredients and mix until smooth.
Divide the batter evenly between the pans, bake for 22‑25 minutes until a toothpick comes out clean. Let the cakes cool completely on a wire rack.
While the cakes cool, melt chocolate chips with heavy cream over low heat, stirring until smooth; set aside to thicken slightly.
Soften the vanilla ice cream, fold in powdered sugar, and spread a generous layer over the first cake layer.
Place the second cake layer on top, then spread the remaining ice cream over the top and sides, smoothing with a spatula.
Pour the chocolate ganache over the top, letting it drip down the sides; sprinkle berries and a pinch of sea salt.
Freeze the assembled cake for at least two hours. Before serving, let it sit ten minutes, then dollop with whipped cream and enjoy.
Notes & Tips
-
1
Make sure the cake layers are completely cool before adding ice cream; otherwise the ice cream will melt.
-
2
For a richer ganache, use 70% dark chocolate.
-
3
If you prefer a fruitier twist, swap the berries for sliced kiwi.
Tools You'll Need
-
Two 9‑inch round cake pans
-
Mixing bowls
-
Electric mixer
-
Spatula
-
Parchment paper
-
Freezer-safe container
Must-Know Tips
-
Do not over‑mix the batter, it can make the cake dense.
-
Allow the ice cream to soften just enough to spread easily.
-
Keep the ganache warm enough to flow, but not too hot.
Professional Secrets
-
Room‑temperature butter creates a tender crumb.
-
A quick blast of high heat at the start gives the cake a nice rise.
-
Cooling the cake on a wire rack prevents soggy bottoms.

Recipe by
Lily AndersonLife is sweeter with dessert 🍰💕 Baking joy, spreading smiles, and loving every sprinkle ✨
Get Delicious Recipes Weekly
Join 25,000+ home cooks getting our best recipes straight to their inbox.
Free forever • No spam • Unsubscribe anytime