
The original Dairy Queen ice cream cake debuted in the 1970s as a quick, chilled treat for the summer crowds. Its popularity grew as families gathered around the counter to watch the cake being assembled, a ritual that fostered community and joy. Over time, home cooks have replicated the magic, creating a version that captures the same creamy texture and subtle vanilla sweetness without the need for a commercial freezer. This recipe honors that history while letting you craft the cake at your own pace.
Why You'll Love It
-
- No baking required, just a few simple steps
-
- Creamy vanilla ice cream and soft cake layers
-
- Easy to personalize with your favorite toppings
-
- Perfect for both kids and adults
"The cake tasted exactly like the real thing—silky, sweet, and perfectly nostalgic."
Essential Ingredient Guide
- Vanilla ice cream: A high‑quality vanilla ice cream provides richness; let it soften just enough to spread.
- Yellow cake mix: The mix offers a light crumb that pairs beautifully with the ice cream.
- Whipped cream for topping: Adds a light, airy finish and balances the coolness of the ice cream.
- Vanilla extract: Boosts the aromatic profile; a teaspoon is enough.
- Lemon juice: A splash brightens the flavor and prevents ice crystals.
- Sugar: Adjust sweetness if your ice cream is already very sweet.

Complete Cooking Process
-
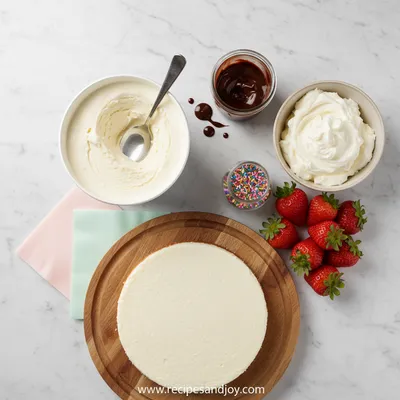
Ingredient Readiness:
Gather the cake mix, vanilla ice cream, and toppings. Soften the ice cream on the counter for about 20 minutes.
-
Flavor Development:
Mix a touch of vanilla extract and lemon juice into the softened ice cream to deepen the aroma.
-
Texture Control:
Fold in a bit of whipped cream to keep the ice cream smooth and prevent it from becoming grainy.
-
Finishing Touches:
Layer the baked cake with the ice cream, smooth the top, and pipe whipped cream.
-
Serving Timing:
Freeze the assembled cake for at least 2 hours before slicing to achieve clean cuts.
-
Use a springform pan for easy removal.
-
Press parchment paper into the pan for a clean edge.
-
Let the cake sit at room temperature 5 minutes before serving.
-
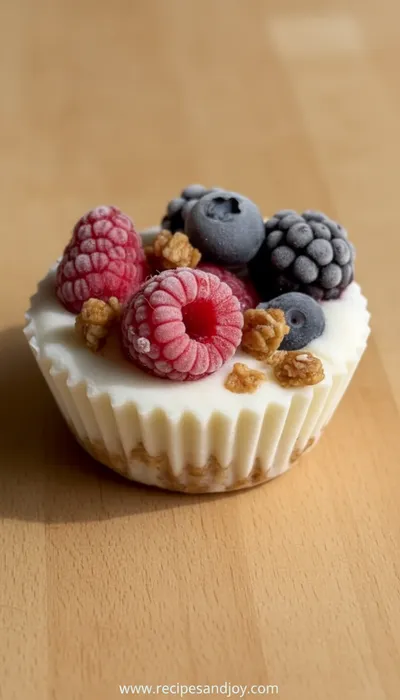
Add fresh berries for a pop of color and acidity.
Pro Tips
These little adjustments make the whole experience feel thoughtful, like you’re giving yourself a gentle hug. I remember the first time I tried this, I let the cake sit a bit longer than recommended—oops, it got a little too firm. So now I always set a timer. It’s a small pause, a moment to appreciate the anticipation before the first bite.
The essence of the dish:
It’s the combination of a soft vanilla cake and a silky ice‑cream core that creates a comforting contrast—cool and warm, smooth and crumbly.
A fun fact or historical angle:
The original Dairy Queen cake was inspired by the brand’s soft‑serve technology, which allowed for quick assembly on site.
Flavor or sensory focus:
You’ll notice the gentle vanilla fragrance, the faint citrus hint from lemon, and the creamy melt that coats your palate.
You Must Know
-
Keep ice cream partially softened, not melted.
-
Freeze the cake long enough for firm slices.
-
Use parchment for clean removal.
Frequently Asked Questions
→ Can I use dairy‑free ice cream?
Yes, substitute a coconut‑based vanilla ice cream and the texture will still be lovely.
→ How long can leftovers be stored?
Keep the cake covered in the freezer for up to a month; let it soften before serving.
→ Do I need to bake the cake from scratch?
No, a boxed yellow cake mix works perfectly and saves time.
→ What toppings work best?
Fresh berries, chocolate shavings, or a drizzle of caramel enhance the flavor.
→ Can I make a chocolate version?
Swap the vanilla ice cream for chocolate or use cocoa in the cake mix.
→ Is the cake safe for kids with nut allergies?
Make sure all ingredients are nut‑free; the recipe itself contains none.
Nutrition Facts
per serving
420
Calories
6g
Protein
45g
Carbs
22g
Fat
Taste Profile
Rich vanilla sweetness with a hint of citrus
Ingredient Substitutions
Don't have an ingredient? Try these alternatives
Provides a dairy‑free option; keep the same amount.
Use the same volume; adds a fresh homemade flavor.
Recipe Variations
Try these delicious twists on the original
Spicy Version
Add a pinch of cayenne and swirl in orange creamsicle ice cream for a subtle heat.
Mediterranean Style
Top with honey‑drizzled figs and a sprinkle of toasted pistachios for a nut‑free twist.
Common Mistakes to Avoid
Learn from others' mistakes for perfect results
- Letting the ice cream melt completely before spreading.
- Skipping the cooling time for the cake, causing it to break.
- Not covering the cake tightly, leading to freezer burn.
Meal Prep & Storage
Make Ahead Tips
You can bake the cake layer a day ahead and keep it wrapped; the ice‑cream filling can be prepared up to 24 hours in advance and refrigerated.
Leftover Ideas
Slice and let sit at room temperature for 5 minutes before serving, or re‑freeze for later enjoyment.
Perfect Pairings
Serve this with...
Cooking Timeline
Preheat oven and prep pan; gather dry cake mix.
Mix cake batter and pour into pan; bake.
Cool cake on rack while ice cream softens.
Combine ice cream, vanilla, lemon, and whipped cream.
Layer ice cream onto cake, smooth top, and freeze.
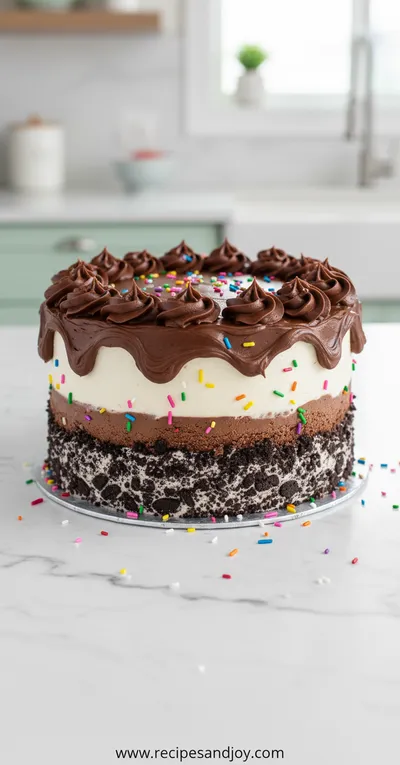
Dairy Queen Copycat Ice Cream Cake
A creamy, dreamy dairy queen copycat ice cream cake that feels like a celebration in a slice, perfect for birthdays or any sweet craving.
Timing
Prep Time
20 Minutes
Cook Time
30 Minutes
Total Time
50 Minutes
Recipe Details
Ingredients
Cake Layer
-
01
1 box yellow cake mix
-
02
1 cup water
-
03
1/3 cup vegetable oil
-
04
3 large eggs
Ice Cream Filling
-
01
1½ quarts vanilla ice cream, softened
-
02
2 tbsp vanilla extract
-
03
1 tbsp lemon juice
-
04
½ cup whipped cream
Topping
-
01
1 cup whipped cream
-
02
Fresh berries or chocolate shavings (optional)
Instructions
Preheat oven to 350°F (175°C). Grease a 9‑inch springform pan and line the bottom with parchment.
Combine cake mix, water, oil, and eggs; mix until smooth. Pour batter into pan and bake 25‑30 minutes until golden. Let cool completely.
While the cake cools, whisk vanilla extract, lemon juice, and softened ice cream together. Fold in whipped cream gently.
Place the cooled cake on a wire rack. Spread the ice‑cream mixture evenly over the top, smoothing with a spatula.
Cover and freeze the assembled cake for at least 2 hours.
Before serving, run a knife under warm water, slice, and top with whipped cream and desired berries.
Notes & Tips
-
1
Make sure the ice cream is not fully melted when mixing; it should be soft but still thick.
-
2
If the cake is slightly crumbly, press gently with the back of a spoon to smooth it out.
-
3
Feel free to add a swirl of mint chocolate chip ice cream for a refreshing twist.
Tools You'll Need
-
Springform pan
-
Mixing bowls
-
Electric mixer
-
Spatula
-
Parchment paper
-
Freezer-safe container
Must-Know Tips
-
Do not over‑mix the cake batter; it stays tender.
-
Let the ice cream soften just enough to spread—avoid a runny mess.
-
Freeze the cake long enough for clean slices.
Professional Secrets
-
Room‑temperature ice cream spreads evenly.
-
A brief chill of the cake before adding ice cream prevents melting.
-
Swirl a bit of melted chocolate for a glossy finish.

Recipe by
Lily AndersonLife is sweeter with dessert 🍰💕 Baking joy, spreading smiles, and loving every sprinkle ✨
Get Delicious Recipes Weekly
Join 25,000+ home cooks getting our best recipes straight to their inbox.
Free forever • No spam • Unsubscribe anytime