
Chocolate has traveled from ancient Mesoamerican beans to modern dessert tables, becoming a universal symbol of comfort. The frozen brownie cake draws on that legacy, marrying two beloved indulgences into one harmonious piece. Originating in American home kitchens, this dessert captures the ease of a family bake while delivering restaurant‑level elegance, all without a fancy pastry chef’s touch.
Why You'll Love It
-
- No oven needed after the brownie base is baked
-
- Layers can be customized with any favorite ice cream
-
- Chocolate glaze adds a glossy finish that looks professional
-
- Makes a stunning centerpiece for celebrations
"I tried this for a potluck and everyone asked for the recipe again – wow!"
Essential Ingredient Guide
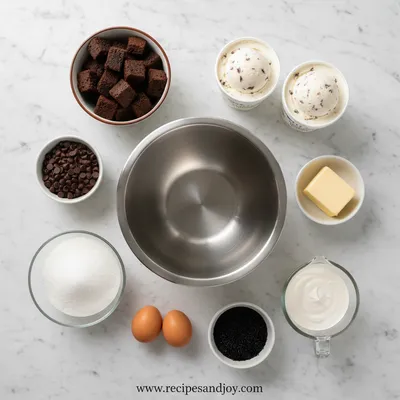
- Brownie mix: Choose a high‑cocoa mix for depth; sift to avoid lumps before melting
- Vanilla ice cream: Softened slightly so it spreads easily; look for a creamy, full‑fat version
- Chocolate ganache: Use bittersweet chocolate for balance; a dash of sea salt lifts flavor
- Heavy cream: Adds shine to the ganache; warm gently before mixing
- Lemon juice: A splash brightens the ganache and cuts sweetness
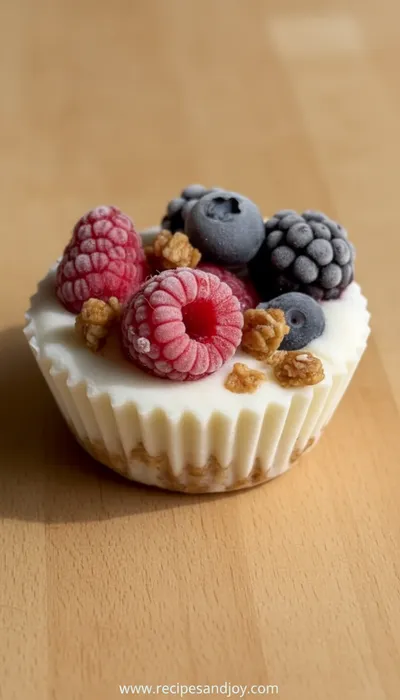
- Optional berries: Fresh raspberries or strawberries add a pop of color and tartness

Complete Cooking Process
-
Ingredient Readiness:
Measure and soften the ice cream, melt chocolate with cream, and bake the brownie base until just set.
-
Flavor Development:
Allow the brownie to cool, then press it into the springform pan; the ganache thickens as it cools, creating a glossy coat.
-
Texture Control:
Spread the softened ice cream evenly over the brownie, smoothing the surface before refreezing.
-
Finishing Touches:
Pour the chocolate ganache over the frozen ice cream layer, letting it cascade down the sides; sprinkle berries if desired.
-
Serving Timing:
Let the cake sit at room temperature for five minutes before slicing to avoid cracking.
-
Use a silicone springform pan for easy release
-
Freeze the brownie base for 15 minutes before adding ice cream
-
Create a ripple effect by swirling the ganache with a knife
-
Store any leftovers tightly wrapped to prevent freezer burn
Pro Tips
These little steps keep the cake looking polished and tasting perfect. I often find that letting the ganache set for a minute before the first slice makes the pieces look glossy and clean. It’s a tiny pause that feels like a breath of calm before the first bite.
The essence of the dish:
It’s the meeting of dense, fudgy brownie crumbs with the silkiness of frozen vanilla ice cream, all wrapped in a dark chocolate sheen. The contrast of cool and warm, soft and slightly crisp, creates a delightful mouthfeel that lingers.
A fun fact or historical angle:
Did you know the first frozen desserts were iced fruit purées from ancient China? Today we enjoy them in forms like this cake, proving that the love of chilled sweetness endures.
Flavor or sensory focus:
The first bite offers a creamy, cold rush that instantly softens the brownie, releasing deep cocoa notes. Then the chocolate ganache adds a bittersweet snap, while a hint of lemon brightens the finish.
You Must Know
-
Work quickly once the ice cream is soft
-
Keep the pan on a flat surface for even layers
-
Allow the ganache to set before slicing
Frequently Asked Questions
→ Can I use dairy‑free ice cream?
Yes, substitute with coconut or almond milk ice cream; the texture stays creamy, just adjust the ganache with a dairy‑free chocolate.
→ How long can I store the cake?
Wrap tightly and keep frozen up to two weeks; for best texture, thaw just before serving.
→ Do I need a springform pan?
A springform makes removal easy, but a regular cake pan works if you line it with parchment.
→ What if I don’t have a ganache?
Melt chocolate with a splash of milk or cream; it will still give a smooth sheen.
→ Can I add a layer of fruit?
Absolutely – thinly sliced strawberries or raspberries add a bright contrast.
→ Is this recipe kid‑friendly?
Yes, just supervise the melting chocolate and keep the sugar level moderate.
Nutrition Facts
per serving
420
Calories
6g
Protein
45g
Carbs
24g
Fat
Taste Profile
Rich chocolate with creamy sweetness
Ingredient Substitutions
Don't have an ingredient? Try these alternatives
Gives a faint coconut aroma; keep the amount the same.
Works well for a dairy‑free ganache, though the shine may be slightly less.
Recipe Variations
Try these delicious twists on the original
Spicy Version
Add a pinch of cayenne and a drizzle of mint chocolate chip ice cream for a subtle heat.
Mediterranean Style
Swap vanilla ice cream for pistachio, and fold in chopped dried figs and a sprinkle of sea salt.
Common Mistakes to Avoid
Learn from others' mistakes for perfect results
- Over‑mixing the brownie batter, which creates a cakey texture.
- Pouring hot ganache over frozen ice cream, which melts the layer.
- Skipping the chill step for the brownie base, leading to a soggy crust.
Meal Prep & Storage
Make Ahead Tips
You can bake the brownie base a day ahead and keep it wrapped; the ice cream layer can be assembled and frozen up to 24 hours before serving.
Leftover Ideas
Slice remaining cake and store in the freezer; let each piece sit at room temperature for 5 minutes before enjoying to soften slightly.
Perfect Pairings
Serve this with...
Cooking Timeline
Preheat oven, combine brownie mix, water, oil, and egg.
Bake brownie, let it cool, then chill in freezer.
Melt chocolate with cream, add butter, lemon, and salt.
Soften ice cream, fold in vanilla, spread over brownie, freeze.
Pour ganache, add garnish, freeze until firm.
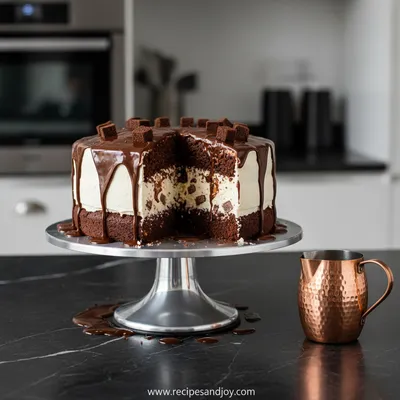
Frozen Brownie Ice Cream Cake
A cool, chocolaty celebration that layers fudgy brownies with creamy ice cream, perfect for a summer soirée or a cozy night in.
Timing
Prep Time
20 Minutes
Cook Time
15 Minutes
Total Time
35 Minutes
Recipe Details
Ingredients
Brownie Base
-
01
1 cup brownie mix
-
02
1/2 cup water
-
03
1/4 cup vegetable oil
-
04
1 large egg
Ice Cream Layer
-
01
2 pints vanilla ice cream, softened
-
02
1 tsp vanilla extract
Chocolate Ganache
-
01
8 oz bittersweet chocolate, chopped
-
02
1/2 cup heavy cream
-
03
1 tbsp unsalted butter
-
04
1 tsp lemon juice
-
05
Pinch sea salt
Optional Garnish
-
01
Fresh raspberries
-
02
Chocolate shavings
Instructions
Preheat oven to 350°F (175°C). Combine brownie mix, water, oil, and egg; stir until smooth.
Spread batter into a 9‑inch springform pan and bake 12‑15 minutes until set. Let cool completely, then chill in freezer for 15 minutes.
While the base chills, melt chocolate with heavy cream over a double boiler, stirring until silky. Add butter, lemon juice, and salt; set aside to thicken.
Soften the vanilla ice cream, fold in vanilla extract, then spoon it over the chilled brownie crust, smoothing the top. Freeze for at least 30 minutes.
Pour the ganache over the frozen ice cream layer, allowing it to drip down the sides. Sprinkle raspberries and chocolate shavings if desired. Freeze until firm, about 1 hour, before serving.
Notes & Tips
-
1
Work quickly when spreading ice cream; it can melt too fast on a warm countertop.
-
2
If the ganache is too thick, warm it gently for a few seconds before pouring.
-
3
For extra crunch, add a thin layer of crushed toasted nuts between the brownie and ice cream.
Tools You'll Need
-
9‑inch springform pan
-
Mixing bowls
-
Whisk
-
Spatula
-
Double boiler or microwave
-
Freezer‑safe spatula
Must-Know Tips
-
Don't over‑bake the brownie; it should be moist, not dry.
-
Let the ganache cool slightly before pouring to avoid melting the ice cream.
-
Use parchment paper at the bottom of the pan for easy removal.
Professional Secrets
-
Room temperature ice cream spreads evenly without tearing the brownie.
-
High‑quality dark chocolate provides depth and a glossy finish.
-
Chilling each layer ensures clean, defined slices.

Recipe by
Lily AndersonLife is sweeter with dessert 🍰💕 Baking joy, spreading smiles, and loving every sprinkle ✨
Get Delicious Recipes Weekly
Join 25,000+ home cooks getting our best recipes straight to their inbox.
Free forever • No spam • Unsubscribe anytime