
Energy balls, or bliss balls as some call them, have roots that stretch back to raw food movements and health-conscious communities seeking nutritious, portable snacks. Their simplicity is their genius – combining dates, nuts, and seeds creates a natural sweetness and energy boost without refined sugars. This no-bake approach preserves nutrients and delivers a dense, satisfying texture that has made them a staple in lunchboxes and pantries worldwide.
Why You'll Love It
-
- Honestly, they come together in minutes with no baking required
-
- You can customize them endlessly with whatever you have on hand
-
- They're perfect for little hands to help make and enjoy
-
- They store beautifully for quick grabs all week long
"My whole family is addicted to these! So much better than store-bought snacks."
Essential Ingredient Guide
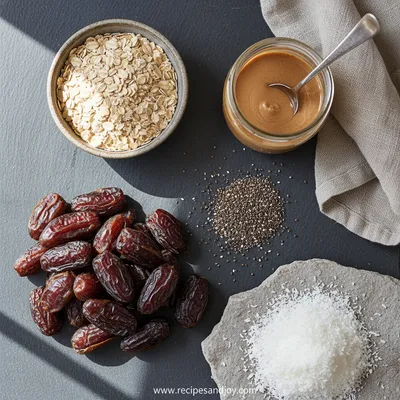
- Medjool dates: These are the heart of it all, really. Their natural stickiness binds everything together and gives that caramel-like sweetness. Look for ones that feel plump and soft - if they're dry, just soak them in warm water for ten minutes to bring them back to life.
- Rolled oats: They give these balls their substance, a wholesome base that makes them filling. Old-fashioned oats work best here - they have just the right texture. Quick oats can get too pasty, you know?
- Nut butter: Almond butter, peanut butter, whatever you like. It adds richness and helps everything stick together. I usually use crunchy for a little texture, but smooth works beautifully too.
- Chia seeds: These tiny powerhouses add nutrition and a pleasant little crunch. They don't really change the flavor much, just make things better for you. Flax seeds work great too if that's what you have.
- Maple syrup: Just a touch, honestly. The dates are usually sweet enough, but sometimes you want that extra hint of flavor. Honey works just as well if you prefer.
- Vanilla extract: It's like the quiet background music that makes everything harmonize. Just a splash rounds out all the flavors beautifully.
 Sweet Treats & Desserts
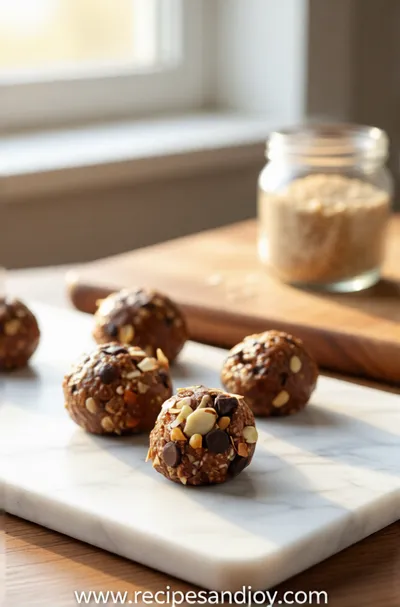
No-Bake Protein Energy Balls – Easy Healthy Snack
A simple, no‑bake bite of protein‑packed goodness you can carry anywhere.
Complete Cooking Process
-
Ingredient Readiness:
Before you start, make sure your dates are nice and soft. If they feel a bit dry, I'll sometimes pop them in warm water for ten minutes, then drain them well. It makes all the difference in getting that perfect sticky texture that holds everything together.
-
Flavor Development:
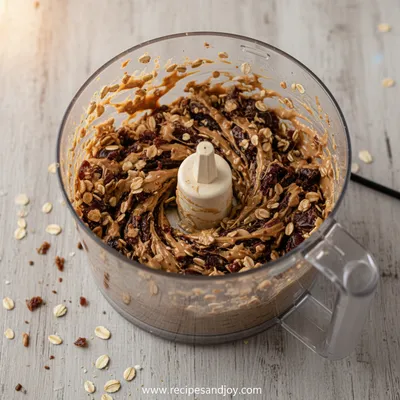
When you pulse everything in the food processor, you'll notice how the fragrance changes. First it's just individual ingredients, then suddenly they become one cohesive mixture. That's when you know it's ready - when it holds together when you pinch it.
-
Texture Control:
The rolling stage is where you really feel the texture come alive in your hands. If the mixture feels too dry, add a teaspoon of water or more nut butter. Too wet? A sprinkle more oats. You want it to hold its shape without sticking to your palms.
-
Finishing Touches:
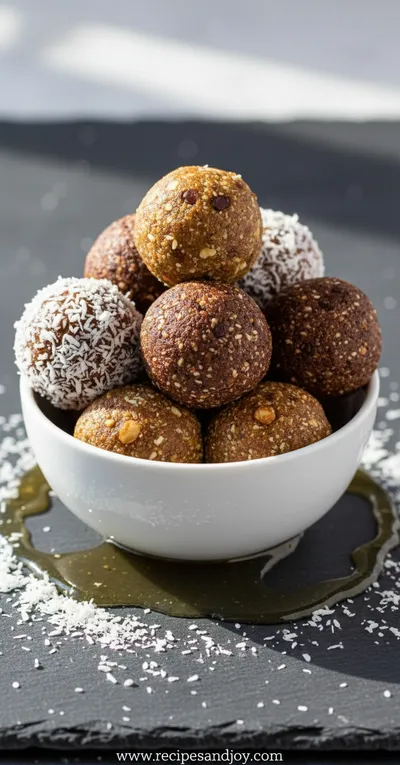
Right before serving, I sometimes give them a light roll in shredded coconut or crushed nuts. It's not necessary, but it makes them look pretty and adds another layer of texture. Like putting on a nice scarf before heading out.
-
Serving Timing:
They're best after chilling for about an hour - it lets the flavors settle and the texture firm up nicely. But honestly? We rarely wait that long. They're delicious right away too, just a bit softer.
-
Wet your hands slightly before rolling - prevents sticking beautifully
-
If mixture is crumbly, add liquid slowly until it just holds together
-
Let kids help with rolling - it's wonderful messy fun
-
Store between layers of parchment paper to keep them separate
Pro Tips
You know, the beauty of these little balls is how forgiving they are. I've messed up ratios, forgotten ingredients, and they still turn out delicious. It's one of those recipes that seems to want to work out for you.
I remember one afternoon when my niece was visiting, and we made three different variations – one with cocoa powder for chocolate lovers, one with dried cranberries for tartness, and one with coconut for tropical vibes. We lined them up on the counter like little edible jewels, and honestly? They were all gone by evening.
 Sweet Treats & Desserts
Healthier Hot Chocolate Recipe
Learn how to make a delicious healthier hot chocolate that's perfect for a cozy warm beverage.
The essence of the dish:
What makes these special is their pure simplicity. They're not trying to be fancy – just honest, wholesome ingredients coming together in the most satisfying way. Each bite feels like a little gift you're giving yourself or your family.
A fun fact or historical angle:
Energy balls became popular in the 1970s health food movement, but their concept is ancient – combining nutrient-dense foods for portable energy is something people have done for centuries across cultures.
Flavor or sensory focus:
When you bite into one, you'll notice the chewy sweetness of dates first, then the nutty depth from the oats and nut butter, with little pops of texture from seeds or add-ins. It's a wonderful symphony of simple pleasures.
You Must Know
-
The mixture MUST hold together when pinched – that's your sign it's ready
-
Chilling firms them up but isn't strictly necessary for eating
-
They freeze beautifully for up to 3 months
-
Let creative additions like this roasted garlic inspire your flavor variations
Frequently Asked Questions
→ Can I make these without a food processor?
Honestly, yeah, you can. Just chop the dates very finely with a sharp knife and mix everything really well in a bowl. It takes more elbow grease, but it works. The texture will be a bit chunkier, which some people actually prefer.
→ How long do they keep?
In an airtight container in the fridge, about two weeks. They freeze beautifully for up to three months – just pop them in a freezer bag. I usually make a double batch and freeze half for later.
→ Can I use different nuts or seeds?
Absolutely. Sunflower seeds, pumpkin seeds, walnuts – whatever you like or have on hand. The base recipe is wonderfully adaptable. I've even used crushed almonds instead of nut butter when I was out.
→ Are these suitable for school lunches?
Most schools are fine with them, but check your specific policies about nuts. You can always use sunflower seed butter instead of nut butter to make them nut-free.
→ What if my mixture is too wet or too dry?
Too wet? Add more oats gradually. Too dry? A teaspoon of water or more nut butter at a time. It's very forgiving – just adjust until it holds together when you squeeze it.
→ Can I add protein powder?
You can, but start with just a tablespoon or two and you might need a bit extra liquid. It changes the texture slightly, making them denser.
Nutrition Facts
per serving
95
Calories
2g
Protein
14g
Carbs
4g
Fat
Taste Profile
Naturally sweet with nutty undertones and subtle vanilla notes
Ingredient Substitutions
Don't have an ingredient? Try these alternatives
Soak longer if needed to achieve sticky consistency
Adjust liquid slightly as different butters have varying thickness
Start with less and add to taste as sweetness varies
Recipe Variations
Try these delicious twists on the original
Chocolate Energy Balls
Add 2 tablespoons cocoa powder and use chocolate chips instead of dried fruit for a decadent treat
Tropical Version
Use coconut oil instead of nut butter and add dried pineapple and macadamia nuts
Savory Herb Balls
Omit sweeteners, add herbs and sun-dried tomatoes for a unique savory snack
Common Mistakes to Avoid
Learn from others' mistakes for perfect results
- Over-processing creates a paste-like texture instead of chunky
- Using dry dates without soaking results in crumbly balls
- Not tasting before rolling - adjust flavors while you can
- Skipping the chill time makes them too soft initially
Meal Prep & Storage
Make Ahead Tips
Perfect for making on Sunday for the whole week. They actually improve in flavor after a day in the refrigerator as everything melds together.
Leftover Ideas
Store in refrigerator and enjoy within 2 weeks. They make excellent additions to lunchboxes or quick grabs before activities.
Perfect Pairings
Serve this with...
Cooking Timeline
Gather and measure all ingredients, prepare dates if needed
Process base ingredients in food processor until cohesive
Add any mix-ins and pulse briefly to combine
Roll mixture into balls and place on parchment paper
Chill to firm up (optional but recommended)
 Healthy, Simple & Family Cooking
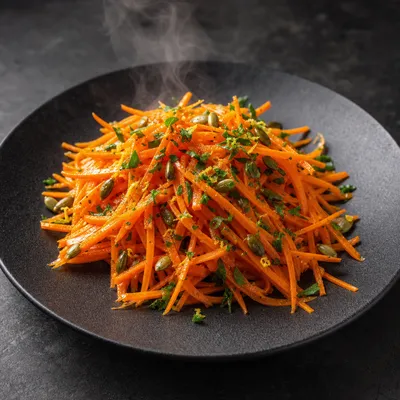
Classic Carrot Summer Salad
A simple, crunchy carrot salad that’s fresh, healthy, and perfect for warm days.
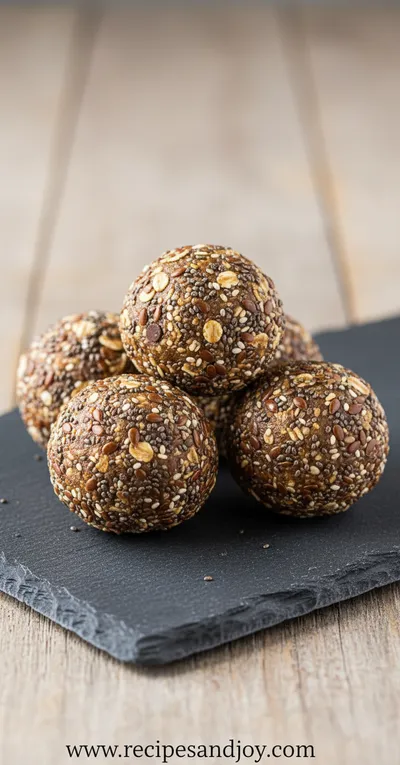
How to Make Energy Balls - Healthy Easy Snack
Honestly, making energy balls feels like finding a quiet moment in a busy day. You just mix a few simple things, roll them into little spheres of goodness, and suddenly you've got this perfect little snack that's both nourishing and comforting. No baking, no fuss - just wholesome ingredients coming together in your hands.
Timing
Prep Time
15 Minutes
Cook Time
0 Minutes
Total Time
15 Minutes
Recipe Details
Ingredients
Base Ingredients
-
01
1 cup pitted Medjool dates (about 10-12 dates)
-
02
1 cup rolled oats
-
03
1/2 cup almond butter or peanut butter
-
04
2 tablespoons maple syrup or honey
-
05
1 teaspoon vanilla extract
-
06
Pinch of sea salt
Add-ins (choose one or combine)
-
01
1/4 cup chia seeds or flax seeds
-
02
1/4 cup shredded coconut
-
03
2 tablespoons cocoa powder for chocolate version
-
04
1/4 cup dried cranberries or raisins
-
05
1/4 cup chopped nuts or seeds
Instructions
If your dates are dry, soak them in warm water for 10 minutes, then drain well. This makes them nice and sticky for binding everything together.
Add the dates, oats, nut butter, maple syrup, vanilla, and salt to a food processor. Pulse until everything is well combined and the mixture holds together when you pinch it. It should look like a coarse dough.
Add any additional ingredients like chia seeds, coconut, or dried fruit. Pulse a few more times just to incorporate them evenly throughout the mixture.
Scoop about a tablespoon of the mixture and roll it between your palms to form a ball. If it's sticking to your hands, dampen them slightly with water. Place each ball on a parchment-lined tray.
If you'd like, roll the balls in extra coconut, crushed nuts, or cocoa powder for a pretty finish. This step is optional but makes them look special.
Place the tray in the refrigerator for at least 30 minutes to firm up. They'll keep their shape better this way, but you can eat them right away if you can't wait.
Notes & Tips
-
1
Store in an airtight container in the refrigerator for up to 2 weeks
-
2
For vegan version, use maple syrup instead of honey
-
3
These freeze beautifully - just thaw at room temperature for 10 minutes
-
4
Perfect for making ahead for busy weeks or family dinners when you need quick snacks
 Healthy, Simple & Family Cooking
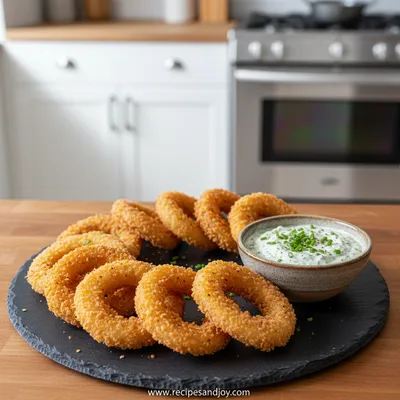
Crispy Keto Onion Rings
A easy, crunchy keto snack that feels indulgent without the carbs.
Tools You'll Need
-
Food processor or strong blender
-
Measuring cups and spoons
-
Mixing bowl if doing by hand
-
Parchment paper or silicone baking mat
-
Air-tight storage container
Must-Know Tips
-
Don't over-process - pulse until just combined for best texture
-
Let the mixture rest for 5 minutes after processing - oats absorb moisture
-
Taste before rolling - adjust sweetness or salt to your preference
Professional Secrets
-
Room temperature nut butter mixes more evenly
-
Toasted oats add deeper flavor - toast lightly before using
-
A bit of citrus zest brightens all the flavors beautifully

Recipe by
Emily ParkerFood hugs in every bite 🥘✨ Lover of cozy meals, nostalgic flavors, and slow evenings around the table ❤️
Get Delicious Recipes Weekly
Join 25,000+ home cooks getting our best recipes straight to their inbox.
Free forever • No spam • Unsubscribe anytime