
The cheeseburger, a true American icon, has humble beginnings traced back to the 1920s. It’s believed that a chef, aiming for convenience, decided to add a slice of cheese to a sizzling beef patty, creating a comforting classic that has been cherished in households ever since. These sliders capture that same spirit of simple, hearty goodness, offering a smaller, more manageable version perfect for sharing around the table with loved ones.
Why You'll Love It
-
Perfectly juicy patties every single time.
-
So quick to put together, even on your busiest evenings.
-
The ooey-gooey melted cheese is just irresistible.
-
A real crowd-pleaser for both kids and adults alike.
My kids asked for these three nights in a row. They're that good!
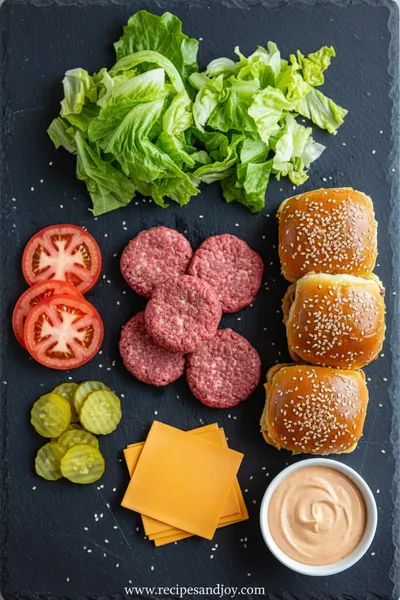
Essential Ingredient Guide
- Ground Beef: I always go for an 80/20 blend. The bit of extra fat means more flavor and juiciness, you know? It just cooks up so much better.
- Slider Buns: Those soft, slightly sweet Hawaiian rolls are my favorite. They toast up nicely and hold everything together without getting soggy.
- American Cheese: Yeah, I know, it's not fancy. But for that classic, melt-in-a-second cheeseburger experience? Nothing else really does the trick.
- Worcestershire Sauce: Just a dash, whisked right into the meat. It’s that secret little something that gives the beef such a deep, savory note.
- Onion: Finely grated. It blends right into the patty, adding moisture and a gentle sweetness you can't really pinpoint but would definitely miss.
- Seasonings: Simple is best here. Garlic powder, salt, pepper. They let the beef flavor shine through without overwhelming it.

Complete Cooking Process
-
Ingredient Readiness:
Getting everything ready before you start makes all the difference. Grate that onion, have your cheese slices unwrapped, and your buns sitting nearby. It just makes the whole process flow so smoothly.
-
Flavor Development:
When you mix the Worcestershire and seasonings into the beef, that's when the magic starts. You want to handle it gently, just until combined. Overmixing makes the patties tough.
-
Texture Control:
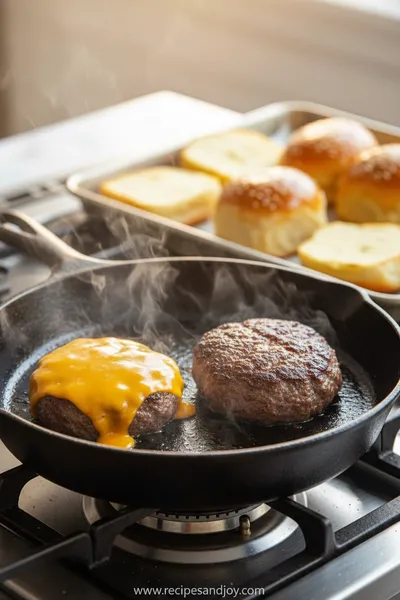
The key to a juicy slider is not pressing down on the patties while they cook. Dang, you lose all those good juices that way. Just let them sizzle and form a nice crust.
-
Finishing Touches:
Melting the cheese right at the end, maybe with a spoonful of water in the pan and a lid on top for a few seconds, gets it perfectly gooey.
-
Serving Timing:
Serve these sliders hot, straight from the pan onto the warm buns. That's when the cheese is at its best and the buns are still soft.
-
Use a light touch when forming the patties—don't pack them tight.
-
Make a small dimple in the center of each raw patty; it helps them stay flat.
-
Toast the buns lightly in the pan after the burgers are done for extra texture.
-
Let the cooked patties rest for a minute before assembling the sliders.
Pro Tips
I remember when my own mom taught me that little dimple trick. I was maybe twelve, standing at the counter next to her, and she showed me how it keeps the middle from puffing up. It’s those small things, you know? The things passed down that just work.
And toasting the buns in the leftover beef drippings—wow. It seems like a tiny step, but it adds so much. The buns get a bit crisp on the cut side and soak up all that savory flavor. It’s the difference between a good slider and a great one.
 Sweet Treats & Desserts
Healthier Hot Chocolate Recipe
Learn how to make a delicious healthier hot chocolate that's perfect for a cozy warm beverage.
The essence of the dish:
What makes these sliders so special is their sheer simplicity and comfort. They’re not trying to be gourmet; they’re trying to be good. Really, genuinely good. The combination of the savory beef, the melted cheese, and the soft bun is just a timeless trio that always satisfies.
A fun fact or historical angle:
The term 'slider' supposedly comes from the way these small burgers could easily 'slide' down your throat. They became especially popular in the 1940s as a quick, inexpensive bite.
Flavor or sensory focus:
The first thing you'll notice is the aroma—the smell of beef searing with a hint of onion and Worcestershire. Then, the first bite gives you the soft bun, the juicy, seasoned patty, and that stretchy, melted cheese all at once. It’s pure comfort.
You Must Know
-
Don't skip resting the meat. A couple of minutes makes the juices settle.
-
High heat is crucial for a good sear and to lock in flavor.
-
Season the meat well. Beef needs a good amount of salt to taste its best.
-
Assemble quickly after cooking to keep everything warm.
Frequently Asked Questions
→ Can I use a different type of cheese?
Absolutely. Cheddar, provolone, or pepper jack would all be delicious. American cheese is just classic for its meltability.
→ What's the best way to reheat leftover sliders?
Gently reheating them in a toaster oven or a regular oven at a low temperature works best to keep the bun from getting soggy. Microwaving can make them soft.
→ Can I make the patties ahead of time?
Yes, you can shape the patties and keep them covered in the fridge for up to a day before cooking. It might even help the flavors meld a bit.
→ How do I keep the sliders from falling apart?
Make sure your pan is hot enough before adding the patties so they sear quickly. And again, don't press down on them while cooking!
→ What can I serve with these sliders?
They're great with a simple side salad, some crispy zucchini fries, or even just some pickles and potato chips.
→ Can I freeze cooked sliders?
You can, but the texture of the bun might change. It's best to freeze the cooked patties separately and assemble with fresh buns when you're ready to eat.
Nutrition Facts
per serving
285
Calories
17g
Protein
18g
Carbs
16g
Fat
Taste Profile
Savory, rich, and deeply satisfying with a perfect balance of beefy umami and salty cheese.
Ingredient Substitutions
Don't have an ingredient? Try these alternatives
Lamb will be richer, turkey leaner. Adjust cooking time slightly for turkey.
These cheeses melt well but might not get quite as uniformly gooey.
Recipe Variations
Try these delicious twists on the original
Bacon Cheeseburger Sliders
Add a slice of crispy cooked turkey ham to each slider for a smoky, salty crunch.
BBQ Slider
Brush the patties with your favorite barbecue sauce in the last minute of cooking instead of using cheese.
Common Mistakes to Avoid
Learn from others' mistakes for perfect results
- Overmixing the meat, which makes the patties tough.
- Pressing down on the patties while they cook, squeezing out the juices.
- Crowding the pan, which steams the meat instead of searing it.
Meal Prep & Storage
Make Ahead Tips
You can shape the patties up to a day ahead. Keep them layered between parchment paper in an airtight container in the fridge.
Leftover Ideas
Reheat patties gently in a skillet over low heat. The buns are best fresh, so reassemble with new buns if possible.
Perfect Pairings
Serve this with...
Cooking Timeline
Prep ingredients: grate onion, measure seasonings.
Gently mix beef with seasonings and form into patties.
Cook patties in batches in the hot skillet until browned.
Melt cheese on patties, optionally toast buns.
Assemble sliders and serve immediately.
 Easy Everyday Dinners
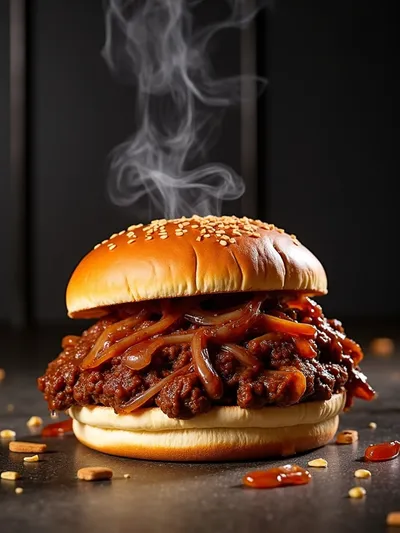
French Onion Beef Sloppy Joes – Easy Dinner
Hearty French onion beef sloppy joes with caramelized onions and a savory, sweet sauce.
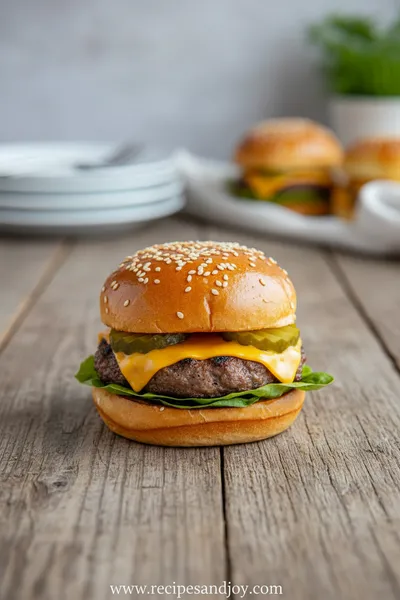
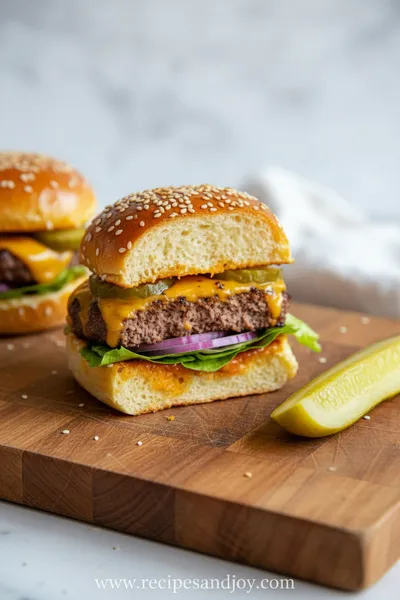
Juicy Cheeseburger Sliders
These juicy cheeseburger sliders are a simple and delicious meal perfect for everyday family dinners. They're flavorful and comforting, hitting the spot every single time.
Timing
Prep Time
15 Minutes
Cook Time
10 Minutes
Total Time
25 Minutes
Recipe Details
Ingredients
For the Slider Patties
-
01
1 ½ lbs ground beef (80/20 blend)
-
02
¼ cup finely grated yellow onion
-
03
1 tbsp Worcestershire sauce
-
04
1 tsp garlic powder
-
05
1 ½ tsp salt
-
06
1 tsp black pepper
-
07
1 tbsp olive oil
For Assembly
-
01
12 slider buns (like Hawaiian rolls)
-
02
12 slices American cheese
-
03
Optional: lettuce, tomato slices, pickles, ketchup, mustard
Instructions
In a large bowl, gently combine the ground beef, grated onion, Worcestershire sauce, garlic powder, salt, and pepper. Use your hands and mix just until everything is incorporated. Be careful not to overwork the meat.
Divide the mixture into 12 equal portions. Gently shape each portion into a small patty, about ½-inch thick. Use your thumb to make a small dimple in the center of each patty—this helps them cook evenly.
Heat the olive oil in a large skillet over medium-high heat. Once the oil is hot and shimmering, carefully add the patties in a single layer. You might need to cook in two batches. Cook for about 3-4 minutes per side, without pressing down, until nicely browned and cooked to your liking.
In the last minute of cooking, place a slice of cheese on each patty. You can add a teaspoon of water to the pan and cover it with a lid for about 30 seconds to help the cheese melt quickly and perfectly.
While the cheese is melting, you can quickly toast the cut sides of the buns in the same skillet for just a minute, if you like. It adds a nice touch.
Let the patties rest for a minute off the heat. Then, place each cheesy patty on the bottom half of a bun. Add your favorite toppings like lettuce or tomato, top with the other bun half, and serve immediately while hot and juicy.
Notes & Tips
-
1
The dimple in the patty is a small step that makes a big difference in getting an even cook.
-
2
Letting the patties rest after cooking allows the juices to redistribute, making them more tender.
-
3
If you have leftover patties, store them separately from the buns to maintain the best texture.
 Easy Everyday Dinners
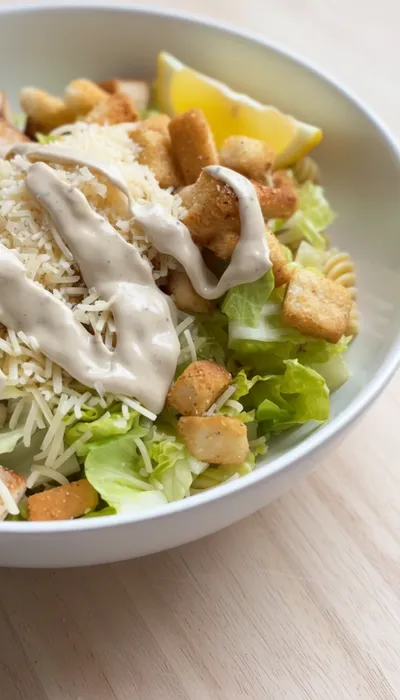
Chicken Caesar Pasta Salad Recipe
Quick creamy chicken Caesar pasta salad, ideal for weeknight meals.
Tools You'll Need
-
Large mixing bowl
-
Large skillet (cast iron is great)
-
Spatula
-
Box grater (for the onion)
Must-Know Tips
-
Don't overcrowd the pan, cook in batches if needed for a good sear.
-
Let meat rest for a minute after cooking for juicier sliders.
-
Taste a tiny bit of the raw meat mixture to check seasoning before forming patties.
Professional Secrets
-
Room temperature meat mixes more evenly and cooks more consistently.
-
High heat for searing creates a flavorful crust and locks in juices.
-
The steam-melt method for the cheese ensures perfect gooeyness without overcooking the meat.

Recipe by
Isabella MooreFood makes every celebration brighter 🎉🍽️ Creating magical seasonal moments with delicious recipes ✨
Get Delicious Recipes Weekly
Join 25,000+ home cooks getting our best recipes straight to their inbox.
Free forever • No spam • Unsubscribe anytime