
Coffee has traveled the world, from Ethiopian highlands to bustling Italian cafés, and now to your freezer. This Mocha Espresso Protein Ice Cream captures that journey in a single scoop, offering both caffeine comfort and nourishing protein. The tradition of espresso‑based desserts dates back to the early 1900s when Italians first drizzled coffee over gelato, creating a timeless pairing. Today, the Ninja Creami lets us honor that heritage with modern nutrition.
Why You'll Love It
-
- Creamy coffee flavor without bitterness
-
- High‑protein boost for post‑workout recovery
-
- Simple, no‑churn method with Ninja Creami
-
- Low‑sugar, satisfying sweet spot
"It’s like a coffee shop in a bowl, but healthier!"
Essential Ingredient Guide
- Espresso powder: Provides deep coffee flavor; dissolve in warm water before mixing for even distribution.
- Cocoa powder: Adds mocha depth; sift to avoid lumps.
- Whey protein isolate: Boosts protein; choose unflavored to let coffee shine.
- Milk (dairy or plant‑based): Creates a silky base; whole milk gives richness, almond adds lightness.
- Honey or maple syrup: Just a touch of sweetener to balance the espresso’s bite.
- Vanilla extract: Rounds out the flavor profile with a subtle warm note.

Complete Cooking Process
-
Ingredient Readiness:
Gather all components, whisk espresso powder into warm milk, and blend protein powder until smooth.
-
Flavor Development:
Combine cocoa, sweetener, and vanilla, then fold into the milk‑espresso mixture; the aroma mellows as it rests.
-
Texture Control:
Pour into the Ninja Creami pint, churn, then freeze an extra hour for that perfect silkiness.
-
Finishing Touches:
After churning, fold in a sprinkle of cocoa nibs or a drizzle of coffee‑infused syrup.
-
Serving Timing:
Serve within a day for the best texture; let a scoop sit a minute before eating to soften slightly.
-
Use freshly brewed espresso for brighter flavor.
-
Freeze the pint at least 24 hours for a smoother churn.
-
Add a pinch of sea salt to heighten sweetness.
-
Store leftovers in an airtight container to prevent ice crystals.
Pro Tips
When you follow these tiny adjustments, the ice cream feels like a café‑crafted dessert, yet it’s made in your own kitchen. I often find that letting it sit a moment after churning releases the scent of coffee even more, making each bite feel like an invitation to pause and enjoy.
The essence of the dish:
It’s a balance of bitter espresso, sweet cocoa, and velvety protein‑rich milk, creating a dessert that comforts and nourishes.
A fun fact or historical angle:
Did you know the first coffee‑flavored ice cream appeared in Italy during the 1930s, inspired by the growing popularity of espresso?
Flavor or sensory focus:
You’ll notice the cool silk of the ice cream first, then the lingering warmth of espresso, finishing with a subtle chocolate afterglow.
You Must Know
-
Use low‑fat milk if you prefer a lighter mouthfeel.
-
Don’t over‑sweeten; the coffee provides enough depth.
-
Protein powder should be fully dissolved to avoid grainy texture.
Frequently Asked Questions
→ Can I use a different protein powder?
Yes, a vanilla‑flavored whey or plant‑based protein works well; just adjust sweetener to taste.
→ Do I need an espresso machine?
No, high‑quality instant espresso or espresso powder dissolved in hot water is sufficient.
→ How long can I store the ice cream?
Keep it sealed in the freezer up to two weeks; stir gently before serving if ice crystals form.
→ Is this recipe gluten‑free?
Absolutely, as long as you choose a gluten‑free protein powder and sweetener.
→ Can I make this dairy‑free?
Swap whole milk for oat, almond, or coconut milk; the texture remains creamy.
→ What if I want a stronger coffee punch?
Add a teaspoon more espresso powder or a shot of cold brew concentrate before chilling.
Nutrition Facts
per serving
210
Calories
15g
Protein
18g
Carbs
8g
Fat
Taste Profile
A balanced coffee‑sweet harmony with a velvety finish
Ingredient Substitutions
Don't have an ingredient? Try these alternatives
May need a bit more sweetener to balance the earthy note.
Provides a milder flavor; adjust quantity to taste.
Recipe Variations
Try these delicious twists on the original
Spicy Version
Add a pinch of cayenne pepper and a drizzle of chocolate‑chili sauce for a subtle kick.
Mediterranean Style
Stir in a spoonful of tahini and garnish with toasted pistachios for a nutty twist.
Common Mistakes to Avoid
Learn from others' mistakes for perfect results
- Not dissolving espresso powder fully, leading to gritty texture.
- Over‑mixing protein powder, causing a grainy mouthfeel.
- Freezing the pint for too short a time, resulting in a coarse churn.
Meal Prep & Storage
Make Ahead Tips
You can blend and freeze the base up to 48 hours ahead; the ice cream will chill further and develop richer coffee notes.
Leftover Ideas
Transfer remaining ice cream to a sealed container; let it soften a few minutes before scooping.
Perfect Pairings
Serve this with...
Cooking Timeline
Warm milk, dissolve espresso and cocoa, whisk in honey, vanilla, and protein powder.
Taste and adjust sweetness, then pour into Ninja Creami pint.
Seal pint, place in freezer for at least 24 hours.
Churn in Ninja Creami, add optional swirl, and serve.
 Sweet Treats & Desserts
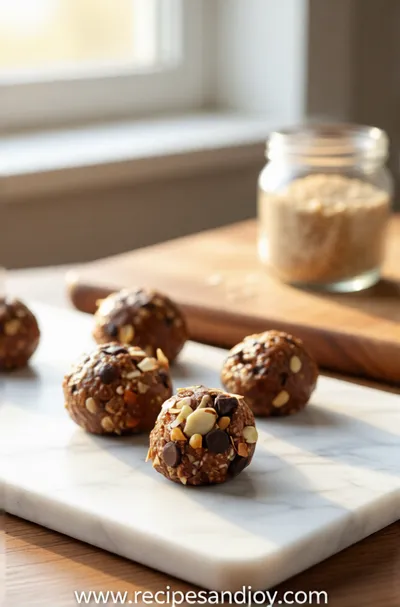
No-Bake Protein Energy Balls – Easy Healthy Snack
A simple, no‑bake bite of protein‑packed goodness you can carry anywhere.
Ninja Creami Mocha Espresso Protein Ice Cream
Honestly, this Ninja Creami Mocha Espresso Protein Ice Cream is a quiet moment of coffee‑kissed sweetness. The creamy base feels like a soft sigh, and the espresso whispers through every bite. I remember when I first tried the Dole Whip version – it set the stage for this richer, protein‑packed treat. It’s perfect for any season, whether you’re curled up on a cool evening or enjoying a sunny afternoon.
Timing
Prep Time
20 Minutes
Cook Time
0 Minutes
Total Time
44 Hours (including freeze)
Recipe Details
Ingredients
Base
-
01
2 cups whole milk (or plant‑based alternative)
-
02
1/4 cup whey protein isolate (unflavored)
-
03
2 tbsp honey or maple syrup
-
04
1 tsp vanilla extract
-
05
1 tbsp cocoa powder
-
06
2 tsp espresso powder
Optional Toppings
-
01
Cocoa nibs
-
02
A drizzle of coffee‑infused syrup
-
03
A pinch of sea salt
Instructions
Warm the milk slightly, dissolve espresso powder and cocoa powder, then whisk in honey, vanilla, and protein powder until smooth.
Pour the mixture into the Ninja Creami pint, smooth the top, and place the lid on tightly.
Freeze the pint for at least 24 hours; for best texture, I like 44 hours.
Attach the pint to the Ninja Creami, select the “Ice Cream” function, and let it churn into a creamy consistency.
If you want extra richness, add a swirl of coffee‑infused syrup and pulse briefly.
Scoop into bowls, garnish with cocoa nibs or a light dusting of cocoa powder, and enjoy.
Notes & Tips
-
1
I love adding a splash of the Espresso shake for extra depth.
-
2
If the ice cream feels a bit dense, let it sit at room temperature for 5‑10 minutes before serving.
-
3
For a richer chocolate note, swap cocoa powder for melted dark chocolate and add a dash of protein pudding.
 Sweet Treats & Desserts
Healthier Hot Chocolate Recipe
Learn how to make a delicious healthier hot chocolate that's perfect for a cozy warm beverage.
Tools You'll Need
-
Ninja Creami machine
-
Measuring cups and spoons
-
Whisk
-
Small saucepan
-
Freezer‑safe pint container
Must-Know Tips
-
Don’t over‑mix the base; gentle whisk keeps it airy.
-
Freeze the pint on the coldest shelf for even texture.
-
Taste the mixture before freezing; adjust sweetness if needed.
Professional Secrets
-
Room temperature milk blends better with protein, ensuring no grainy spots.
-
A brief whirl of the Ninja Creami at high speed creates a smoother finish.
-
Adding a pinch of salt after churning lifts the coffee flavors.

Recipe by
Lily AndersonLife is sweeter with dessert 🍰💕 Baking joy, spreading smiles, and loving every sprinkle ✨
Get Delicious Recipes Weekly
Join 25,000+ home cooks getting our best recipes straight to their inbox.
Free forever • No spam • Unsubscribe anytime