
Chocolate and peanuts have traveled together across continents for centuries, each adding richness to the other's character. The combination dates back to ancient trade routes where cacao beans were bartered alongside legumes, creating a timeless duo. In modern kitchens, this pairing becomes a convenient, nutrient‑dense snack that honors that shared history. Chocolate bliss meets the power of protein, delivering both comfort and stamina.
Why You'll Love It
-
- No oven needed, perfect for summer evenings
-
- Only four wholesome ingredients
-
- Rich chocolate flavor without added sugar
-
- Portable snack for busy days
"These balls are my go‑to post‑walk treat – sweet, satisfying, and they keep me full for hours!"
Essential Ingredient Guide
- Peanut butter: Choose a natural, unsweetened variety for the best texture and a deep nutty aroma.
- Chocolate protein powder: Select a high‑quality, low‑sugar chocolate whey or plant‑based powder; it adds richness and protein.
- Dark chocolate chips: Optional, but they melt into a glossy coating that elevates the bite.
- Sea salt: A pinch balances the sweetness and highlights the chocolate depth.
- Honey: Adds a subtle natural sweetness and helps bind the mixture.
- Oats (optional): If you like a bit of chew, rolled oats give texture without overwhelming the flavor.

Complete Cooking Process
-
Ingredient Readiness:
Measure peanut butter, protein powder, honey, and salt; have chocolate chips ready for folding.
-
Flavor Development:
Warm the honey slightly, then combine with peanut butter to release aromatic notes before adding cocoa powder.
-
Texture Control:
Stir in protein powder until the mixture is smooth; this prevents grainy bites.
-
Finishing Touches:
Fold in chocolate chips and a pinch of sea salt; the chips melt slightly, giving a glossy finish.
-
Serving Timing:
Roll balls and chill for 15 minutes; serve cold or at room temperature for the best bite.
-
If the mixture feels sticky, refrigerate for 10 minutes before shaping.
-
Use a small cookie scoop for uniform size.
-
Dust finished balls with cocoa powder for an elegant look.
-
Store in an airtight container; they stay fresh up to a week.
Pro Tips
Well, these little tricks make the whole process feel almost ceremonial, like a quiet pause in a busy day. Ugh, I love how a simple sprinkle of cocoa can turn a humble ball into something that feels special, and the chill in the fridge locks in that soft, chewy texture. So, when you pop one into your mouth later, you’ll notice the gentle snap of the coating followed by the creamy peanut butter heart.
The essence of the dish:
It’s the harmony of creamy peanut butter and deep chocolate, bound together by a touch of honey, creating a snack that feels both indulgent and nourishing.
A fun fact or historical angle:
Did you know that peanuts were originally called “groundnuts” and were introduced to Europe by Portuguese traders in the 16th century?
Flavor or sensory focus:
Expect the first bite to release a warm cocoa aroma, followed by a silky peanut butter core that lingers pleasantly on the palate.
You Must Know
-
Keep the mixture cool to avoid melting.
-
Measure ingredients precisely for proper binding.
-
Taste and adjust sweetener before rolling.
Frequently Asked Questions
→ Can I use almond butter instead?
Yes, almond butter works well; just ensure it’s unsweetened to keep the flavor balanced.
→ How long do they keep?
Stored in an airtight container in the fridge, they stay fresh for about 7 days.
→ Are they freezer‑safe?
Absolutely. Freeze for up to 3 months; thaw in the fridge before serving.
→ Can I make them vegan?
Swap honey for maple syrup and use a plant‑based protein powder.
→ Do I need any special equipment?
A small bowl, spoon, and a cookie scoop or your hands are enough.
→ What if the mixture is too dry?
Add a teaspoon of warm water or extra honey until it sticks together.
Nutrition Facts
per serving
120
Calories
8g
Protein
10g
Carbs
7g
Fat
Taste Profile
Chocolate‑nutty with a gentle honey finish
Ingredient Substitutions
Don't have an ingredient? Try these alternatives
Almond butter adds a milder flavor; keep the same quantity.
Maple syrup keeps it vegan and adds a hint of caramel.
Recipe Variations
Try these delicious twists on the original
Spicy Version
Add a pinch of cayenne pepper and a drizzle of chili‑infused honey for a subtle heat.
Mediterranean Style
Swap chocolate protein powder for vanilla, add chopped pistachios, and finish with a light dusting of za'atar.
Common Mistakes to Avoid
Learn from others' mistakes for perfect results
- Overmixing can make the mixture too warm and sticky.
- Skipping the chill step leads to balls that lose shape.
- Using too much honey makes the texture overly soft.
Meal Prep & Storage
Make Ahead Tips
You can mix the base and refrigerate the dough for up to 24 hours; roll into balls when ready to serve.
Leftover Ideas
Reheat gently in a skillet for 30 seconds to soften if they become too firm.
Perfect Pairings
Serve this with...
Cooking Timeline
Gather and measure all ingredients; warm honey slightly.
Combine peanut butter, honey, protein powder, and salt; mix until smooth.
Fold in chocolate chips and optional oats.
Roll into balls, place on tray, and chill.
 Sweet Treats & Desserts
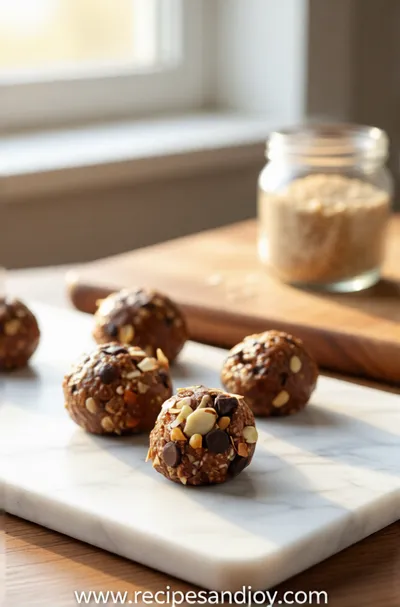
No-Bake Protein Energy Balls – Easy Healthy Snack
A simple, no‑bake bite of protein‑packed goodness you can carry anywhere.
No-Bake Chocolate Peanut Butter Protein Balls
These no‑bake chocolate peanut butter protein balls are perfect for a quick energy boost, similar to protein balls that you can grab on the go.
Timing
Prep Time
10 Minutes
Cook Time
0 Minutes
Total Time
15 Minutes
Recipe Details
Ingredients
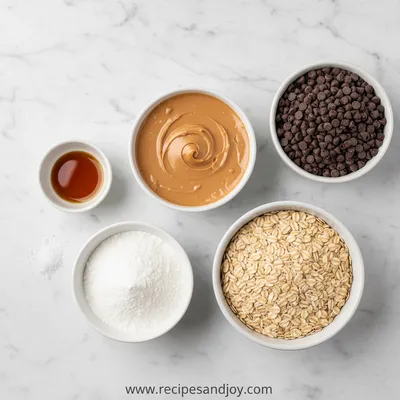
Main Ingredients
-
01
1 cup natural peanut butter
-
02
1/2 cup chocolate protein powder
-
03
1/4 cup honey
-
04
1/4 cup dark chocolate chips
-
05
Pinch of sea salt
Optional Add‑Ins
-
01
2 tbsp rolled oats
-
02
Extra cocoa powder for dusting
Instructions
In a medium bowl, combine the peanut butter and honey; stir gently until smooth and glossy.
Add the chocolate protein powder and sea salt, mixing until the batter is uniform and no lumps remain.
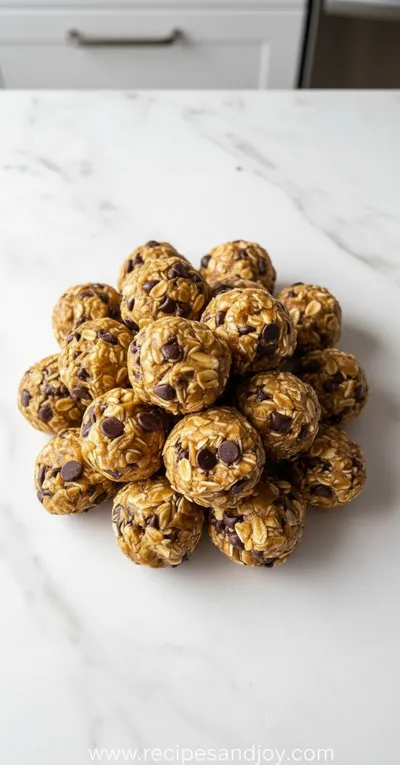
Fold in the dark chocolate chips and optional oats; the chips will stay whole, adding tiny bursts of melt.
Using a small cookie scoop or your hands, roll the mixture into 1‑inch balls and place on a parchment‑lined tray.
Chill the balls in the refrigerator for at least 15 minutes; this firms them up for easy handling.
Notes & Tips
-
1
If the mixture sticks to your hands, lightly dampen them with water.
-
2
Feel free to drizzle extra melted chocolate on top for a glossy finish.
-
3
For extra crunch, roll balls in toasted coconut flakes before chilling.
 Sweet Treats & Desserts
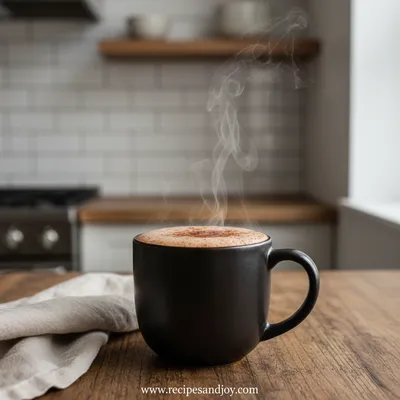
Healthier Hot Chocolate Recipe
Learn how to make a delicious healthier hot chocolate that's perfect for a cozy warm beverage.
Tools You'll Need
-
Medium mixing bowl
-
Spatula or spoon
-
Cookie scoop or tablespoon
-
Parchment paper
-
Refrigerator
Must-Know Tips
-
Don't overcrowd the tray; give each ball space to set.
-
Let the balls rest at room temperature for 5 minutes before serving.
-
Taste the mixture before shaping; adjust sweetness as needed.
Professional Secrets
-
Warm honey slightly to blend more easily with peanut butter.
-
Use a high‑quality protein powder to avoid gritty texture.
-
Chill the mixture; colder batter holds shape better.

Recipe by
Lily AndersonLife is sweeter with dessert 🍰💕 Baking joy, spreading smiles, and loving every sprinkle ✨
Get Delicious Recipes Weekly
Join 25,000+ home cooks getting our best recipes straight to their inbox.
Free forever • No spam • Unsubscribe anytime