
The concept of the no-bake cheesecake is a clever evolution of the traditional New York style, born from a desire for a lighter, more mousse-like texture that doesn't require the precision of a water bath. While the original cheesecake dates back to ancient Greece, the modern 'no-bake' variation gained popularity in the mid-20th century as refrigeration became more reliable and whipped toppings became a staple in home kitchens.
Incorporating the Oreo, a cookie introduced in 1912, transforms this classic dessert into a cultural phenomenon. The pairing of a cream cheese base with the distinct cocoa flavor of the cookie reflects the American love for 'cookies and cream,' a flavor profile that has dominated dessert menus for decades. This specific iteration of oreo no-bake cheesecake cups takes the large-scale cake and shrinks it into an intimate, individual portion.
Culturally, these treats represent the shift toward 'miniature' desserts, allowing guests to enjoy a rich treat without the commitment of a full slice. By utilizing a chilled heavy cream fold, the dessert achieves a structural integrity that mimics baked cheesecake while maintaining a refreshing coolness. It is a study in texture, balancing the density of melted butter and cookie crumbs with an airy, sweet filling.
Why You'll Love It
-
- Honestly, it's just such a treat to have these little individual cups; no messy slicing and everyone gets their own perfect portion.
-
- The way the crunch of the 1 ½ cups Oreo cookie crumbs meets that velvety filling... well, it's just a little piece of heaven.
-
- I love that there's no oven involved, so the kitchen stays cool and you don't have to worry about any cracks on top, oops!
-
- It has this wonderful, nostalgic feel to it, reminds me of the desserts I used to make for the kids' school parties years ago.
"Honestly, these are the only desserts my grandkids ever ask for. So creamy and just the right amount of chocolate!"
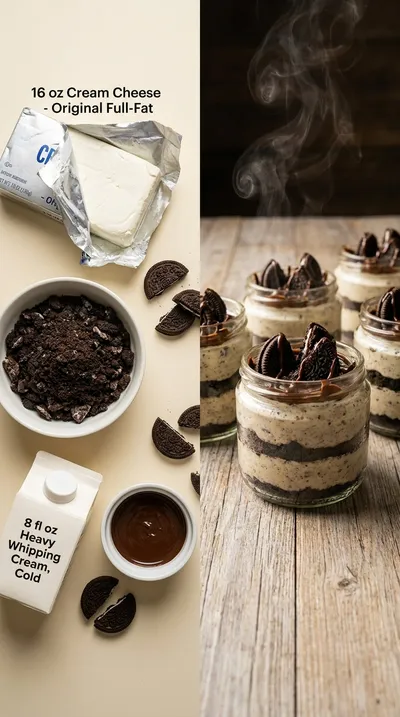
Essential Ingredient Guide
- 16 ounces cream cheese, softened: This is the heart of the filling. I always suggest the full-fat kind because it's just so much creamier, and please, let it sit out until it's truly soft or you'll find little lumps in there.
- 8 ounces heavy cream, cold: Keeping this very cold is the secret to those beautiful stiff peaks. It's what gives the cheesecake its lightness, so don't let it warm up before you whip it.
- 2 tablespoons melted chocolate: This is just a little extra touch for the top. It adds a lovely bit of richness and makes the cups look so polished, like something from a bakery.
- 1 teaspoon vanilla extract: Just a tiny splash, but it rounds out all the sweetness. It adds a warm, comforting scent that ties the chocolate and cream together just right.
- 1 ½ cups Oreo cookie crumbs: These provide that wonderful, dark chocolate base. I find that crushing them just enough—not too fine, not too chunky—gives the best texture.
- 1 cup powdered sugar: I use this instead of granulated sugar because it dissolves right in. It keeps the filling smooth as silk, which is exactly what we want.

Complete Cooking Process
-
Getting Ready:
Start by softening your 16 ounces cream cheese at room temperature. I also make sure the 8 ounces heavy cream stays chilled in the fridge until the very moment it's needed.
-
Building the Base:
The flavor starts with mixing those 1 ½ cups Oreo cookie crumbs with 5 tablespoons unsalted butter, melted. Pressing them firmly into the liners is what keeps the crust from getting soggy.
-
Creating the Texture:
The magic happens when you gently fold the whipped cream into the cream cheese and 1 cup powdered sugar. You have to be careful not to overmix, or you'll lose that airy, cloud-like feel.
-
The Finishing Touch:
Once the cups are set, I love adding the 8 Oreo cookies, quartered, and a drizzle of 2 tablespoons melted chocolate. It's the little details that make it feel special.
-
The Patient Wait:
These really need at least 2 hours in the fridge, but honestly, 4 to 6 hours is better. It lets the flavors settle and ensures the filling is perfectly firm.
-
Let your cream cheese sit for at least 30 minutes to avoid lumps in your filling.
-
Keep your heavy cream chilled to get those stiff peaks more easily.
-
Press the Oreo crust down firmly with a spoon to prevent a soggy bottom!
-
Fold the whipped cream gently so you don't deflate the mixture.
Pro Tips
Just take your time and enjoy the process, it'll be worth the wait!
Better For You Treats
Ways to Make it Your Own
Serving Suggestions
Frequently Asked Questions
→ Can I leave these on the counter?
Oh, I wouldn't recommend that! Because of the cream cheese and whipped cream, they really need to stay in the refrigerator to stay safe and firm.
→ Can I freeze these for later?
Yes, you certainly can. Just wrap them individually in plastic wrap and put them in an airtight container for up to a month, then thaw them in the fridge overnight.
→ What if my filling is too runny?
Usually, that just means they need more time in the fridge. Give them a few more hours to set, and they should firm right up.
Nutrition Facts
per serving
410
Calories
5g
Protein
32g
Carbs
28g
Fat
Taste Profile
A rich, creamy balance of sweet cocoa and tangy cream cheese.
Ingredient Substitutions
Don't have an ingredient? Try these alternatives
A slightly lower fat option, though the texture may be slightly softer.
Works well for the crust, though you lose that classic cream filling taste.
Can be whipped, but will make the dessert much denser.
Recipe Variations
Try these delicious twists on the original
Mint Chocolate Oreo Cheesecake Cups
Give it a refreshing twist by adding ½ teaspoon of peppermint extract to the cheesecake filling and using Double Stuf Oreos for an extra punch of minty chocolate.
Salted Caramel Oreo Cheesecake Cups
For something a bit more complex, drizzle some salted caramel sauce over the filling before you pop them in the fridge and finish with a tiny sprinkle of flaky sea salt.
Common Mistakes to Avoid
Learn from others' mistakes for perfect results
- Over-whipping the cream, which can lead to a grainy texture or butter.
- Using cold cream cheese, which leaves lumps in the final filling.
- Not pressing the crust firmly enough, resulting in a crumbly base.
Meal Prep & Storage
Make Ahead Tips
These are actually better when made ahead! Let them set for 4-6 hours in the fridge, or even freeze them for up to a month if you're planning a big party.
Leftover Ideas
Keep them wrapped in the refrigerator. If frozen, just thaw them in the fridge overnight before you serve them.
Perfect Pairings
Serve this with...
Cooking Timeline
Crush cookies and mix with melted butter.
Press crusts into muffin liners.
Beat cream cheese with sugar and vanilla.
Whip cream and fold into the filling.
Fill cups and refrigerate for at least 2 hours.
 Sweet Treats & Desserts
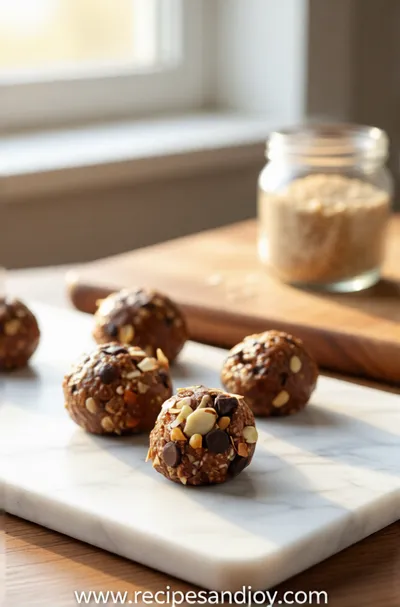
No-Bake Protein Energy Balls – Easy Healthy Snack
A simple, no‑bake bite of protein‑packed goodness you can carry anywhere.
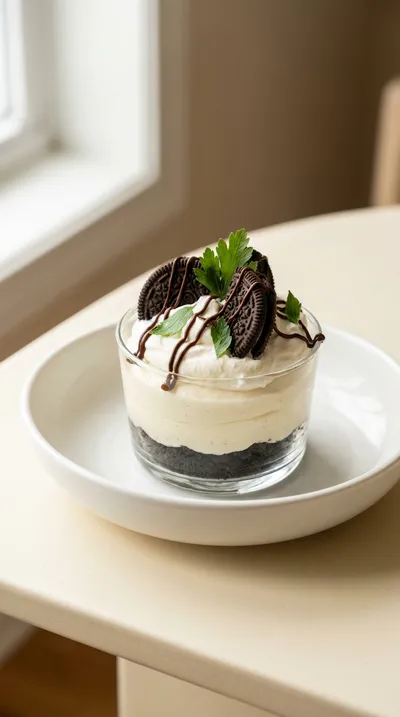
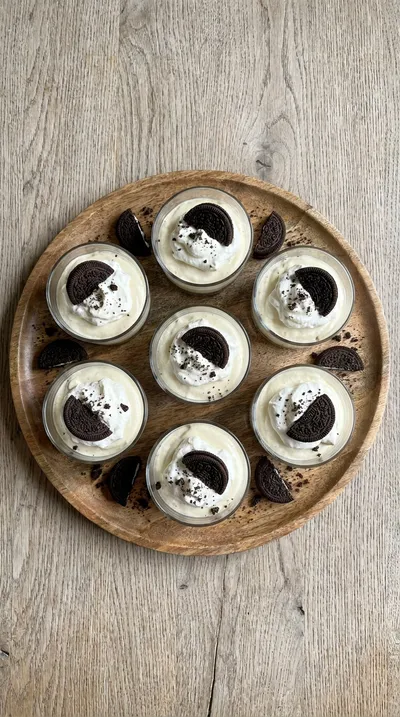
Oreo No-Bake Cheesecake Cups Recipe
These creamy and crunchy oreo no-bake cheesecake cups bring a touch of nostalgic sweetness to any table. With a rich, velvety filling and a buttery cookie base, they are the perfect little bite of indulgence.
Timing
Prep Time
20 Minutes
Cook Time
0 Minutes
Total Time
20 Minutes
Recipe Details
Ingredients
The Crust
-
01
1 ½ cups Oreo cookie crumbs (about 25-30 cookies, crushed)
-
02
5 tablespoons unsalted butter, melted
The Cheesecake Filling
-
01
16 ounces cream cheese, softened (full-fat recommended)
-
02
1 cup powdered sugar
-
03
1 teaspoon vanilla extract
-
04
8 ounces heavy cream, cold
For Garnish
-
01
8 Oreo cookies, quartered (for garnish)
-
02
2 tablespoons melted chocolate (optional, for drizzling)
Instructions
First, we need to get those cookies crumbled. If you've got a food processor, just pulse them until they're finely ground. If not, no worries—just pop them in a zip-top bag and crush them with a rolling pin. Once you have your crumbs, stir in the 5 tablespoons unsalted butter, melted, in a medium bowl until everything is evenly moistened. It's a bit messy, but that's the fun part, yeah?
Now, take that lovely crumb mixture and press it into the bottom of each cupcake liner in your muffin tin. I like to use the back of a spoon or just my fingers to really press them down firmly. You want a solid base here, otherwise, the bottom might get a bit soggy, and we definitely don't want that.
In a large bowl, take your 16 ounces cream cheese, softened, and beat it with an electric mixer. You're looking for a smooth, creamy texture—honestly, just make sure there are no lumps left before you move on.
Gradually add the 1 cup powdered sugar to the cream cheese. Keep the mixer on low speed so the sugar doesn't fly everywhere—oops, we've all been there. Scrape down the sides of the bowl with your spatula as you go.
Stir in the 1 teaspoon vanilla extract. Just a quick mix until it's all incorporated and smelling wonderful.
In a separate bowl that's been chilled, whip your 8 ounces heavy cream, cold, on medium-high speed. Watch it closely until stiff peaks form. Just be careful not to over-whip it, or you'll end up with butter!
Now, very gently fold that whipped cream into the cream cheese mixture. I mean, really take your time here—don't overmix, or you'll lose that lovely lightness we worked so hard for.
Spoon or pipe that creamy filling evenly into your prepared Oreo crusts. Fill them almost to the top, but leave a tiny bit of room.
The hardest part: waiting. Put them in the refrigerator for at least 2 hours. Well, look, if you can leave them for 4-6 hours, that's even better. They really need that time to set completely.
Right before you're ready to serve, garnish each cup with those quartered Oreo cookies. And if you're feeling a bit fancy, go ahead and drizzle some of that optional 2 tablespoons melted chocolate on top.
Notes & Tips
-
1
Make sure your cream cheese is truly softened—let it sit at room temperature for 30 minutes.
-
2
Keep your heavy cream cold to get those stiff peaks more easily.
-
3
Pressing the crust firmly is the secret to a sturdy cheesecake cup.
 Sweet Treats & Desserts
Healthier Hot Chocolate Recipe
Learn how to make a delicious healthier hot chocolate that's perfect for a cozy warm beverage.
Tools You'll Need
-
9-inch pie plate or food processor for crushing those cookies
-
Medium and large mixing bowls
-
Electric mixer (handheld or stand mixer works great)
-
Rubber spatula for scraping the bowl
-
Measuring cups and spoons
-
12 cupcake liners
-
Muffin tin (12-cup size)
Must-Know Tips
-
Softened Cream Cheese, prevents lumps in the filling for a professional smooth finish.
-
Cold Heavy Cream, essential for achieving the stiff peaks needed for lift.
-
Firm Crust, pressing the crumbs down hard prevents a soggy bottom.
Professional Secrets
-
Folding Technique: Gently combining the whipped cream preserves the air bubbles for a mousse-like texture.
-
Temperature Control: Using a chilled bowl for the cream helps stabilize the fats for a quicker whip.
-
Curing Time: Allowing the cups to set for 6 hours instead of 2 creates a much cleaner slice and firmer bite.

Recipe by
Lily AndersonLife is sweeter with dessert 🍰💕 Baking joy, spreading smiles, and loving every sprinkle ✨
Get Delicious Recipes Weekly
Join 25,000+ home cooks getting our best recipes straight to their inbox.
Free forever • No spam • Unsubscribe anytime