
The origins of peanut butter ice cream trace back to the early 20th century, when adventurous home cooks began experimenting with frozen desserts beyond classic vanilla and chocolate. By the 1940s, the first commercial peanut butter ice cream appeared in America, captivating families with its rich, nutty flavor. Today, modern appliances like the Ninja Creami make this classic treat accessible to anyone who wants a smooth, indulgent scoop without a trip to the store.
Why You'll Love It
-
- Effortless preparation with just five ingredients
-
- Creamy texture thanks to the Ninja Creami’s precision
-
- Rich peanut flavor without added sugar overload
-
- Versatile base for mix‑ins like chocolate chips or swirls
"I never thought homemade ice cream could be this creamy—pure peanut perfection!"
Essential Ingredient Guide
- Peanut butter: Choose a natural, unsweetened variety for a deep, roasted taste; stir well to blend the oils.
- Heavy cream: Full‑fat cream provides the silky mouthfeel that defines a premium ice cream.
- Whole milk: Milk balances richness and keeps the churn from becoming overly dense.
- Sugar: Granulated sugar dissolves easily; you can adjust the amount for your preferred sweetness.
- Vanilla extract: A dash adds aromatic depth that highlights the nutty notes.
- Salt: Just a pinch brightens the flavor and rounds out the sweetness.

Complete Cooking Process
-
Ingredient Readiness:
Measure and whisk all components together until the mixture is smooth, ensuring the peanut butter is fully incorporated.
-
Flavor Development:
Allow the blend to sit for a few minutes; this lets the peanut oils meld with the dairy, enhancing flavor.
-
Texture Control:
Pour the mixture into the Ninja Creami’s pint container, freeze solid, then churn for the perfect creamy consistency.
-
Finishing Touches:
After churning, fold in optional mix‑ins like chocolate chips or a swirl of extra peanut butter, then refreeze briefly.
-
Serving Timing:
Let the pint sit at room temperature for 3‑5 minutes before scooping to achieve optimal softness.
-
Use room‑temperature ingredients for a smoother churn
-
Seal the pint tightly to prevent ice crystals
-
If the ice cream feels too firm, add a splash of milk before the second churn
-
Store in an airtight container to keep texture velvety
Pro Tips
Well, these little adjustments make a world of difference. I remember once forgetting to seal the lid and ending up with a gritty texture—oops! A quick fix is to give it a gentle stir before the second spin. The result? A scoop that melts delicately on the tongue, releasing that familiar roasted peanut aroma.

The essence of the dish:
What makes this ice cream special is the balance between the rich cream base and the earthy, roasted notes of natural peanut butter. The Ninja Creami captures that balance, turning a simple blend into a luxurious, velvety dessert.
A fun fact or historical angle:
Did you know peanut butter was originally marketed as a protein‑rich meat substitute during the 1910s? Its evolution into a beloved ice cream flavor reflects the creativity of home cooks over the decades.
Flavor or sensory focus:
When you first taste it, the silky coldness gives way to a warm, nutty richness that lingers, while a subtle hint of vanilla rounds out the experience.
You Must Know
-
Use unsweetened peanut butter for authentic flavor
-
Never skip the pinch of salt—it brightens the dessert
-
A brief rest before serving yields the perfect scoop texture
Frequently Asked Questions
→ Can I use a different nut butter?
Absolutely—you can swap almond or cashew butter for a slightly different flavor profile, just keep the quantity the same.
→ Do I need to add extra sugar?
The recipe’s sugar level is balanced, but feel free to adjust up to 1‑2 extra tablespoons if you prefer a sweeter finish.
→ How long can I store the ice cream?
Keep it in an airtight container in the freezer for up to two weeks; stir gently before serving if ice crystals form.
→ Can I make this without a Ninja Creami?
Yes—use a traditional ice cream maker or freeze the mixture, stirring every 30 minutes to break up crystals.
→ Is this recipe freezer‑friendly for batch making?
Yes, simply double the ingredients, freeze in two separate pints, and churn each separately.
→ What toppings work best?
Chocolate chips, crushed pretzels, or a drizzle of honey complement the nutty base beautifully.
Nutrition Facts
per serving
380
Calories
9g
Protein
30g
Carbs
24g
Fat
Taste Profile
Rich, nutty, and subtly sweet
Ingredient Substitutions
Don't have an ingredient? Try these alternatives
Provides a milder flavor; adjust salt slightly.
Creates a dairy‑free version with a hint of coconut.
Recipe Variations
Try these delicious twists on the original
Spicy Version
Add ¼ tsp cayenne pepper and a drizzle of honey for a subtle heat that brightens the nutty base.
Mediterranean Style
Stir in crumbled feta and toasted pistachios for a savory‑sweet twist.
Common Mistakes to Avoid
Learn from others' mistakes for perfect results
- Overfilling the pint, which can cause overflow during churn.
- Skipping the pinch of salt, resulting in a flat flavor.
- Not allowing the ice cream to rest before serving, leading to a too‑firm scoop.
Meal Prep & Storage
Make Ahead Tips
You can whisk and freeze the base mixture up to 24 hours ahead; just let it thaw slightly before churning.
Leftover Ideas
Re‑churn any leftovers with a splash of milk for a refreshed texture, then enjoy within a week.
Perfect Pairings
Serve this with...
Cooking Timeline
Gather and whisk all ingredients until smooth.
Pour mixture into pint container and seal.
Freeze pint solid.
Churn in Ninja Creami on Ice Cream setting.
Fold in optional mix‑ins and refreeze briefly.
 Sweet Treats & Desserts
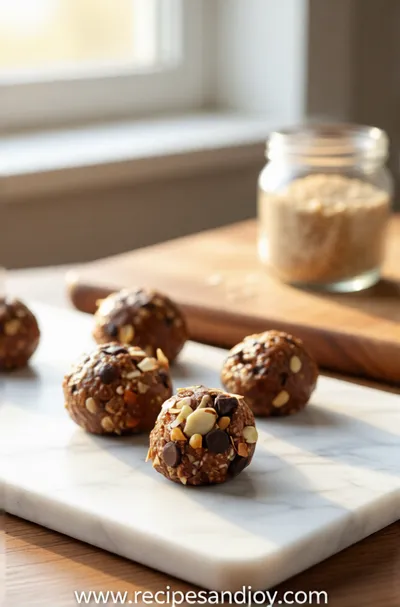
No-Bake Protein Energy Balls – Easy Healthy Snack
A simple, no‑bake bite of protein‑packed goodness you can carry anywhere.
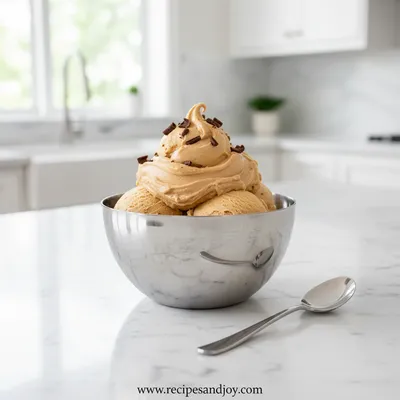
Peanut Butter Ice Cream Recipe
A luxuriously smooth peanut butter ice cream made effortlessly in the Ninja Creami. This nutty dessert delivers a creamy, dreamy texture that satisfies any sweet craving with a comforting, homemade touch.
Timing
Prep Time
15 Minutes
Cook Time
0 Minutes
Total Time
4 Hours (including freeze time)
Recipe Details
Ingredients
Base Ice Cream
-
01
1 cup natural unsweetened peanut butter
-
02
1 cup heavy cream
-
03
1 cup whole milk
-
04
½ cup granulated sugar
-
05
1 tsp vanilla extract
-
06
¼ tsp fine sea salt
Instructions
In a medium bowl, whisk together the milk, heavy cream, and sugar until the sugar dissolves.
Add the peanut butter, vanilla, and salt; stir until the mixture is smooth and glossy.
Pour the blend into the Ninja Creami pint container, seal tightly, and freeze for at least 4 hours or overnight.
Once frozen solid, install the pint into the Ninja Creami, select the "Ice Cream" function, and churn until creamy.
If desired, fold in mix‑ins (like chocolate chips or extra swirls of peanut butter), return to freezer for 30 minutes, then scoop and serve.
Notes & Tips
-
1
For an extra smooth texture, whisk the base with an immersion blender before freezing.
-
2
If the ice cream is too firm after churning, add a tablespoon of milk and give it a quick second churn.
-
3
Feel free to experiment with a pinch of cinnamon for a warm spice note.
 Sweet Treats & Desserts
Healthier Hot Chocolate Recipe
Learn how to make a delicious healthier hot chocolate that's perfect for a cozy warm beverage.
Tools You'll Need
-
Ninja Creami ice cream maker
-
Medium mixing bowl
-
Whisk or immersion blender
-
Measuring cups and spoons
-
Spatula for folding mix‑ins
Must-Know Tips
-
Don’t overfill the pint; leave space for expansion during freezing.
-
Ensure the lid is sealed airtight to avoid ice crystals.
-
Taste the base before freezing; adjust sweetness if needed.
Professional Secrets
-
Room temperature ingredients lead to a smoother churn.
-
High‑speed whisking incorporates air for a lighter mouthfeel.
-
A quick pause after the first churn helps stabilize texture.

Recipe by
Lily AndersonLife is sweeter with dessert 🍰💕 Baking joy, spreading smiles, and loving every sprinkle ✨
Get Delicious Recipes Weekly
Join 25,000+ home cooks getting our best recipes straight to their inbox.
Free forever • No spam • Unsubscribe anytime