
The humble slider has a surprisingly rich history, tracing back to the early 20th century when small, affordable burgers were served in diners and taverns as a quick bite. These turkey ham and cheese sliders are a modern twist on that classic concept, transforming simple ingredients into a crowd-pleasing favorite. They've become a staple at gatherings because they're effortlessly scalable, satisfying, and capture the comforting essence of melted cheese and savory meat in every single bite.
Why You'll Love It
-
Incredibly easy to assemble with minimal prep work.
-
Perfect for feeding a crowd at parties or game day.
-
The buttery, seasoned topping creates an irresistible golden crust.
-
Kids and adults alike can't get enough of the classic flavor.
"My family devoured these in minutes! So easy and so much flavor."
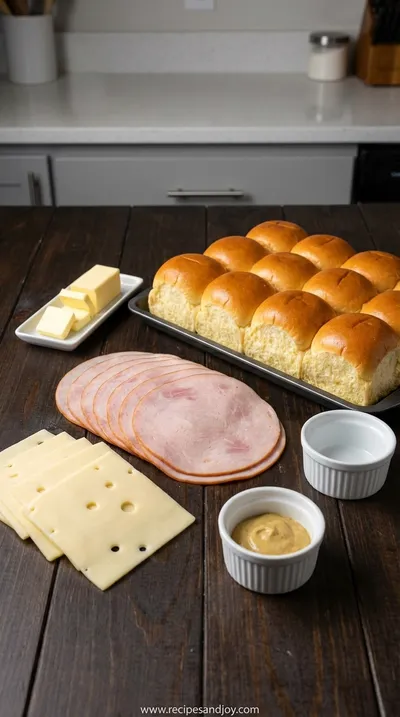
Essential Ingredient Guide
- Hawaiian Sweet Rolls: Their slight sweetness perfectly balances the savory turkey ham and cheese. Pull them apart gently to keep them connected at the base.
- Turkey Ham: Look for a good-quality, thinly sliced turkey ham. It provides a lean, savory saltiness that's the heart of the slider.
- Swiss Cheese: Swiss melts beautifully and has a mild, nutty flavor that doesn't overpower. Provolone is a great alternative if you prefer.
- Dijon Mustard: Just a thin layer adds a subtle tang that cuts through the richness. It's the secret flavor booster.
- Butter: Mixed with a few simple seasonings and brushed over the top, it's what gives the sliders that gorgeous, crispy, flavorful finish.
- Poppy Seeds: They add a tiny crunch and a lovely, aromatic flavor that makes these sliders taste a little bit special.

Complete Cooking Process
-
Ingredient Readiness:
Have your turkey ham and cheese sliced and ready. The butter mixture should be melted and whisked smooth. This is all about assembly, so having everything prepped makes it flow.
-
Flavor Development:
The magic happens in the oven. As the sliders bake, the cheese melts, the ham warms through, and the buttery topping soaks into the bread, creating layers of savory, rich flavor.
-
Texture Control:
The initial brief covering with foil keeps the rolls soft while the filling heats. Removing the foil for the last part of baking is crucial for achieving that perfect, crisp top.
-
Finishing Touches:
Letting the sliders rest for just a few minutes after baking allows the cheese to set slightly, making them easier to slice into individual portions without being a gooey mess.
-
Serving Timing:
These are best served warm, right out of the oven, when the cheese is perfectly melty. They're the ultimate comfort food for a hearty meal pairing.
-
Use a serrated knife to slice the entire package of rolls in half horizontally for a perfect, even base.
-
Don't skip the Dijon mustard layer—it adds a depth of flavor you'll miss if it's gone.
-
Press down gently on the assembled sliders before adding the butter topping to help them hold together.
-
If making ahead, assemble completely, cover, and refrigerate. Add 5-10 minutes to the baking time.
Pro Tips
You know, the real pro tip is to just enjoy the process. There's no fancy technique here. It's about taking a few simple things and making them into something that feels like a treat. I love that I can pop these in the oven while I'm getting other things ready, and the smell just fills the whole house. It's that kind of easy, reliable recipe that never lets you down, perfect for a busy weeknight or a big family favorite gathering.
 Sweet Treats & Desserts
Healthier Hot Chocolate Recipe
Learn how to make a delicious healthier hot chocolate that's perfect for a cozy warm beverage.
The essence of the dish:
It’s the ultimate shareable comfort food. Warm, soft bread, melty cheese, and savory turkey ham in every bite. They’re simple, yes, but sometimes simple is exactly what you need.
A fun fact or historical angle:
Sliders got their name because the small burgers were so easy to 'slide' down your throat. This baked version is a much neater, crowd-friendly evolution of that idea.
Flavor or sensory focus:
You'll notice the golden, buttery top first, then the soft pull of the bread, and finally the gooey, savory burst of cheese and ham. It's a triple threat of texture and taste.
You Must Know
-
The butter topping is non-negotiable for the signature flavor and crust.
-
Let them cool for 5 minutes before cutting—patience prevents a cheese slide!
-
These reheat surprisingly well, making them great for leftovers.
Frequently Asked Questions
→ Can I use a different type of rolls?
Absolutely. Brioche or potato rolls work wonderfully. The key is using a soft, slightly sweet roll that will get tender in the oven.
→ Can I make these ahead of time?
Yes, you can assemble them completely, cover tightly with foil, and refrigerate for up to 24 hours. You may need to add a few extra minutes to the baking time since they'll be cold.
→ What's a good cheese substitute for Swiss?
Provolone, Muenster, or even a mild cheddar are all fantastic alternatives. You want something that melts well.
→ How do I store leftovers?
Store any leftover sliders in an airtight container in the refrigerator for up to 3 days. Reheat in the oven or a toaster oven to bring back the crispness.
→ Can I freeze these sliders?
They are best enjoyed fresh, but you can freeze them after baking and cooling. Wrap individually and freeze. Reheat from frozen in a 350°F oven until warm.
→ What can I serve with these sliders?
They're great on their own as an appetizer, or pair them with a creamy soup, a simple green salad, or some carrot and celery sticks for a fuller spread.
Nutrition Facts
per serving
285
Calories
12g
Protein
23g
Carbs
16g
Fat
Taste Profile
Savory, rich, and slightly sweet from the rolls with a buttery, aromatic finish.
Ingredient Substitutions
Don't have an ingredient? Try these alternatives
Any good melting cheese will work beautifully.
The slight sweetness complements the savory fillings, but any soft dinner roll will do.
Recipe Variations
Try these delicious twists on the original
Pizza Sliders
Use pepperoni (or turkey pepperoni) and mozzarella cheese with a little marinara sauce brushed on the bottom roll.
BBQ Chicken Sliders
Use shredded cooked chicken tossed in BBQ sauce and cheddar cheese.
Common Mistakes to Avoid
Learn from others' mistakes for perfect results
- Separating the rolls before assembling, which makes a mess.
- Skipping the foil cover, which can lead to over-browned tops before the inside is hot.
- Using cold butter that hasn't been fully melted, leading to an uneven glaze.
Meal Prep & Storage
Make Ahead Tips
You can assemble the sliders completely, cover tightly with plastic wrap or foil, and refrigerate for up to 24 hours before baking. Add a few extra minutes to the baking time if baking straight from the fridge.
Leftover Ideas
Reheat leftovers in a 300°F oven for 10-15 minutes, or until warm. The oven is best for restoring the crisp top. They also reheat well in an air fryer for a few minutes.
Perfect Pairings
Serve this with...
Cooking Timeline
Preheat oven, slice rolls, and melt butter.
Assemble sliders: mustard, turkey ham, cheese.
Prepare and brush on the butter topping.
Bake covered for 15 min, then uncovered for 5-7 min.
Let rest for 5 minutes before slicing and serving.
 Easy Everyday Dinners
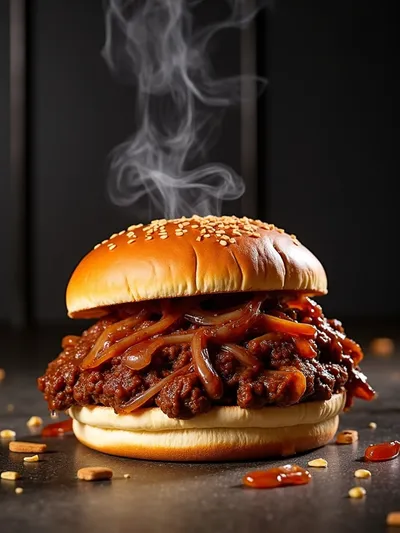
French Onion Beef Sloppy Joes – Easy Dinner
Hearty French onion beef sloppy joes with caramelized onions and a savory, sweet sauce.
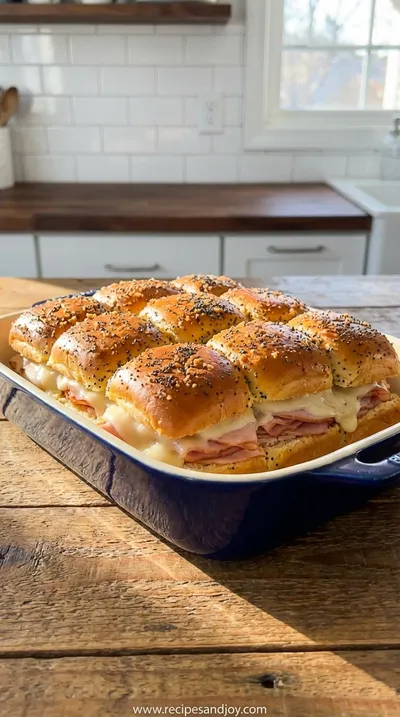
Turkey Ham and Cheese Sliders: Easy Game Day Food
Delicious turkey ham and cheese sliders - the perfect finger food for parties, tailgates, and game day gatherings. Easy appetizer recipe that comes together in minutes with simple ingredients everyone loves.
Timing
Prep Time
15 Minutes
Cook Time
20 Minutes
Total Time
35 Minutes
Recipe Details
Ingredients
For the Sliders
-
01
1 package (12 count) Hawaiian sweet rolls
-
02
1/2 cup (1 stick) unsalted butter, melted
-
03
1 tablespoon Dijon mustard
-
04
1 tablespoon Worcestershire sauce
-
05
1 teaspoon onion powder
-
06
1/2 teaspoon garlic powder
-
07
1 tablespoon poppy seeds
-
08
1/2 pound thinly sliced turkey ham
-
09
6 slices Swiss cheese, cut in half
Instructions
Preheat your oven to 350°F (175°C). Without separating the rolls, use a long serrated knife to slice the entire package of rolls in half horizontally, so you have one large top and one large bottom slab.
Place the bottom half of the rolls in a 9x13 inch baking dish. Spread the Dijon mustard evenly over the cut side of the bottom rolls.
Layer the turkey ham evenly over the mustard, folding the slices to fit. Place the half-slices of Swiss cheese over the turkey ham, covering the surface. Place the top half of the rolls back on.
In a small bowl, whisk together the melted butter, Worcestershire sauce, onion powder, garlic powder, and poppy seeds. Brush this mixture generously over the top of the rolls, making sure to get it into the cracks.
Cover the baking dish with aluminum foil and bake for 15 minutes. Then, remove the foil and bake for another 5-7 minutes, or until the tops are golden brown and the cheese is melted and bubbly.
Remove from the oven and let cool for 5 minutes before using the serrated knife to slice along the perforations into individual sliders. Serve warm.
Notes & Tips
-
1
For a flavor boost, you can add a very thin layer of mayonnaise under the turkey ham.
-
2
If you don't have poppy seeds, you can substitute with Everything Bagel seasoning for a different but delicious twist.
-
3
Letting the sliders rest for a few minutes after baking is key to clean slicing.
 Easy Everyday Dinners
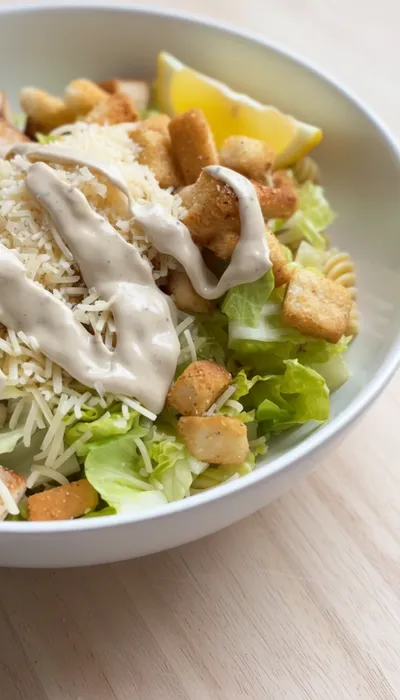
Chicken Caesar Pasta Salad Recipe
Quick creamy chicken Caesar pasta salad, ideal for weeknight meals.
Tools You'll Need
-
9x13 inch baking dish
-
Serrated knife
-
Small bowl
-
Whisk or fork
-
Pastry brush
Must-Know Tips
-
Slice rolls carefully: Use a gentle sawing motion with a serrated knife to get a clean cut.
-
Press down gently: After assembling, press the top on firmly so the sliders hold together.
-
Brush generously: Don't be shy with the butter mixture—it soaks in and creates the flavor.
Professional Secrets
-
Room temperature butter: Melts more evenly for a consistent topping.
-
Cover initially: Keeps the rolls soft while the inside heats through.
-
Uncover to finish: Crucial for achieving that perfect golden, crisp top.

Recipe by
Isabella MooreFood makes every celebration brighter 🎉🍽️ Creating magical seasonal moments with delicious recipes ✨
Get Delicious Recipes Weekly
Join 25,000+ home cooks getting our best recipes straight to their inbox.
Free forever • No spam • Unsubscribe anytime