
The origins of vanilla ice cream trace back to 17th‑century France, where chefs first experimented with frozen desserts using shaved ice and flavorings. Over time, the technique evolved into the smooth, creamy treat we cherish today, embodying both elegance and simplicity.
Why You'll Love It
-
- No stove needed, perfect for hot days
-
- Simple ingredients you probably already have
-
- Creamy texture that rivals churned ice cream
-
- Versatile base for endless flavor tweaks
"The texture was so smooth, I could hear the sweetness whispering with each bite."
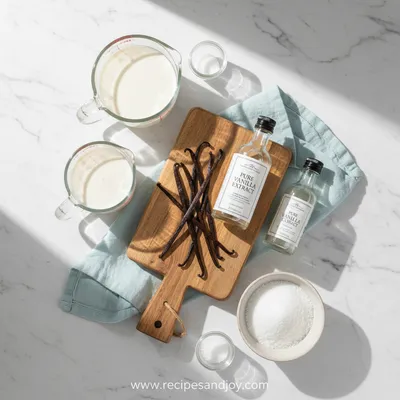
Essential Ingredient Guide
- Whole milk: Choose fresh, high‑fat milk for richness; whole milk gives that velvety mouthfeel.
- Heavy cream: Adds body and silkiness; chill it well before mixing.
- Pure vanilla extract: A splash provides aromatic depth; use the best quality you can find.
- Granulated sugar: Dissolves easily; adjust to taste for subtle sweetness.
- A pinch of salt: Enhances flavor and balances the sweetness.
- Optional fruit or chocolate swirls: Fold in after freezing for texture contrast.

Complete Cooking Process
-
Ingredient Readiness:
Measure and chill the milk and cream, then combine with sugar and vanilla in a bowl.
-
Flavor Development:
Stir gently until sugar dissolves, allowing vanilla fragrance to bloom.
-
Texture Control:
Pour the mixture into a shallow pan, cover, and freeze, stirring every 30 minutes.
-
Finishing Touches:
After the final stir, fold in any optional mix‑ins and let set a final hour.
-
Serving Timing:
Serve within 24 hours for optimal creaminess; let sit a minute at room temperature before scooping.
-
Use a metal pan for faster, even freezing.
-
Stir with a rubber spatula to create tiny air pockets.
-
Keep the freezer door closed as much as possible.
-
For extra silkiness, blend the mixture briefly before freezing.
Pro Tips
Well, these small steps make a world of difference. Yeah, you’ll notice the texture stay smooth, and the flavor stay bright, without any icy crystals forming. It feels like a gentle, cool hug on a sunny afternoon.
The essence of the dish:
It’s the pure, clean taste of vanilla, balanced by a buttery cream base, offering a whisper of sweetness that lingers on the palate.
A fun fact or historical angle:
In the 1800s, ice‑cream makers would bury containers in snow to keep desserts cold—our freezer does the same, just more conveniently.
Flavor or sensory focus:
Expect the scent of fresh vanilla to drift from the bowl, while the bite feels soft and melt‑in‑your‑mouth, with a faint buttery glow.
You Must Know
-
Keep the mixture cold at all times.
-
Stir at consistent intervals.
-
Don’t over‑freeze before the final stir.
Frequently Asked Questions
→ Can I use plant‑based milk?
Yes, almond or oat milk works, though texture will be slightly lighter.
→ Do I need an ice‑cream maker?
No, the no‑cook method uses a simple freezer and regular stirring.
→ How long can it be stored?
Keep it sealed for up to 5 days; stir before serving if crystals form.
→ Can I add mix‑ins?
Absolutely—fold in fruit, chocolate chips, or caramel after the final freeze.
→ Why is the texture sometimes icy?
Insufficient stirring allows large ice crystals; stir regularly every 30 minutes.
→ Is it safe for kids?
Yes, just ensure all ingredients are pasteurized and avoid added alcohol.
Nutrition Facts
per serving
210
Calories
3g
Protein
22g
Carbs
12g
Fat
Taste Profile
Creamy vanilla sweetness with a gentle buttery finish
Ingredient Substitutions
Don't have an ingredient? Try these alternatives
Provides a dairy‑free richness; may add a slight coconut aroma.
Use ⅔ cup maple syrup; reduces the need for additional liquid.
Recipe Variations
Try these delicious twists on the original
Spicy Version
Add a pinch of cinnamon and a dash of ground cardamom for a warm, fragrant twist.
Mediterranean Style
Fold in chopped pistachios and a drizzle of honey for a nutty, floral note.
Almond Milk Version
Swap dairy for almond milk and use the almond milk base for a nutty sweetness.
Common Mistakes to Avoid
Learn from others' mistakes for perfect results
- Skipping the regular stirring, leading to icy texture.
- Using low‑fat milk, which reduces creaminess.
- Leaving the mixture uncovered, causing freezer burn.
Meal Prep & Storage
Make Ahead Tips
You can whisk the base and store it in the freezer for up to 24 hours; just stir again before serving.
Leftover Ideas
Re‑stir the leftover ice cream in a saucepan over low heat for a minute, then refreeze for a softer texture.
Perfect Pairings
Serve this with...
Cooking Timeline
Gather and measure all ingredients; whisk together in a bowl.
Place mixture in freezer; first stir after 30 minutes.
Stir every 30 minutes, breaking up ice crystals.
Fold in optional add‑ins; let set final hour.
Serve or store in airtight container.
 Sweet Treats & Desserts
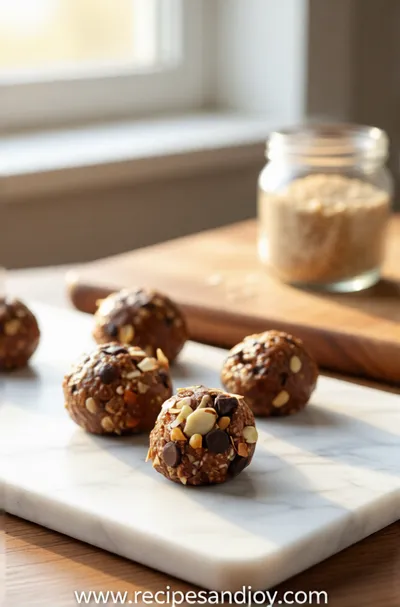
No-Bake Protein Energy Balls – Easy Healthy Snack
A simple, no‑bake bite of protein‑packed goodness you can carry anywhere.
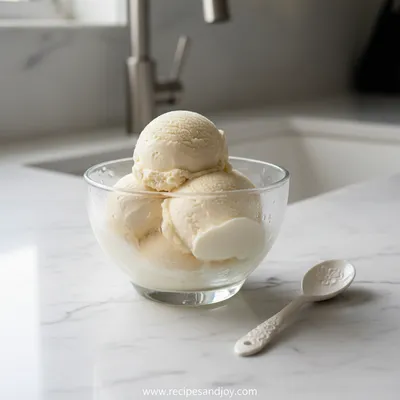
Vanilla Ice Cream - No-Cook Homemade Recipe
A silky vanilla ice cream that never touches the stove, just chill and enjoy. The gentle aroma of sweet beans fills the kitchen, and the texture stays creamy without a boil. For a simple twist, try this no‑cook treat.
Timing
Prep Time
10 Minutes
Cook Time
0 Minutes
Total Time
2 Hours 30 Minutes
Recipe Details
Ingredients
Base
-
01
2 cups whole milk
-
02
1 cup heavy cream
-
03
½ cup granulated sugar
-
04
2 tsp pure vanilla extract
-
05
Pinch of sea salt
Optional Add‑ins
-
01
¼ cup crushed berries
-
02
2 tbsp chocolate chips
-
03
1 tsp caramel swirl
Instructions
In a large bowl, whisk together the milk, cream, sugar, vanilla, and salt until the sugar is fully dissolved.
Cover the bowl with plastic wrap and place it in the freezer.
After 30 minutes, remove and stir vigorously with a rubber spatula, breaking up any forming ice crystals.
Repeat the stirring every 30 minutes for the next 2 hours, or until the mixture is thick and creamy.
If using, fold in optional add‑ins, then let the ice cream set for an additional hour before serving.
Notes & Tips
-
1
Make sure the bowl is shallow for even freezing.
-
2
For a richer flavor, let the mixture sit at room temperature for 5 minutes before freezing.
-
3
You can double the recipe for a larger batch; just increase stirring frequency.
 Sweet Treats & Desserts
Healthier Hot Chocolate Recipe
Learn how to make a delicious healthier hot chocolate that's perfect for a cozy warm beverage.
Tools You'll Need
-
Large mixing bowl
-
Rubber spatula
-
Plastic wrap
-
Freezer-safe shallow pan
-
Measuring cups and spoons
Must-Know Tips
-
Don’t skip the regular stirring, it keeps the texture smooth.
-
Leave a small space under the lid for expansion.
-
Taste after each stir to adjust sweetness if needed.
Professional Secrets
-
Use chilled ingredients, ensures a consistent freeze.
-
Stir in a clockwise motion, creates fine crystals.
-
Cover tightly, prevents freezer burn.

Recipe by
Lily AndersonLife is sweeter with dessert 🍰💕 Baking joy, spreading smiles, and loving every sprinkle ✨
Get Delicious Recipes Weekly
Join 25,000+ home cooks getting our best recipes straight to their inbox.
Free forever • No spam • Unsubscribe anytime