
The vintage no‑bake cookie hails from mid‑century American households where convenience met comfort. During the post‑war era, families embraced recipes that could be prepared quickly with pantry staples, offering a sweet reprieve without heating the kitchen. This classic treats generations with its buttery, chocolatey texture and remains a beloved staple at gatherings.
Why You'll Love It
-
- No oven required, perfect for summer days
-
- Simple pantry ingredients you already have
-
- Chewy texture that satisfies any sweet tooth
-
- Nostalgic flavor that feels like a warm hug
"These cookies melt in your mouth and bring back memories of my childhood kitchen—pure magic!"
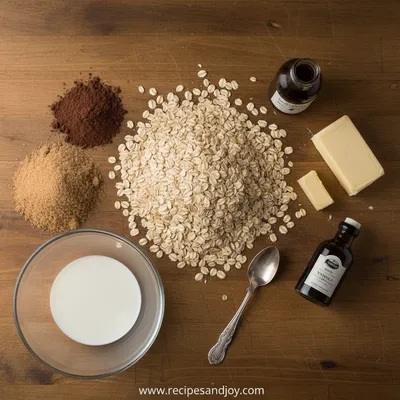
Essential Ingredient Guide
- Sugar: Choose fine granulated sugar for smooth melting; it dissolves evenly.
- Butter: Unsalted butter gives you control over the salt level and adds richness.
- Cocoa powder: Use Dutch‑process cocoa for a deeper, more mellow chocolate flavor.
- Milk: Whole milk adds creaminess; you can substitute with oat milk for a dairy‑free version.
- Peanut butter: Creamy peanut butter binds the mixture and adds a subtle nutty bite.
- Vanilla extract: A dash of vanilla lifts the flavor, making it feel more rounded.

Complete Cooking Process
-
Ingredient Readiness:
Measure and have all dry and wet ingredients within reach; the batter comes together fast.
-
Flavor Development:
Melt butter with sugar and cocoa, letting the aromas fill the kitchen before adding peanuts.
-
Texture Control:
Stir in peanut butter and vanilla just until smooth; avoid over‑mixing which can make the cookies tough.
-
Finishing Touches:
Drop spoonfuls onto parchment, let them set at room temperature or chill briefly for firmness.
-
Serving Timing:
Serve once set, ideally within a few hours for the perfect chewy snap.
-
Use a silicone spatula for easy scraping of the pot.
-
Chill the mixture for 5 minutes if it seems too runny.
-
Dust the cookies with a light sprinkle of powdered sugar for extra sparkle.
Pro Tips
Honestly, these little tricks keep the process smooth and the result consistent. I’ve found that a brief chill helps the cookies hold their shape better, especially on warm days. So, take a moment, let the mixture rest, then enjoy the simple pleasure of shaping each bite.
The essence of the dish:
These vintage no‑bake cookies marry buttery sweetness with a mellow chocolate kiss, creating a chew that feels both familiar and comforting.
A fun fact or historical angle:
During the 1950s, no‑bake desserts surged in popularity because they saved families time and kept kitchens cooler in summer.
Flavor or sensory focus:
Expect a soft, almost melt‑in‑your‑mouth texture, punctuated by the nutty undertone of peanut butter and the warm scent of melted butter and cocoa.
You Must Know
-
Work quickly once the butter is melted.
-
Use parchment to prevent sticking.
-
Store in a cool place to keep chewiness.
Frequently Asked Questions
→ Can I use almond butter instead of peanut butter?
Yes, almond butter works beautifully; just note it adds a slightly different nutty flavor.
→ How long do the cookies keep?
Store in an airtight container at room temperature for up to five days.
→ What if I want a chocolate‑only version?
Omit the peanut butter and add an extra tablespoon of butter for extra richness.
→ Can I make these gluten‑free?
All ingredients are naturally gluten‑free, just ensure your cocoa powder is certified.
→ Do I need to refrigerate them?
Not necessary, but a short chill helps them set faster and stay chewy.
→ How can I make them extra decorative?
Top each cookie with a drizzle of melted white chocolate or a pinch of sea salt.
Nutrition Facts
per serving
120
Calories
3g
Protein
15g
Carbs
6g
Fat
Taste Profile
Rich chocolate‑nutty sweetness
Ingredient Substitutions
Don't have an ingredient? Try these alternatives
Coconut oil adds a faint tropical note; reduce milk slightly.
Almond butter offers a milder flavor and works well for allergy‑sensitive guests.
Recipe Variations
Try these delicious twists on the original
Spicy Version
Add ½ teaspoon cayenne pepper and a pinch of chili flakes for a subtle heat.
Mediterranean Style
Mix in chopped dried apricots and a sprinkle of toasted sesame seeds.
Common Mistakes to Avoid
Learn from others' mistakes for perfect results
- Over‑cooking the butter mixture, which can make the cookies brittle.
- Adding oats too early before the mixture is smooth.
- Skipping the cooling step, resulting in overly soft cookies.
Meal Prep & Storage
Make Ahead Tips
You can prepare the batter up to 24 hours ahead and store it in the fridge; shape the cookies when ready to serve.
Leftover Ideas
Re‑heat gently in a microwave for 10 seconds to bring back softness, or enjoy at room temperature.
Perfect Pairings
Serve this with...
Cooking Timeline
Gather and measure all ingredients.
Melt butter, add sugar and cocoa; stir until smooth.
Stir in milk, then remove from heat.
Whisk in peanut butter and vanilla.
Fold in oats and drop onto parchment.
Let set, then serve or store.
 Sweet Treats & Desserts
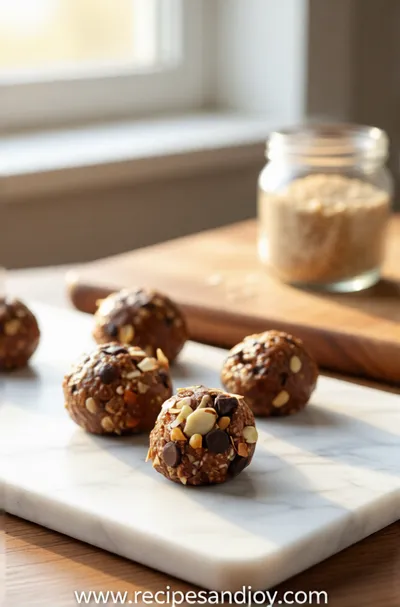
No-Bake Protein Energy Balls – Easy Healthy Snack
A simple, no‑bake bite of protein‑packed goodness you can carry anywhere.
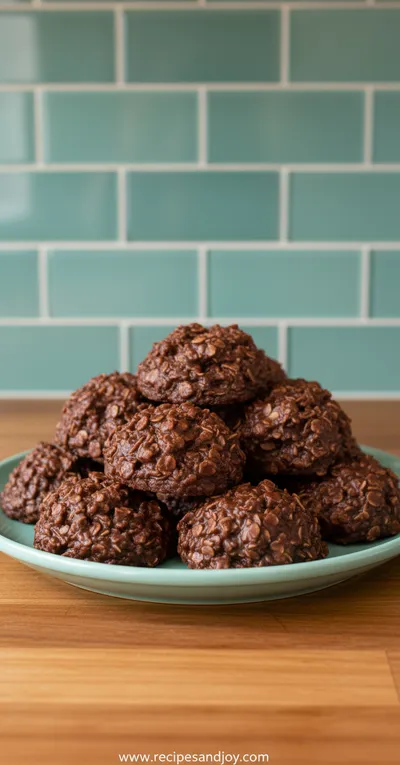
Vintage No-Bake Cookies
Delight in sweet, chewy vintage no-bake cookies that come together in minutes—no oven, just a little love and a pinch of nostalgia.
Timing
Prep Time
10 Minutes
Cook Time
5 Minutes
Total Time
15 Minutes
Recipe Details
Ingredients
Main Ingredients
-
01
1 cup granulated sugar
-
02
1/2 cup unsalted butter
-
03
1/2 cup cocoa powder
-
04
1/4 cup whole milk
-
05
1/2 cup creamy peanut butter
-
06
1 teaspoon vanilla extract
-
07
1 cup quick‑cooking oats
Instructions
In a medium saucepan, melt the butter over low heat, then stir in the sugar and cocoa powder until smooth.
Add the milk and continue stirring for another minute, watching the mixture become glossy.
Remove from heat and whisk in the peanut butter and vanilla until fully incorporated.
Fold in the quick‑cooking oats until every crumb is coated.
Drop rounded spoonfuls onto parchment paper; let them sit for 5‑10 minutes to set.
Optional: drizzle with melted white chocolate or sprinkle a pinch of sea salt for extra flair.
Notes & Tips
-
1
If the mixture cools too quickly, gently re‑warm it for a smoother consistency.
-
2
Avoid over‑mixing once the oats are added to keep the cookies tender.
-
3
You can freeze the cookies for up to a month; thaw at room temperature before serving.
 Sweet Treats & Desserts
Healthier Hot Chocolate Recipe
Learn how to make a delicious healthier hot chocolate that's perfect for a cozy warm beverage.
Tools You'll Need
-
Medium saucepan
-
Wooden spoon
-
Measuring cups and spoons
-
Parchment paper
-
Small cookie scoop or spoon
Must-Know Tips
-
Don’t let the butter burn – keep the heat low.
-
Work quickly after adding oats to prevent hardening.
-
Store in a cool, dry place for best texture.
Professional Secrets
-
Use a double‑boiler for gentle melting, ensuring a silk‑like texture.
-
Add a splash of coffee to deepen the chocolate flavor.
-
Let the mixture rest for a minute before shaping for smoother cookies.

Recipe by
Lily AndersonLife is sweeter with dessert 🍰💕 Baking joy, spreading smiles, and loving every sprinkle ✨
Get Delicious Recipes Weekly
Join 25,000+ home cooks getting our best recipes straight to their inbox.
Free forever • No spam • Unsubscribe anytime