
The concept of individual dessert jars gained popularity in the early 2000s as part of the portion-control movement, but cheesecake itself dates back to ancient Greece. Athletes were served cheesecake for energy during the first Olympic games in 776 BC, making this high-protein version a modern twist on an ancient tradition. The convenience of jarred desserts revolutionized home baking, allowing for perfect portions and easy storage.
Why You'll Love It
-
No baking required - just mix and chill
-
Portion-controlled perfection in every jar
-
Packed with protein to keep you satisfied
-
Endlessly customizable with your favorite toppings
'I make these every Sunday for the week ahead. My kids love them, and I love that they're getting protein without even knowing it!'
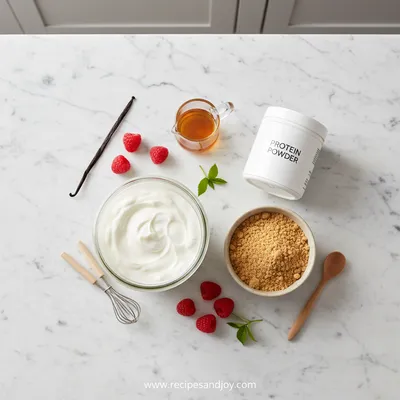
Essential Ingredient Guide
- Greek yogurt: Use full-fat for the creamiest texture, honestly. I've tried low-fat, and it just doesn't set up the same way. The tanginess balances the sweetness beautifully.
- Cream cheese: Let it come to room temperature, yeah? It makes blending so much easier. I sometimes forget and end up with little lumps, but hey, that's life.
- Protein powder: Vanilla or unflavored works best here. Whey protein gives a smooth texture, but plant-based works too. Just make sure it's one you like the taste of.
- Graham crackers: Crushed fine, but not dust. You want a little crunch at the bottom. I use a zip-top bag and a rolling pin—cathartic, really.
- Lemon juice: Just a splash brightens everything up. Fresh is nice, but bottled works in a pinch. It keeps the cheesecake from feeling too heavy.
- Honey or maple syrup: Adjust to your sweetness preference. I like mine just sweet enough, not cloying. You can always add more later.
Complete Cooking Process
-
Ingredient Readiness:
Letting the cream cheese soften on the counter for an hour makes all the difference. Cold cream cheese just won't blend smoothly, and you'll end up with bits. The Greek yogurt should be chilled though—it helps the filling set.
-
Flavor Development:
The flavors really meld together as they chill. That's the magic time. The lemon juice brightens, the vanilla deepens, and the crust softens just enough to be tender but still give a little resistance when you spoon into it.
-
Texture Control:
Beating the filling until it's completely smooth is key. No one wants lumpy cheesecake. And when you layer it into the jars, do it gently—no need to tap them down. The settling happens naturally in the fridge.
-
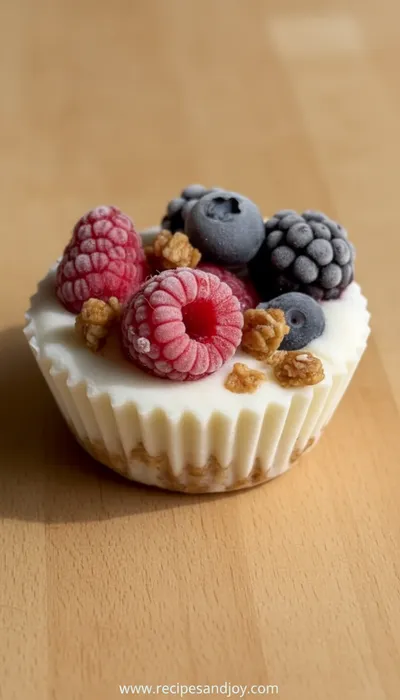
Finishing Touches:
The toppings are your chance to make it special. Fresh berries, a drizzle of honey, even some dark chocolate shavings. I like to add these right before serving so they stay fresh and crisp.
-
Serving Timing:
These are best after chilling for at least four hours, but overnight is even better. The texture becomes firm yet creamy, like a proper cheesecake. They're perfect for family-friendly gatherings where you want something easy to serve.
-
Use a whisk attachment if you have one—it incorporates more air for a lighter texture
-
Taste the filling before adding sweetener—protein powders vary in sweetness
-
If the mixture seems too thick, add a tablespoon of milk to thin it
-
Write the date on the lids with a marker if you're making a batch for the week
Pro Tips
I've made these so many times now, and each time I learn something new. Like, if you're taking them to a potluck, put the toppings in separate little bags so people can customize their own. It's a nice touch.
And honestly, don't stress if they're not perfect. The first time I made these, I kind of messed up the layers, but they still tasted wonderful. It's about the feeling you get when you open that jar—a little moment of calm, a small treat just for you.

The essence of the dish:
It's that feeling of having a decadent dessert without the guilt. The creamy texture, the slight tang, the crunchy base—it all comes together in a way that feels both familiar and new. Like a magical one-pot meal for dessert, simple but satisfying.
A fun fact or historical angle:
The earliest known cheesecake recipe was recorded by Athenaeus in 230 AD, though it was quite different from what we know today—made with honey and wheat. The modern version evolved in the 18th century with the addition of eggs.
Flavor or sensory focus:
What you'll notice first is the cool creaminess against the slight grit of the crust. Then the vanilla and lemon notes come through, followed by that rich, protein-packed body that feels substantial without being heavy. It's a dessert that actually satisfies your hunger, not just your sweet tooth.
You Must Know
-
These need at least 4 hours to set properly—plan ahead
-
The crust will soften over time—eat within 3-4 days for best texture
-
You can freeze these for up to a month—thaw in refrigerator overnight
-
If your protein powder is clumpy, sift it first for smoother results
Frequently Asked Questions
→ Can I make these dairy-free?
Absolutely. Use dairy-free cream cheese and coconut yogurt. The texture will be slightly different, but still delicious. Look for brands that are specifically formulated for baking for best results.
→ What type of protein powder works best?
Whey protein isolate gives the smoothest texture, but plant-based proteins work well too. Just avoid those with strong flavors that might clash with the cheesecake. Vanilla or unflavored are your safest bets.
→ How long do these keep in the fridge?
They'll last about 5 days refrigerated. The crust will continue to soften, so for the best texture, enjoy within 3 days. They're perfect for quick easy desserts throughout the week.
→ Can I freeze these cheesecake jars?
Yes! Freeze them without toppings for up to a month. Thaw in the refrigerator overnight. The texture might be slightly less creamy after freezing, but still very good.
→ What can I use instead of graham crackers?
Digestive biscuits, vanilla wafers, or even crushed gluten-free cookies work beautifully. You could even use nuts blended with dates for a no-bake crust option.
→ My filling is too runny—what did I do wrong?
This usually happens if the yogurt was too watery or if you didn't use enough thickening agent. Next time, add a teaspoon of gelatin dissolved in water, or use Greek yogurt that's been strained longer.

Nutrition Facts
per serving
285
Calories
18g
Protein
22g
Carbs
15g
Fat
Taste Profile
Creamy and slightly tangy with a balanced sweetness that satisfies without overwhelming
Ingredient Substitutions
Don't have an ingredient? Try these alternatives
Any similar crunchy biscuit will work. For gluten-free, use gluten-free cookies.
Neufchâtel has less fat but similar texture. Dairy-free versions work but may affect setting.
Skyr has even more protein. Coconut yogurt will make it dairy-free but may be thinner.
Maple syrup gives a nice flavor variation. Agave is more neutral but equally sweet.
Recipe Variations
Try these delicious twists on the original
Chocolate Protein Version
Use chocolate protein powder and add 2 tablespoons of cocoa powder. Top with chocolate shavings for double chocolate indulgence.
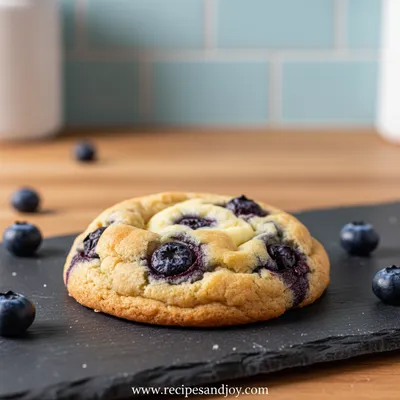
Lemon Blueberry
Increase lemon juice to 2 tablespoons and fold in 1/2 cup of fresh blueberries. Top with lemon zest for extra brightness.
Pumpkin Spice
Replace 1/2 cup of yogurt with pumpkin puree and add pumpkin pie spice. Perfect for autumn gatherings.
Common Mistakes to Avoid
Learn from others' mistakes for perfect results
- Using cold cream cheese—results in lumpy filling
- Over-sweetening—protein powder adds sweetness too
- Not chilling long enough—texture won't set properly
- Packing crust too hard—becomes dense and pasty
Meal Prep & Storage
Make Ahead Tips
These are perfect for making ahead. Prepare up to 3 days in advance and store refrigerated. Add toppings just before serving to maintain freshness and texture. They actually improve with a day of chilling as the flavors meld together.
Leftover Ideas
Store covered in the refrigerator and consume within 5 days. The crust will continue to soften, but they remain delicious. Not ideal for freezing with the crust, but the filling alone freezes well.
Perfect Pairings
Serve this with...
Cooking Timeline
Crush graham crackers and store in airtight container. Bring cream cheese to room temperature if making next day.
Prepare crusts—mix crumbs with oil and honey, divide among jars, press gently.
Make filling—beat cream cheese until smooth, add remaining ingredients, blend thoroughly.
Fill jars with cheesecake mixture, smooth tops, cover and refrigerate.
Add toppings and serve chilled. Perfect after a simple pasta dinner.
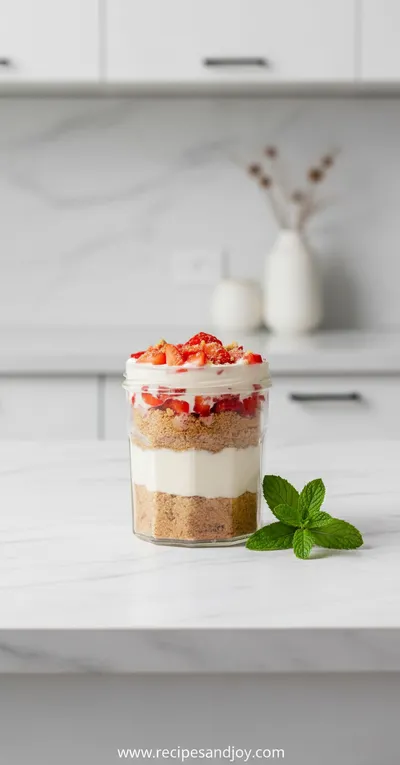
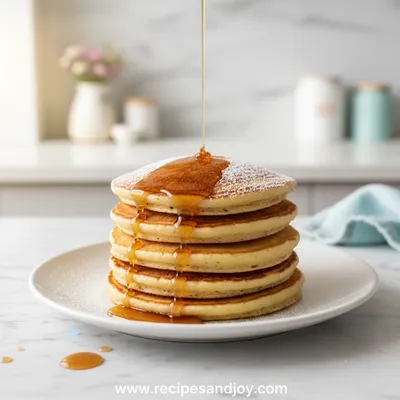
High Protein Cheesecake Jars
Honestly, these little cheesecake jars are just the thing when you need something sweet but don't want to feel heavy afterwards. I mean, they're creamy, they're satisfying, and they come together in no time. I remember making these for my niece after her track meets, and she'd always ask for more. The texture is just right—smooth and rich, but light somehow. Well, you'll see.
Timing
Prep Time
15 Minutes
Cook Time
0 Minutes
Total Time
4 Hours 15 Minutes
Recipe Details
Ingredients
For the Crust
-
01
3/4 cup graham cracker crumbs (about 6 full sheets)
-
02
2 tablespoons melted coconut oil
-
03
1 tablespoon honey or maple syrup
For the Cheesecake Filling
-
01
8 ounces cream cheese, softened
-
02
1 cup plain Greek yogurt
-
03
1/2 cup vanilla protein powder
-
04
1/4 cup honey or maple syrup
-
05
1 teaspoon vanilla extract
-
06
1 tablespoon fresh lemon juice
-
07
Pinch of salt
Optional Toppings
-
01
Fresh berries
-
02
Lemon zest
-
03
Dark chocolate shavings
-
04
Extra graham cracker crumbs
Instructions
In a small bowl, mix the graham cracker crumbs with the melted coconut oil and honey until it resembles wet sand. Divide this mixture evenly among 4 small jars (about 1/2 pint size) and press down gently with the back of a spoon. You don't need to pack it too tight—just enough to form a base.
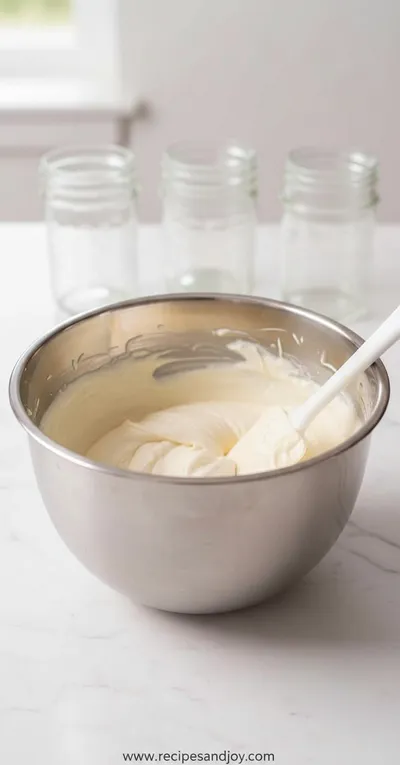
In a medium bowl, beat the softened cream cheese with an electric mixer until smooth. This might take a minute or two. Scrape down the sides to make sure there are no lumps. Add the Greek yogurt and beat again until combined.
Add the protein powder, honey, vanilla extract, lemon juice, and salt. Beat on medium speed until everything is completely smooth and well incorporated. Taste it and adjust sweetness if needed. The flavor will mellow a bit as it chills.
Spoon the cheesecake filling over the crust in each jar, dividing it evenly. Smooth the tops with the back of a spoon or a small spatula. They should look pretty and inviting, like little old-fashioned desserts but modernized.
Cover the jars with lids or plastic wrap and refrigerate for at least 4 hours, or preferably overnight. This waiting time is crucial—it allows the flavors to develop and the texture to set properly.
When ready to serve, add your chosen toppings. Fresh berries are lovely, or a sprinkle of lemon zest for brightness. Serve chilled, and enjoy that moment of quiet satisfaction.
Notes & Tips
-
1
Make sure your cream cheese is truly room temperature—cold cream cheese won't blend smoothly
-
2
If you don't have jars, you can use ramekins or small bowls covered with plastic wrap
-
3
For a thicker crust, use 1 cup of graham cracker crumbs and adjust the oil and honey accordingly
-
4
These travel well—perfect for picnics or packed lunches
Tools You'll Need
-
4 small glass jars (1/2 pint size)
-
Mixing bowls
-
Electric mixer or stand mixer
-
Measuring cups and spoons
-
Spatula
-
Zip-top bag and rolling pin (for crushing crackers)
Must-Know Tips
-
Let ingredients reach room temperature, Cold cream cheese causes lumps
-
Taste before sweetening, Protein powders vary in sweetness
-
Chill thoroughly, At least 4 hours ensures proper setting
Professional Secrets
-
Scrape bowl frequently, Ensures no unmixed ingredients
-
Use full-fat dairy, Creates creamier texture
-
Chill before serving, Allows flavors to meld completely

Recipe by
Lily AndersonLife is sweeter with dessert 🍰💕 Baking joy, spreading smiles, and loving every sprinkle ✨
Get Delicious Recipes Weekly
Join 25,000+ home cooks getting our best recipes straight to their inbox.
Free forever • No spam • Unsubscribe anytime