
The ice cream sandwich cake traces its roots to 20th‑century American fairs, where vendors would slice soft sponge between scoops of ice cream for a portable treat. Over the decades, home cooks adapted the concept, turning an on‑the‑go snack into a celebratory centerpiece. Dairy Queen copycat versions sparked a wave of creativity, encouraging bakers to experiment with flavors and textures. This evolution reflects the timeless appeal of combining the comforting warmth of cake with the refreshing chill of ice cream, a balance that feels both nostalgic and new.
Why You'll Love It
-
- Simple ingredients you probably already have
-
- Fun surprise of cold and warm in each bite
-
- Beautifully layered look for any occasion
-
- Versatile to adapt with favorite flavors
"The first bite felt like summer in a slice—soft, sweet, and perfectly chilled."
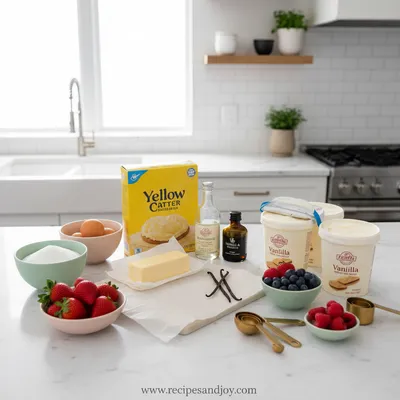
Essential Ingredient Guide
- Vanilla cake: Choose a light, fluffy sponge; homemade or a good quality box mix works.
- Premium vanilla ice cream: A rich, creamy ice cream gives the best contrast; see Vanilla ice cream.
- Buttercream or whipped topping: Adds a silky frosting layer that holds everything together.
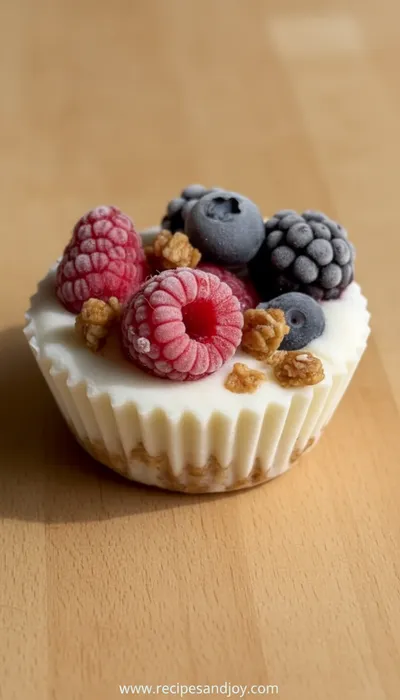
- Fresh berries: A handful of berries adds a bright pop and slight tartness.
- Lemon zest: A tiny bit lifts the richness with a subtle citrus whisper.
- Sugar: Just enough to sweeten the frosting without overwhelming.

Complete Cooking Process
-
Ingredient Readiness:
Sift dry cake ingredients, soften butter, and let ice cream soften just enough to spread.
-
Flavor Development:
Bake the cake layers, then let them cool completely; the aroma of vanilla deepens.
-
Texture Control:
Spread ice cream between layers while still pliable; ensure even layers to avoid soggy spots.
-
Finishing Touches:
Pipe frosting around the edges and gently press berries onto the top.
-
Serving Timing:
Freeze the assembled cake for at least 2 hours, then slice with a warm knife for clean cuts.
-
Use parchment paper between layers for easy removal.
-
Freeze the cake on a cake board to keep shape.
-
Warm your knife in hot water for smooth slicing.
-
Add a pinch of salt to the frosting for depth.
Pro Tips
These little adjustments make the experience feel polished without turning the process into a chore. I remember the first time I tried the warm‑knife trick; the slices came out perfectly clean, and it felt like a small victory worth savoring. So, take a moment, breathe, and enjoy the gentle rhythm of assembling this cool treat.
The essence of the dish:
A marriage of soft, airy cake and luxuriously smooth ice cream creates a texture that’s simultaneously cool and comforting, inviting you to linger over each bite.
A fun fact or historical angle:
In the 1950s, ice cream sandwiches were sold at beachside stands, and the idea of turning them into a layered cake emerged during the home‑baking boom of the 1970s.
Flavor or sensory focus:
You’ll first notice the fragrant vanilla aroma, then the chill of the ice cream, followed by a buttery crunch from the cake’s crumb.
You Must Know
-
Keep the cake layers level for even stacking.
-
Work quickly once ice cream softens.
-
Freeze the final cake thoroughly before serving.
Frequently Asked Questions
→ Can I use a different ice cream flavor?
Absolutely—strawberry, chocolate, or mint all work well. Just ensure the flavor complements the cake.
→ How long can the cake stay frozen?
It keeps nicely for up to 3 days; just let it rest at room temperature for 10 minutes before slicing.
→ Do I need a special pan?
A standard 9‑inch round cake pan works fine; line it with parchment for easy removal.
→ Can I make it ahead of time?
Yes, assemble and freeze the night before; add fresh berries just before serving.
→ Is there a dairy‑free version?
Swap regular ice cream for Almond milk ice cream and use a vegan buttercream.
→ What’s the best way to slice?
Warm a knife in hot water, dry it, and cut gently for clean slices.
Nutrition Facts
per serving
420
Calories
5g
Protein
45g
Carbs
22g
Fat
Taste Profile
Richly sweet with a buttery vanilla backdrop
Ingredient Substitutions
Don't have an ingredient? Try these alternatives
Provides a dairy‑free option with a subtle tropical flavor.
Use a 1:1 replacement for gluten‑free needs.
Recipe Variations
Try these delicious twists on the original
Spicy Version
Add a pinch of cayenne to the frosting and swirl in a jalapeño-infused ice cream.
Mediterranean Style
Incorporate crushed pistachios and orange zest into the cake and use a honey‑nectar ice cream.
Common Mistakes to Avoid
Learn from others' mistakes for perfect results
- Skipping the cooling step, causing ice cream to melt.
- Over‑mixing batter, which makes the cake dense.
- Not freezing the assembled cake long enough, leading to collapse.
Meal Prep & Storage
Make Ahead Tips
You can bake and cool the cake layers a day ahead, then assemble with softened ice cream the morning of serving and freeze until ready.
Leftover Ideas
Store leftover slices in a freezer‑safe container; let soften slightly before enjoying again.
Perfect Pairings
Serve this with...
Cooking Timeline
Gather and measure all ingredients; preheat oven.
Mix batter, bake cake layers, and let them cool completely.
Soften ice cream, fold in zest and berries.
Assemble cake with ice cream layers and freeze.
Whip frosting, coat chilled cake, and add final garnish.
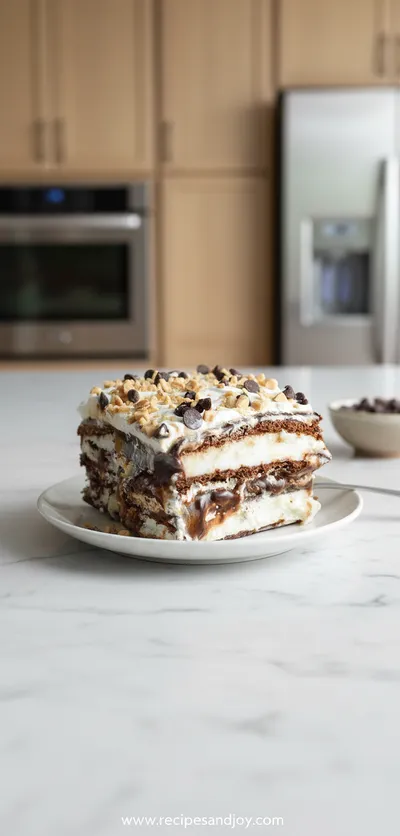
Ice Cream Sandwich Cake Recipe
A playful, cool dessert that layers fluffy cake with creamy ice cream, perfect for celebrations or a sunny afternoon treat.
Timing
Prep Time
20 Minutes
Cook Time
30 Minutes
Total Time
4 Hours (including chilling)
Recipe Details
Ingredients
Main Cake
-
01
2 cups all-purpose flour
-
02
1 ½ cups granulated sugar
-
03
1 cup unsalted butter, softened
-
04
4 large eggs
-
05
1 cup whole milk
-
06
2 tsp vanilla extract
-
07
2 tsp baking powder
-
08
½ tsp salt
Ice Cream Layer
-
01
1 ½ quarts premium vanilla ice cream (see Vanilla ice cream)
-
02
½ cup fresh berries (optional)
-
03
1 tsp lemon zest
Frosting
-
01
1 cup heavy cream
-
02
2 tbsp powdered sugar
-
03
1 tsp vanilla extract
Instructions
Preheat oven to 350°F (175°C). Grease two 9‑inch round pans and line with parchment.
In a bowl, whisk flour, baking powder, and salt. In another bowl, cream butter and sugar until light, then add eggs one at a time.
Mix dry ingredients into the butter mixture, alternating with milk, and stir in vanilla. Pour batter evenly into pans.
Bake 25‑30 minutes until a toothpick comes out clean. Let cakes cool completely on a wire rack.
Soften ice cream until spreadable, fold in lemon zest and berries, then spread a thick layer on the first cake, top with second layer, and freeze for 2 hours.
Whip heavy cream with powdered sugar and vanilla until soft peaks form. Frost the chilled cake, garnish with extra berries, and return to freezer until ready to serve.
Notes & Tips
-
1
Make sure the cake layers are completely cooled before adding ice cream to avoid melting.
-
2
If the ice cream becomes too soft, return it to the freezer for a few minutes.
-
3
Use a warm knife for clean slices.
Tools You'll Need
-
Two 9‑inch round cake pans
-
Electric mixer
-
Spatula
-
Parchment paper
-
Freezer-safe cake board
Must-Know Tips
-
Don't rush the cooling step; it prevents soggy layers.
-
Use parchment between layers for easy removal.
-
Warm your knife for smooth cutting.
Professional Secrets
-
Room‑temperature butter creates a lighter crumb.
-
Freeze the assembled cake before frosting for a stable structure.
-
Whipping the cream just to soft peaks keeps frosting airy.

Recipe by
Lily AndersonLife is sweeter with dessert 🍰💕 Baking joy, spreading smiles, and loving every sprinkle ✨
Get Delicious Recipes Weekly
Join 25,000+ home cooks getting our best recipes straight to their inbox.
Free forever • No spam • Unsubscribe anytime