
Vanilla ice cream has traveled across continents, from the royal courts of Europe to the humble kitchen tables of America. Its origins trace back to the 17th century when explorers first brought vanilla pods from Mexico, and the icy treat soon became a symbol of indulgence. Over the centuries, technology has transformed this classic dessert, and today the Ninja Creami offers a modern twist that brings the artisanal texture of old‑world ice cream into the home kitchen.
Why You'll Love It
-
- Effortless, no‑churn method delivers ultra‑creamy texture
-
- Pure vanilla flavor shines without heavy additives
-
- Quick turnaround – ready in under an hour
-
- Perfect base for endless toppings and mix‑ins
"The smoothness was unbeatable – it felt like I’d bought a pint from a boutique shop, but I made it myself!"
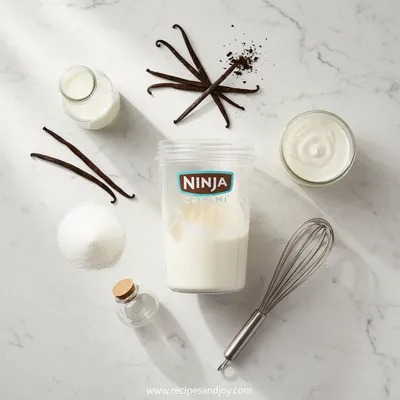
Essential Ingredient Guide
- Whole milk: Provides a rich, silky base; choose a high‑fat variety for maximum creaminess.
- Heavy cream: Adds luxurious mouthfeel; whisk gently to blend with milk.
- Pure vanilla extract: Choose a high‑quality extract for aromatic depth; a splash of vanilla bean seeds can elevate the flavor.
- Granulated sugar: Balances the natural sweetness of the cream; dissolve fully before freezing.
- A pinch of salt: Enhances the vanilla notes and rounds out the flavor profile.
- Optional: vanilla bean pods: Scrape the seeds for an extra fragrant, speckled appearance.

Complete Cooking Process
-
Ingredient Readiness:
Measure milk, cream, and sugar; whisk until sugar dissolves, then stir in vanilla and salt.
-
Flavor Development:
If using a vanilla bean, split and scrape the seeds into the mixture, letting the pod steep for a few minutes.
-
Texture Control:
Pour into the Ninja Creami container, secure the lid, and freeze solid for at least 24 hours.
-
Finishing Touches:
Spin the frozen base in the Creami; fold in any swirl or mix‑in after the churn.
-
Serving Timing:
Serve immediately for a soft‑serve texture, or refreeze for a firmer scoop.
-
Let the mixture sit at room temperature for 5 minutes before loading; it helps smooth the spin.
-
Taste the base before freezing; adjust sweetness if needed.
-
Add a splash of bourbon‑free vanilla liqueur for an adult twist if desired.
Pro Tips
I learned these little adjustments over many batches, and they really make a difference. The texture becomes even silkier, and the flavor feels perfectly balanced. It’s the kind of detail that turns a good recipe into a cherished one.
The essence of the dish:
This vanilla ice cream is all about purity – just vanilla, cream, and a hint of sweetness, letting the natural flavors shine.
A fun fact or historical angle:
The first recorded vanilla ice cream in Europe was served to French aristocracy in the 1680s, a true luxury of the era.
Flavor or sensory focus:
Expect a fragrant vanilla aroma that greets you before the first bite, followed by a buttery, melt‑in‑the‑mouth texture.
You Must Know
-
Use cold ingredients for best churn
-
Do not over‑mix after spinning
-
Store leftovers in an airtight container
Frequently Asked Questions
→ Can I use low‑fat milk?
Yes, but the texture will be less creamy. Consider adding a bit more cream to compensate.
→ How long can I store the ice cream?
Keep it sealed in the freezer for up to two weeks for optimal flavor.
→ Can I add mix‑ins like chocolate chips?
Absolutely – fold them in after the Creami finishes its spin.
→ Do I need to pre‑chill the container?
The container must be frozen solid for at least 24 hours before using the Creami.
→ Is this recipe suitable for paleo diets?
Yes – see the paleo vanilla ice cream link for a dairy‑free adaptation.
→ What if I want a no‑cook version?
Check out our no‑cook homemade ice cream guide for alternatives.
Nutrition Facts
per serving
210
Calories
3g
Protein
22g
Carbs
12g
Fat
Taste Profile
A smooth, sweet vanilla flavor with a buttery finish.
Ingredient Substitutions
Don't have an ingredient? Try these alternatives
Will produce a slightly thinner texture; add a bit more cream.
Gives a subtle coconut flavor; keep sugar level the same.
Recipe Variations
Try these delicious twists on the original
Spicy Version
Add a pinch of ground cinnamon and a dash of cayenne after the spin for subtle heat.
Mediterranean Style
Fold in toasted pistachios and a drizzle of honey for a nutty twist.
Common Mistakes to Avoid
Learn from others' mistakes for perfect results
- Using warm ingredients – leads to a grainy texture.
- Skipping the 24‑hour freeze – the Creami won’t churn properly.
- Over‑mixing after the spin – can break the airy structure.
Meal Prep & Storage
Make Ahead Tips
You can whisk the base and freeze it up to 24 hours ahead; the Creami spin remains the same.
Leftover Ideas
Re‑scoop from the freezer; let sit 3–5 minutes before serving for softer texture.
Perfect Pairings
Serve this with...
Cooking Timeline
Whisk together milk, cream, sugar, vanilla, and salt until smooth.
Add vanilla bean seeds if using, then pour into the pint container.
Secure lid and place container in the freezer for 24+ hours.
Attach to Ninja Creami and spin on "Ice Cream" setting.
Fold in any desired toppings, then serve or refreeze.
 Sweet Treats & Desserts
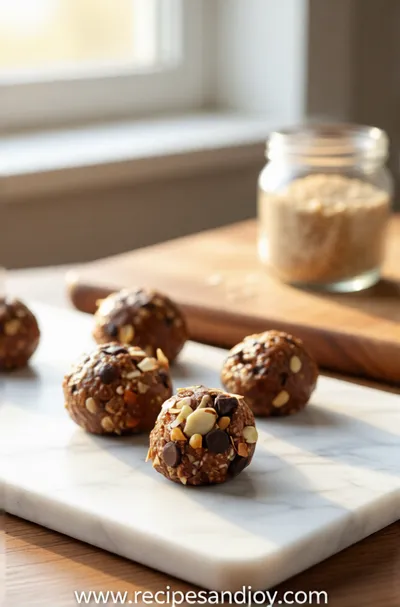
No-Bake Protein Energy Balls – Easy Healthy Snack
A simple, no‑bake bite of protein‑packed goodness you can carry anywhere.

Vanilla Ice Cream Recipe – Ninja Creami
Enjoy a silky, smooth vanilla ice cream made effortlessly with your Ninja Creami – a dessert that feels like a gentle hug on a warm afternoon.
Timing
Prep Time
15 Minutes
Cook Time
0 Minutes
Total Time
25 Hours (including freeze time)
Recipe Details
Ingredients
Base
-
01
2 cups whole milk
-
02
1 cup heavy cream
-
03
½ cup granulated sugar
-
04
2 tsp pure vanilla extract
-
05
1 pinch salt
-
06
Optional: 1 vanilla bean, split and seeds scraped
Instructions
In a medium bowl, whisk together milk, cream, sugar, vanilla extract, and salt until the sugar dissolves completely.
If using a vanilla bean, stir in the scraped seeds and let the pod steep for 5 minutes, then remove the pod.
Pour the mixture into the Ninja Creami pint container, securing the lid tightly.
Freeze the container for at least 24 hours (I usually leave it overnight).
Remove from freezer, attach the container to the Ninja Creami, and select the "Ice Cream" function. Let it spin until smooth.
If you want add‑ins, fold them in gently after the spin, then serve immediately or refreeze for firmer scoops.
Notes & Tips
-
1
For an extra fragrant note, add a splash of vanilla bean paste before freezing.
-
2
If the ice cream looks a bit icy after the spin, run the "Re‑spin" function for a smoother texture.
-
3
Serve with fresh berries or a drizzle of caramel for a delightful contrast.
 Sweet Treats & Desserts
Healthier Hot Chocolate Recipe
Learn how to make a delicious healthier hot chocolate that's perfect for a cozy warm beverage.
Tools You'll Need
-
Ninja Creami machine
-
Measuring cups and spoons
-
Whisk
-
Medium mixing bowl
-
Spatula
Must-Know Tips
-
Make sure the pint is completely frozen before spinning; this guarantees a creamy texture.
-
Taste the base before freezing; adjust sugar or vanilla to your preference.
-
Do not over‑mix after the spin; a gentle fold preserves the airy texture.
Professional Secrets
-
Use cold ingredients straight from the fridge; it reduces ice crystal formation.
-
A quick 5‑minute rest at room temperature before spinning improves consistency.
-
Add a pinch of salt; it amplifies the vanilla sweetness without making it salty.

Recipe by
Lily AndersonLife is sweeter with dessert 🍰💕 Baking joy, spreading smiles, and loving every sprinkle ✨
Get Delicious Recipes Weekly
Join 25,000+ home cooks getting our best recipes straight to their inbox.
Free forever • No spam • Unsubscribe anytime